BYOK with Azure
How to configure Bring-Your-Own-Key encryption with Microsoft Azure KMS?
Create Azure KMS Encryption Key
This section explains how to create a cryptographic key in Microsoft Azure KMS and use this key with Afi Backup. The guide assumes that you have a Microsoft Azure account with enabled billing.
The key steps to configure encryption with Microsoft Azure KMS are the following:
- Create a Microsoft 365 application in your Entra ID (Azure Active Directory) domain.
- Generate a private key and certificate pair for this application and create a corresponding application credentials entity on the Afi side (this will allow Afi to use this application for accessing your Azure KMS key).
- Create an Azure KMS key and grant access to this key to the application created in step 1.
- Create an Azure KMS key secret on the Afi side with the key identifier from step 3 and application credentials from step 2.
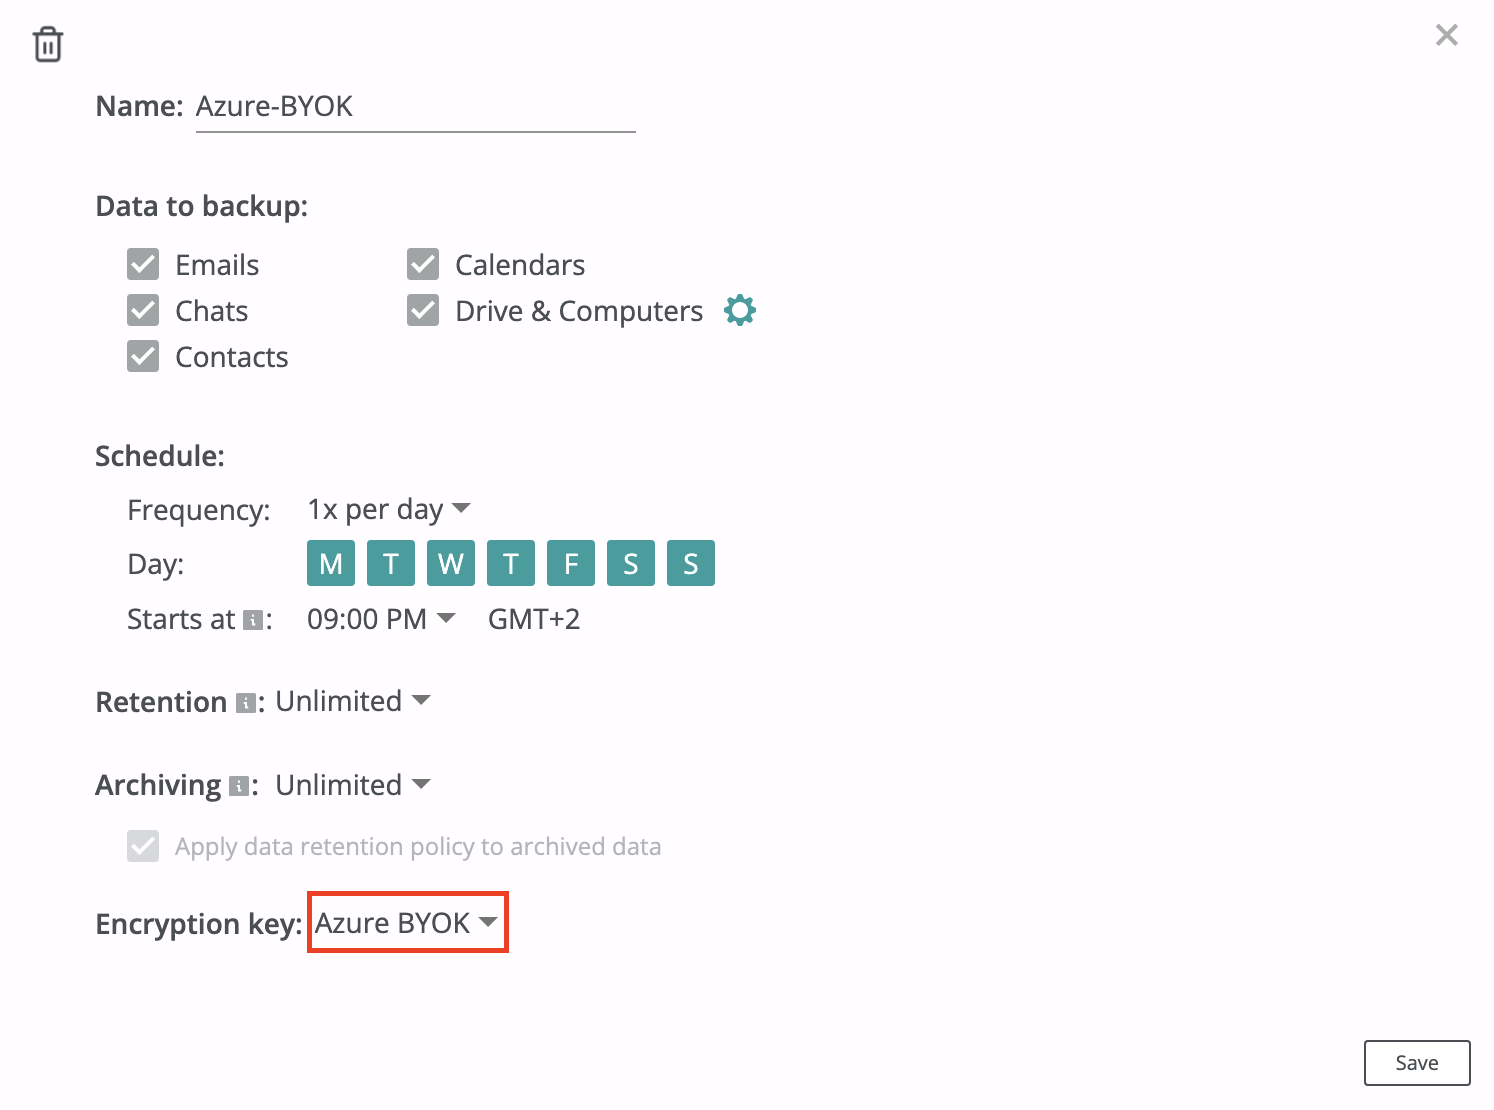
- Select a key created in step 4 as an encryption key in backup policies that you use to protect the data.
Below is the detailed description of the outlined configuration steps.
Step 1 - Create a Microsoft 365 application
Open Entra ID portal in your Microsoft Azure account and go to the App registrations section to create an application.
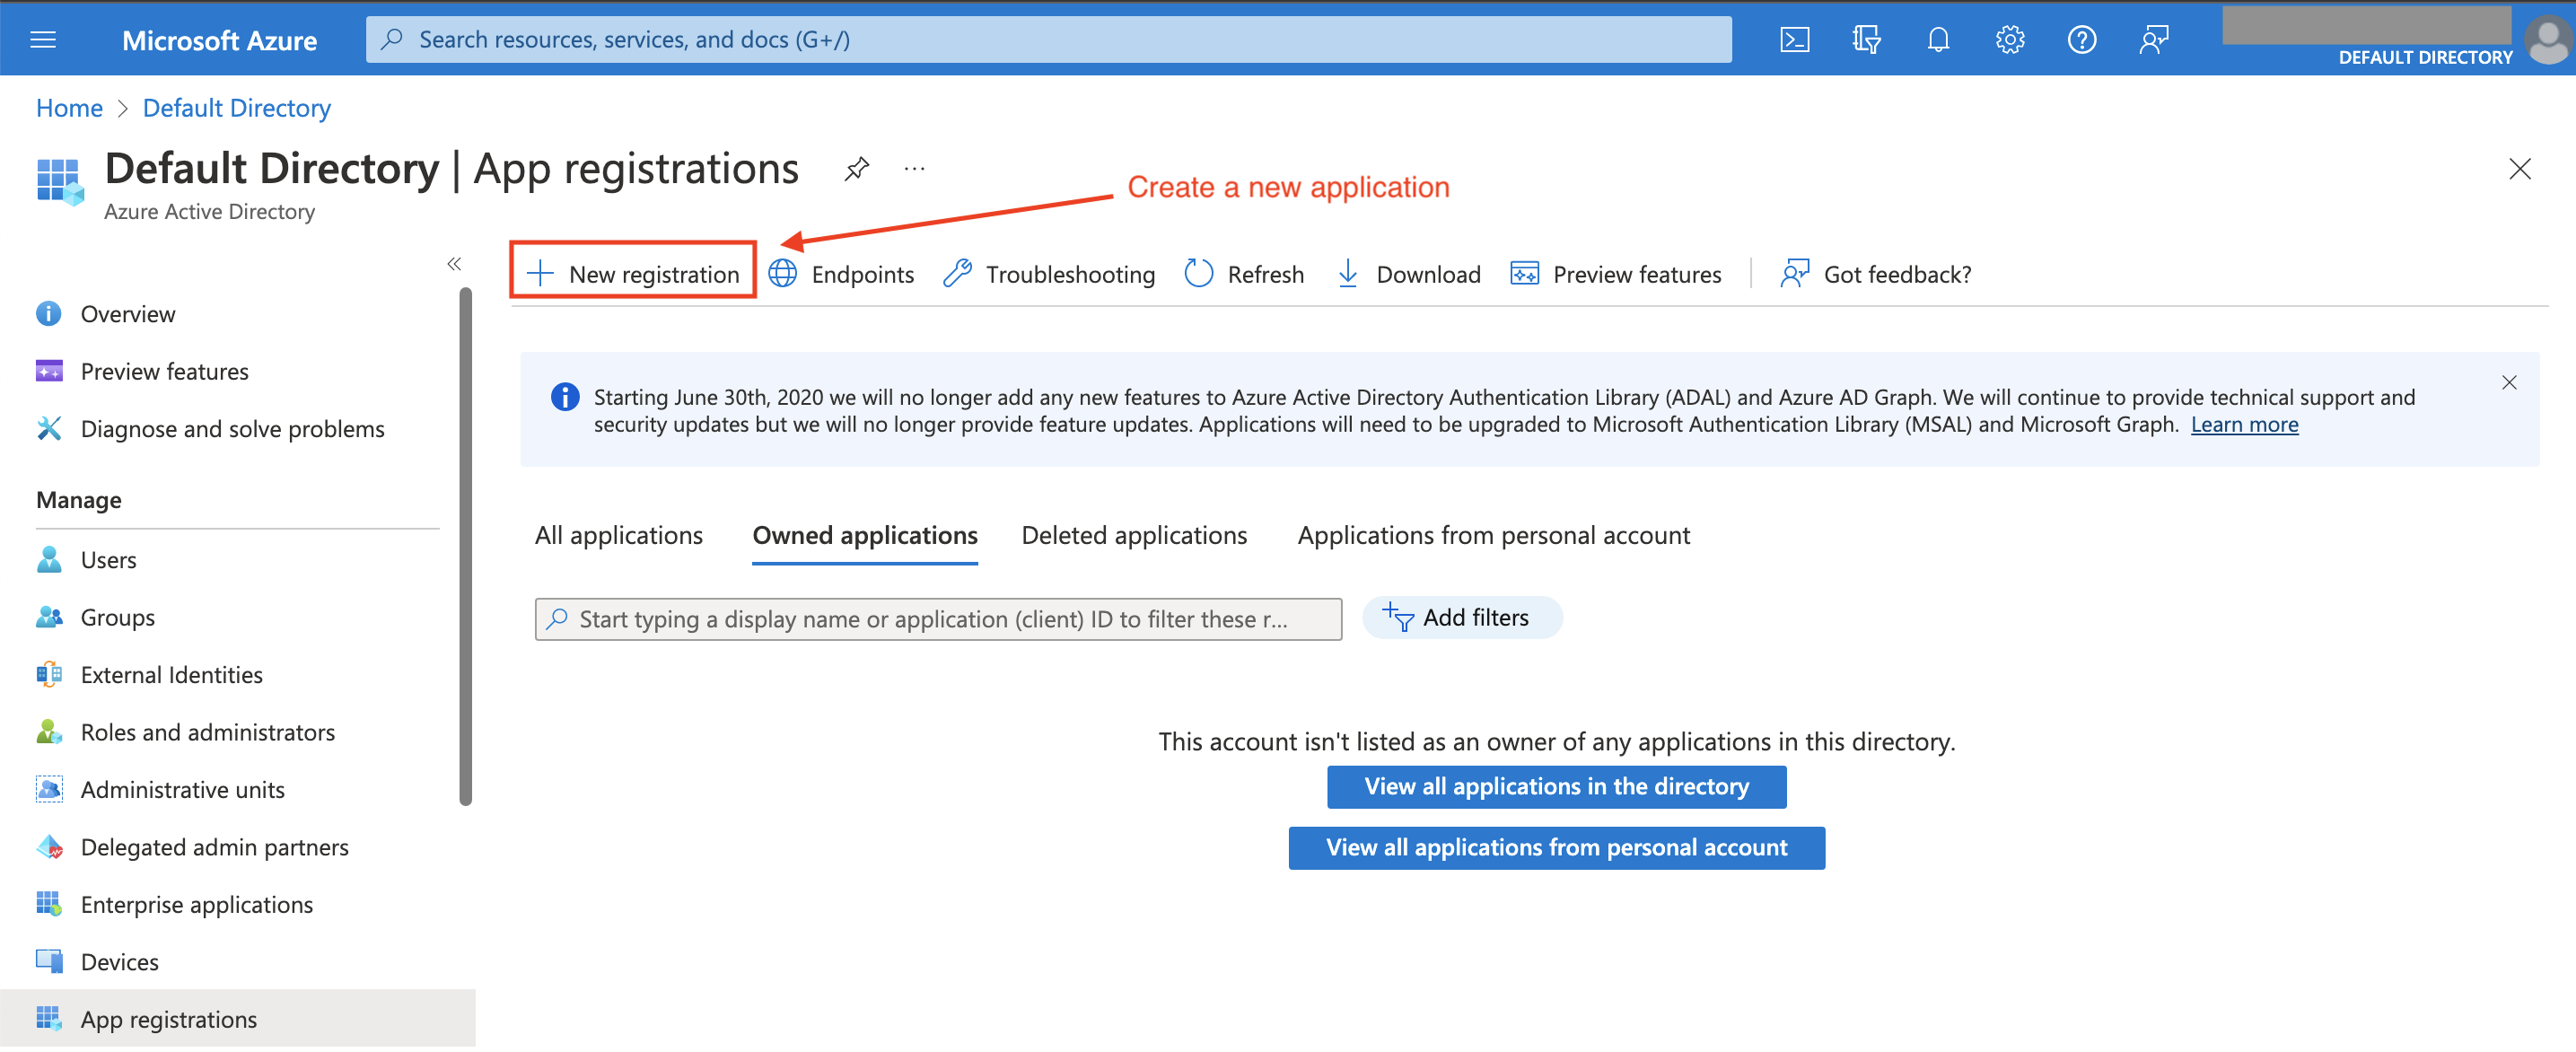
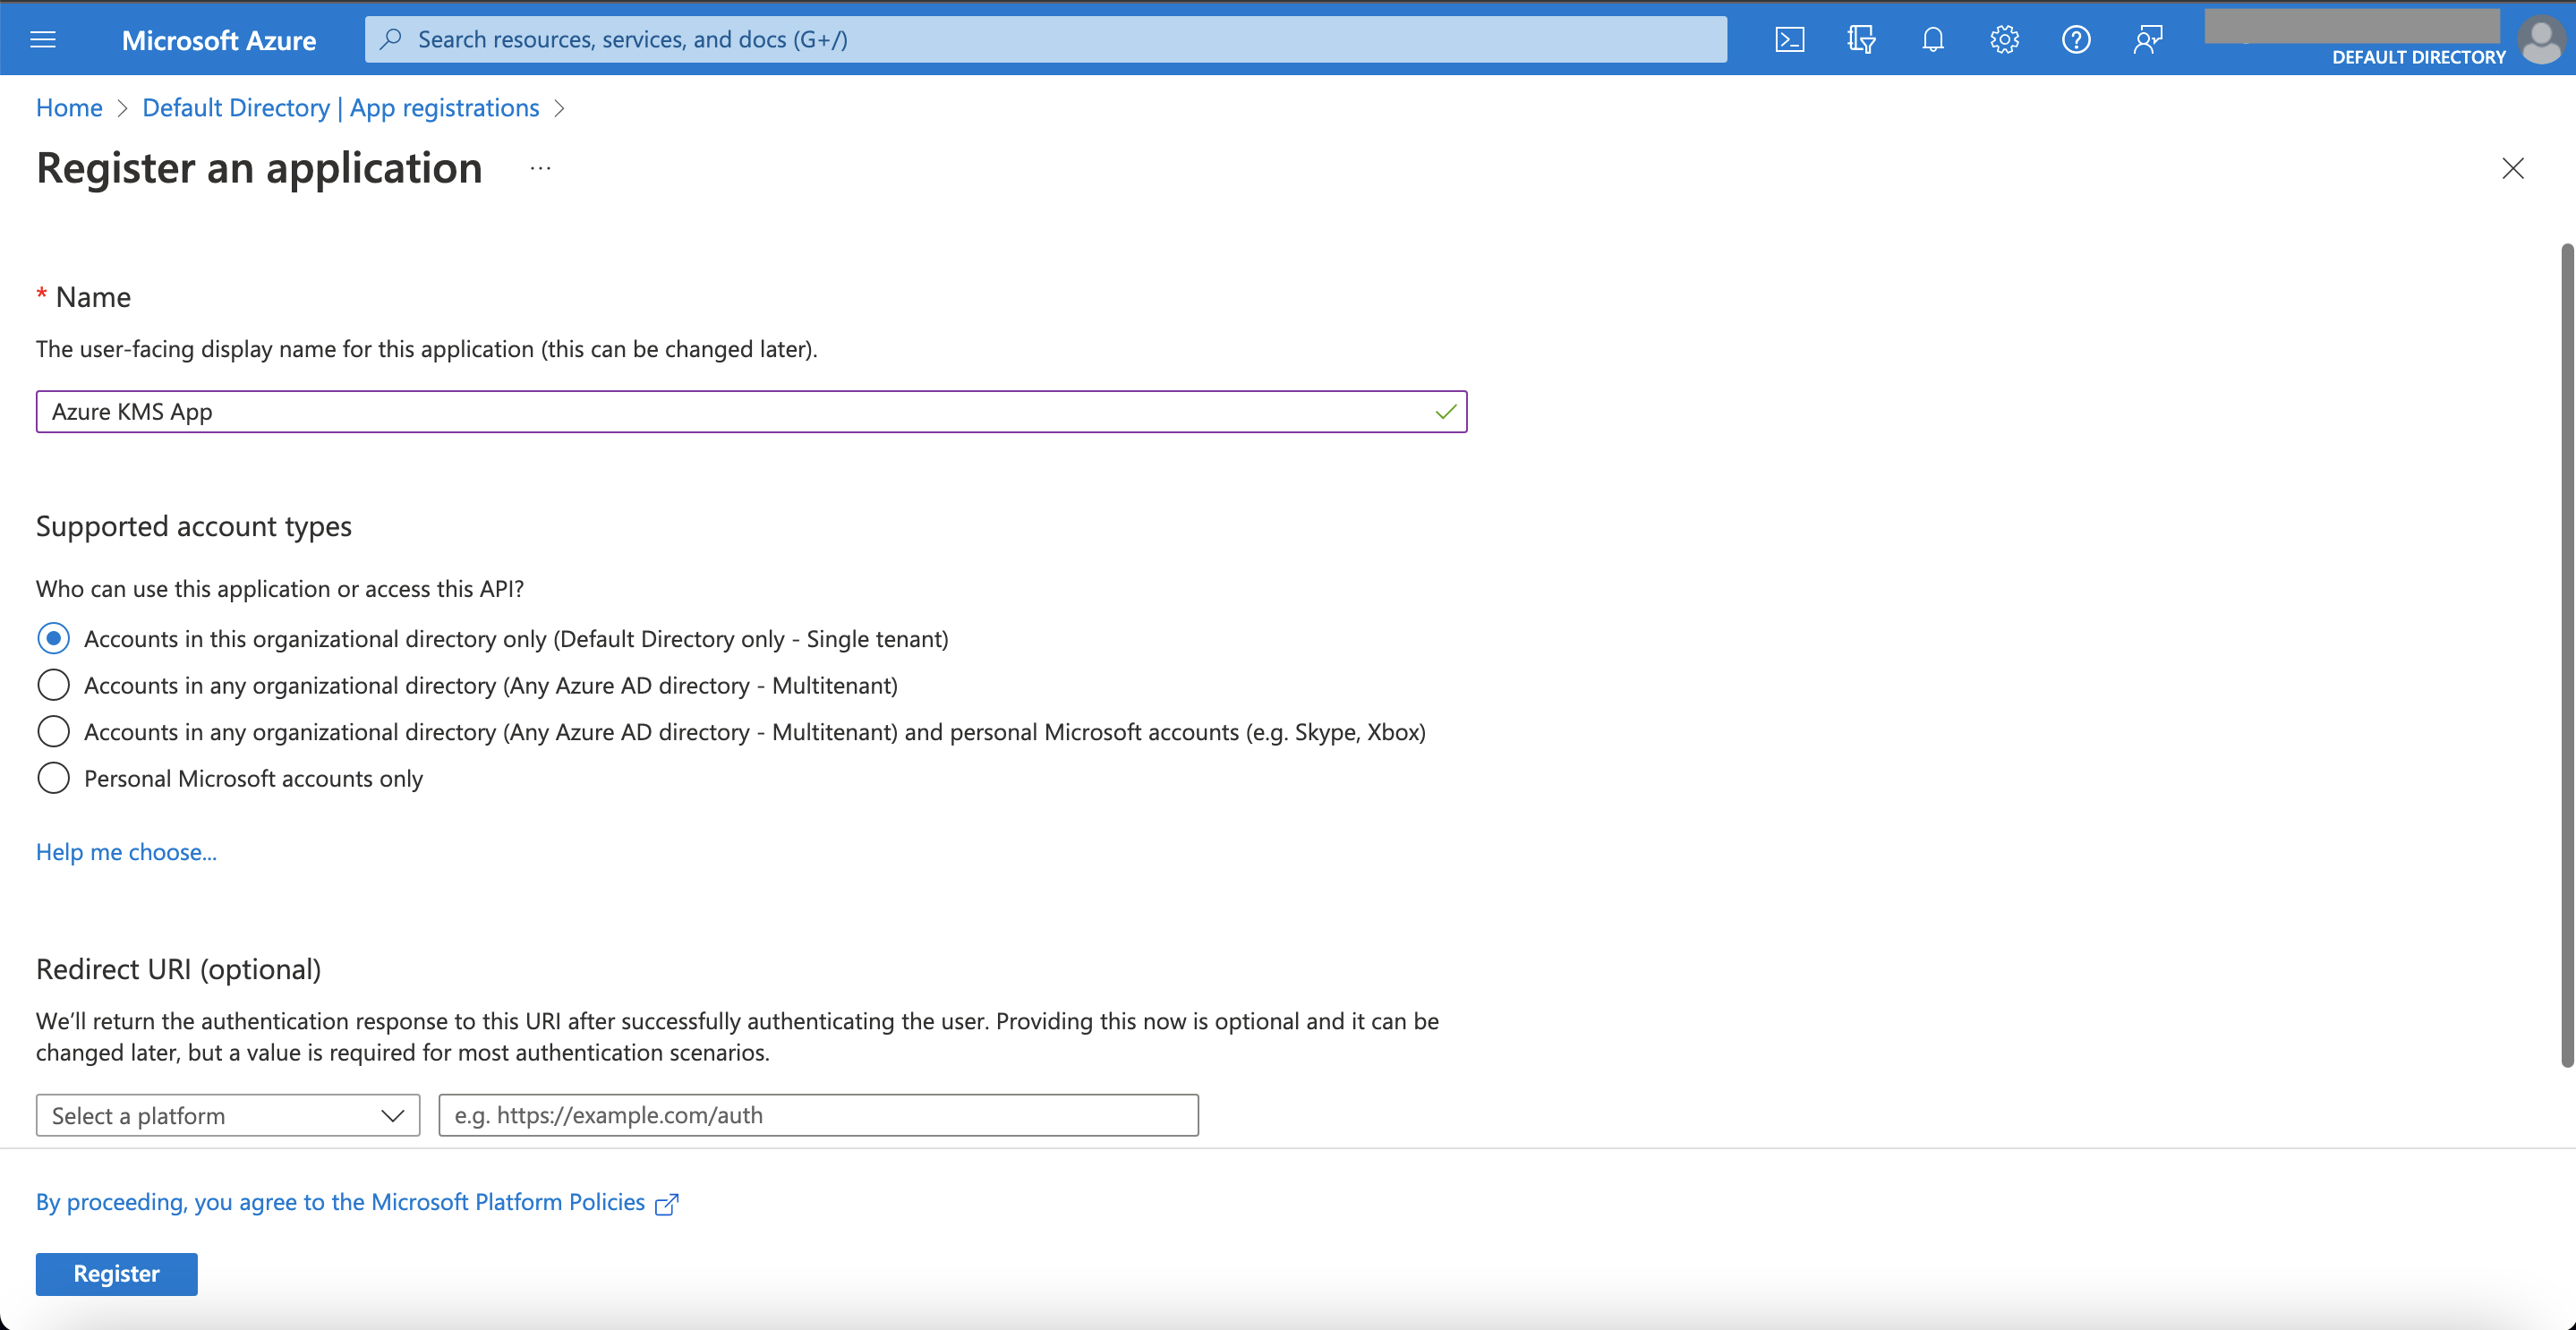
Click on the New registration button to create an application. We suggest to create an application available only inside your current organizational directory (not a multi-tenant one).
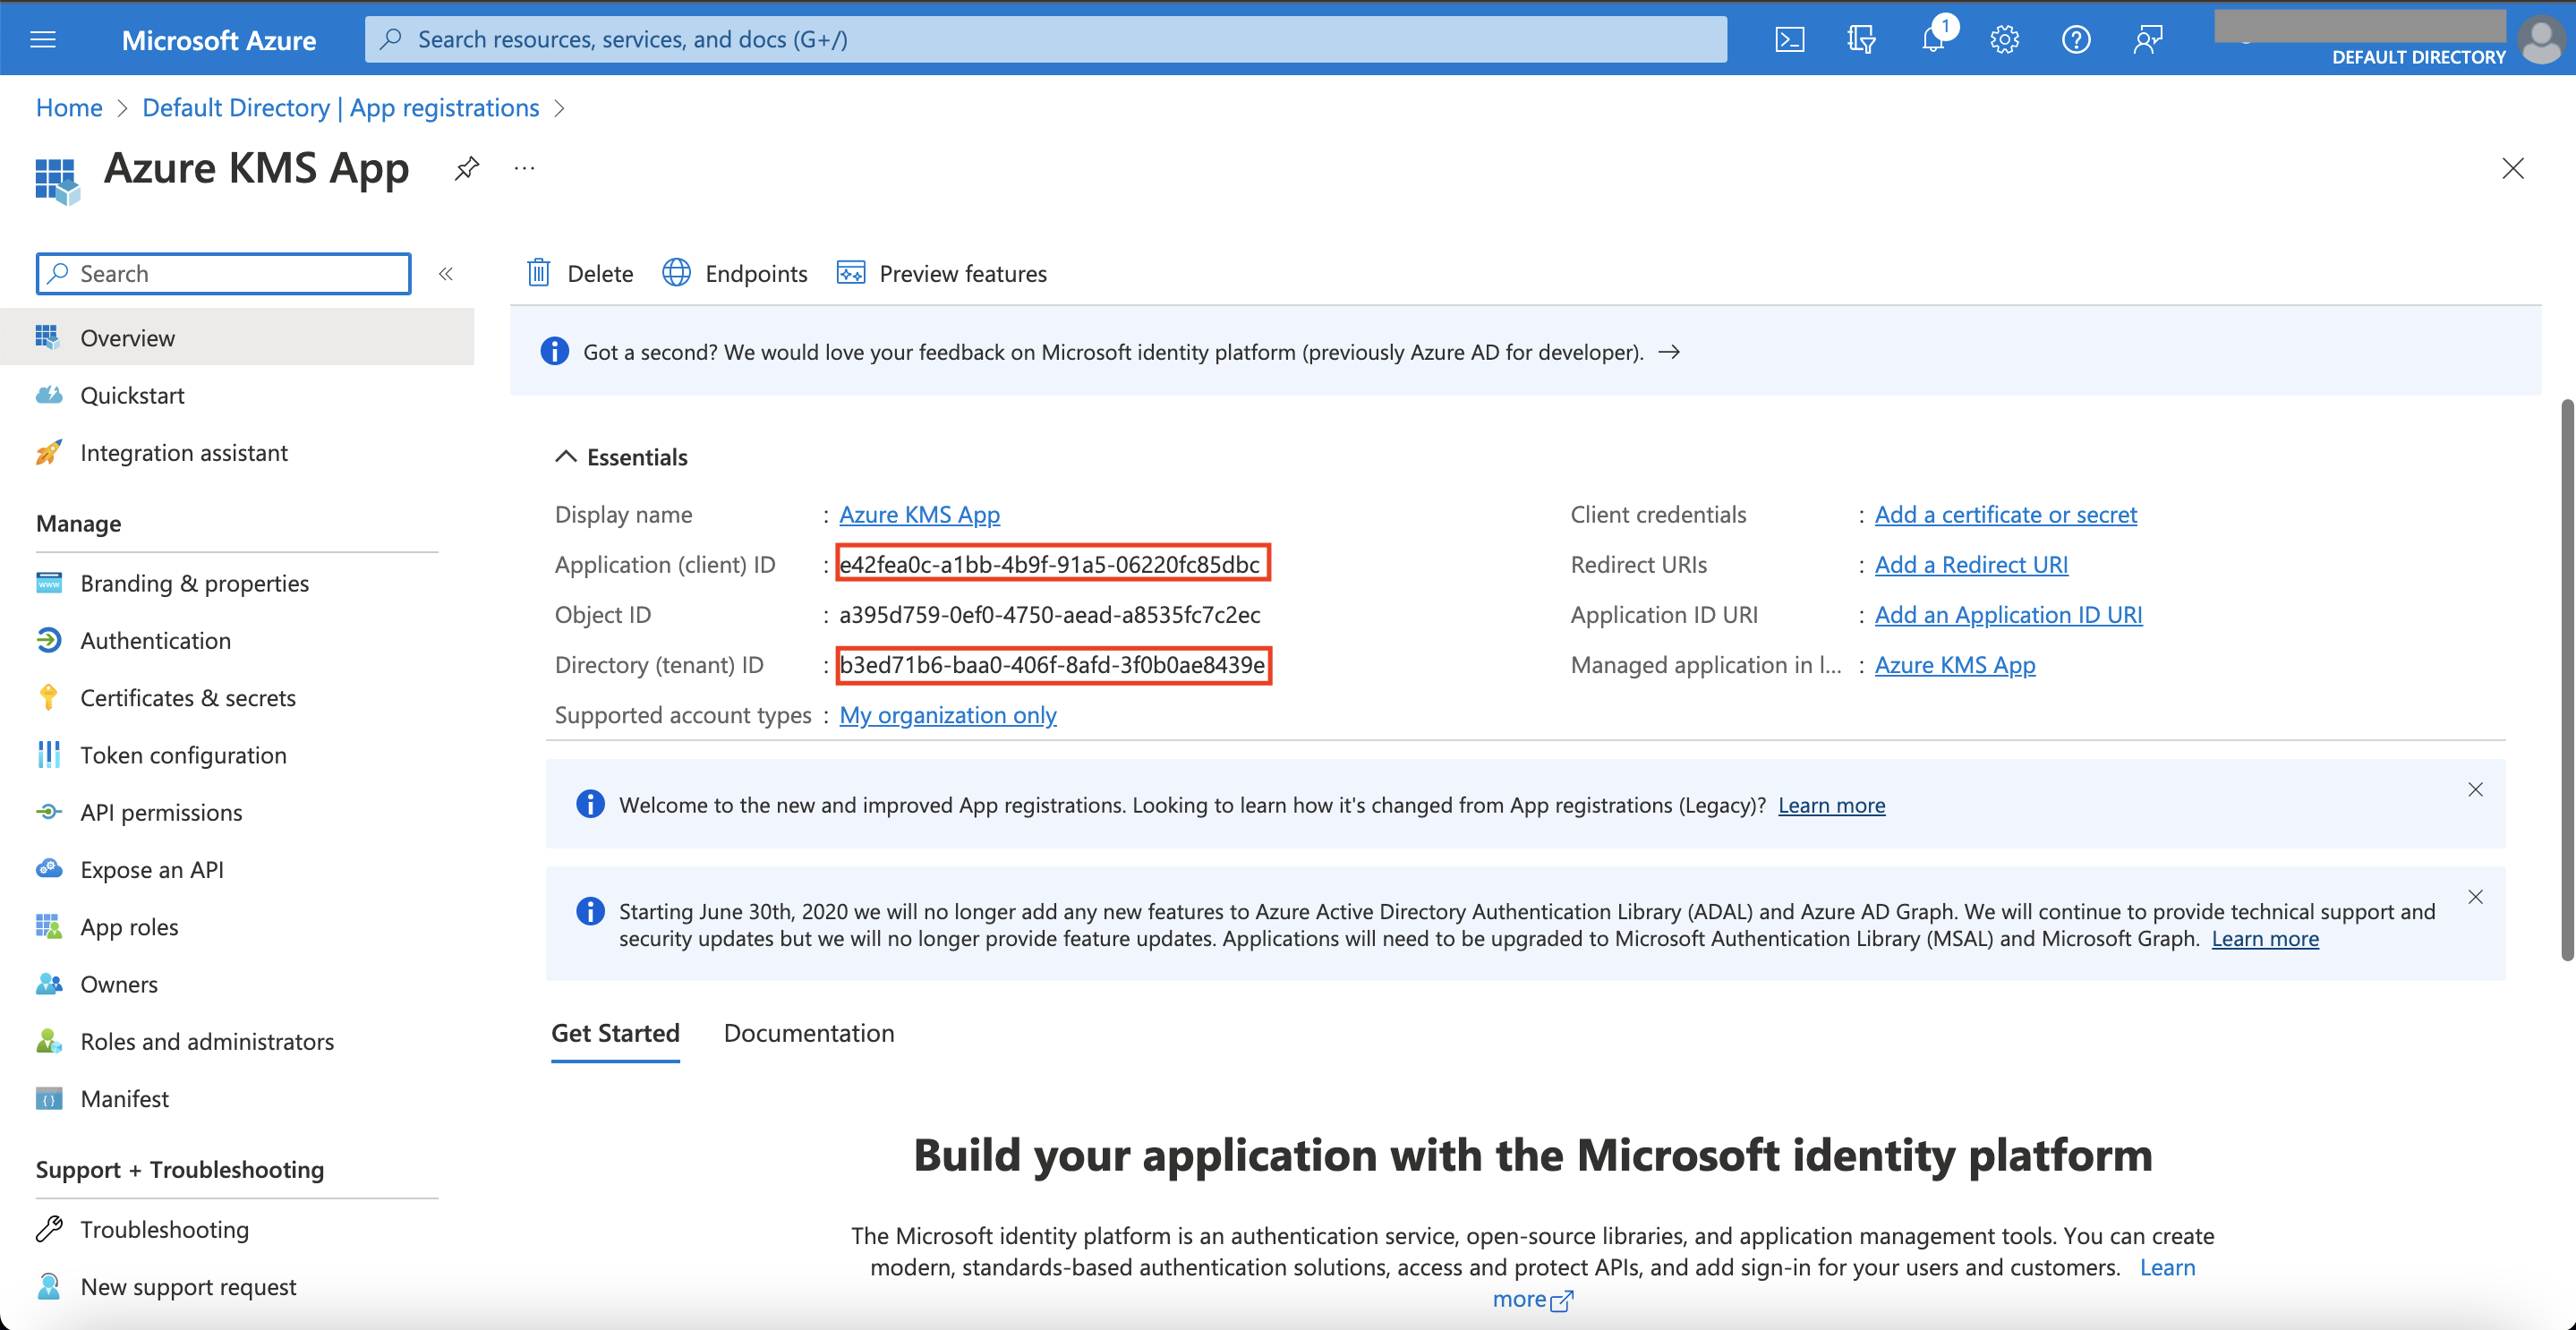
After the application is created, copy its client and tenant IDs - you will need them later to create an application credentials entity on the Afi side.
Step 2 - Create application credentials
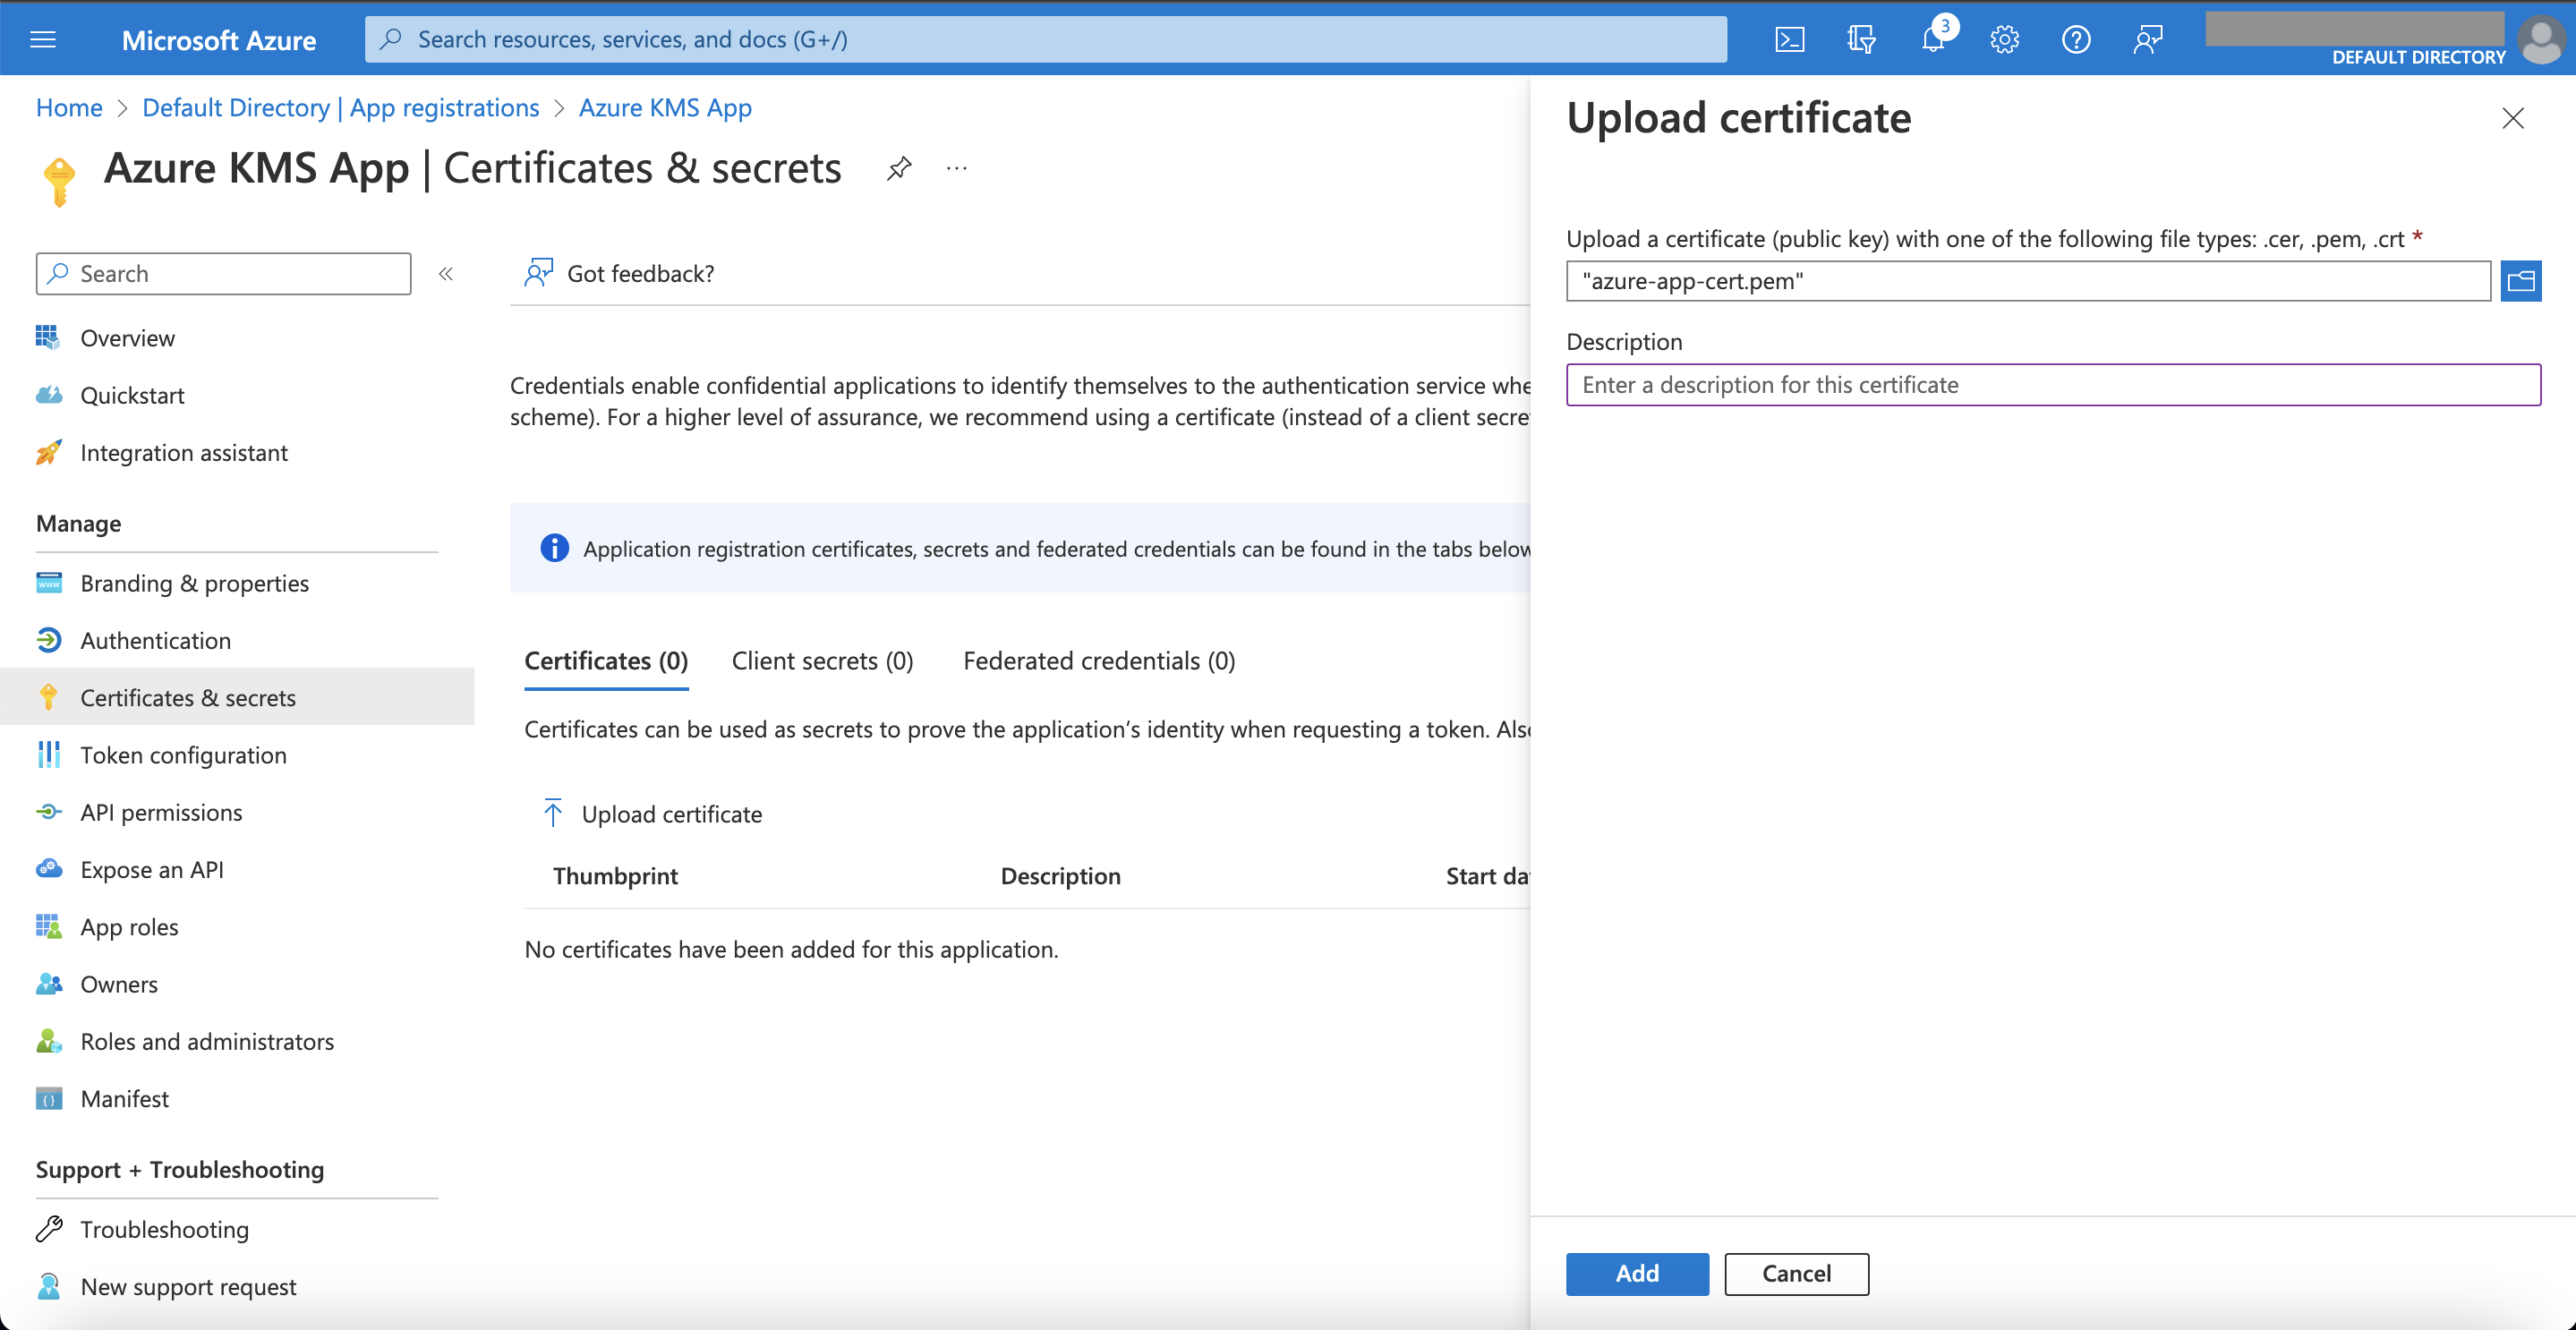
After the application is created, you need a private key and certificate pair that will be used by Afi to act on behalf of the application. The certificate should be uploaded in the application created in Step 1 and both the key and certificate will be used to create application credentials on the Afi side.
To proceed, please go to the Afi application and create an application credentials object with tenant and client identifiers from Step 1 on the Service → Settings → Secrets tab.
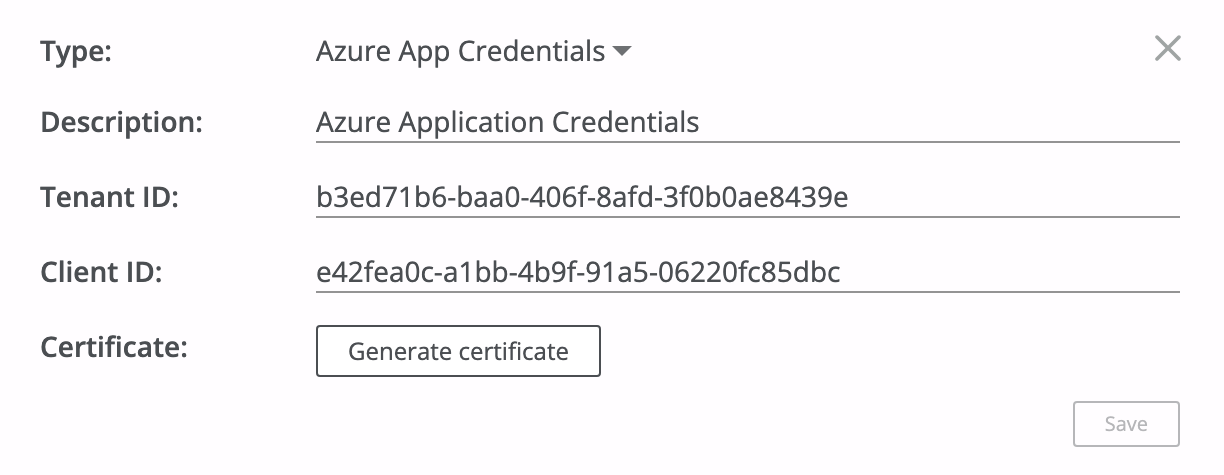
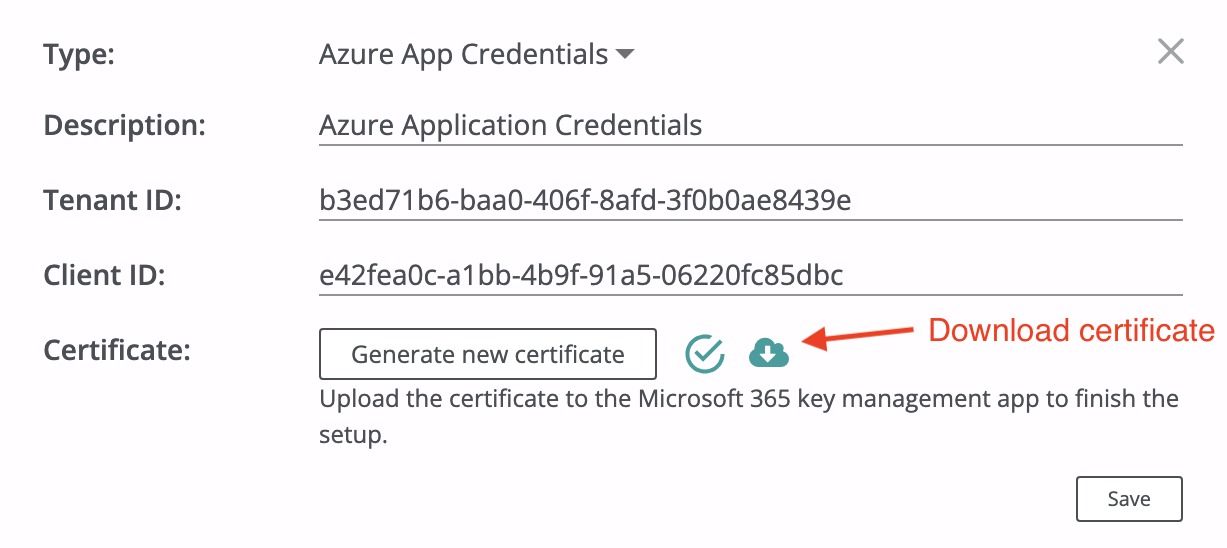
Then click on the Generate certificate button and download a certificate locally before saving an application credentials secret (a private key linked to the certificate will be kept on the Afi side and used to interact with the application on the Azure side):
Go to the Certificates & secrets section inside the application settings and upload the certificate:
Step 3 - Create an Azure Key Vault and a KMS key
Go to the Key vaults service in the Azure portal (it can be located via the search bar) and create a key vault where your Azure KMS key will reside.

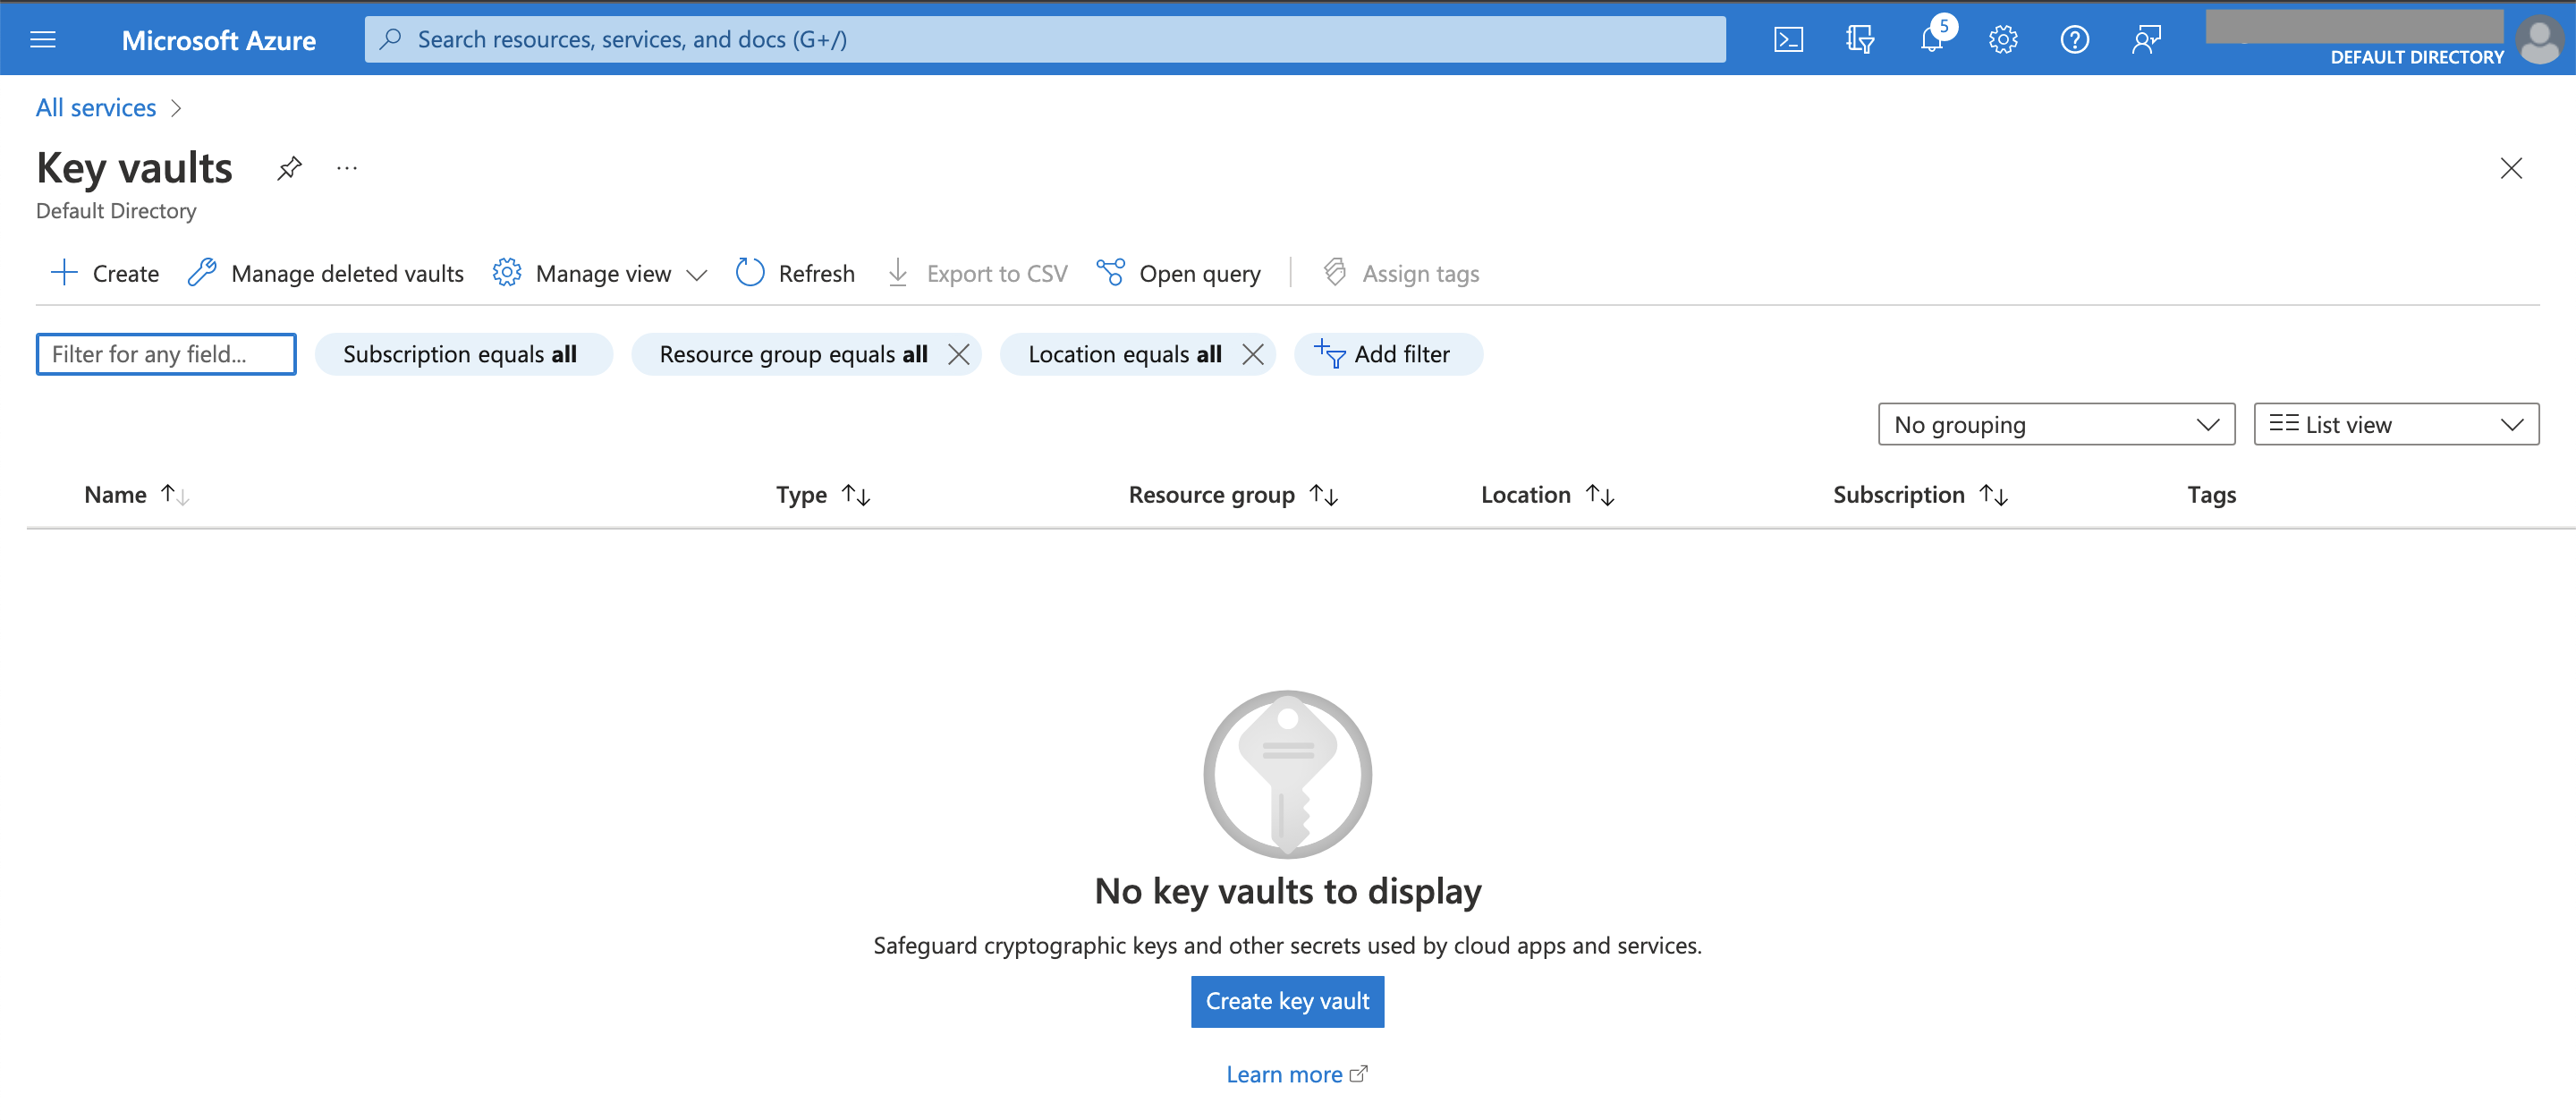
We recommend to create a key vault with the default settings suggested by Azure and make sure that you create a key in a region that is geographically close to the selected region in Afi.
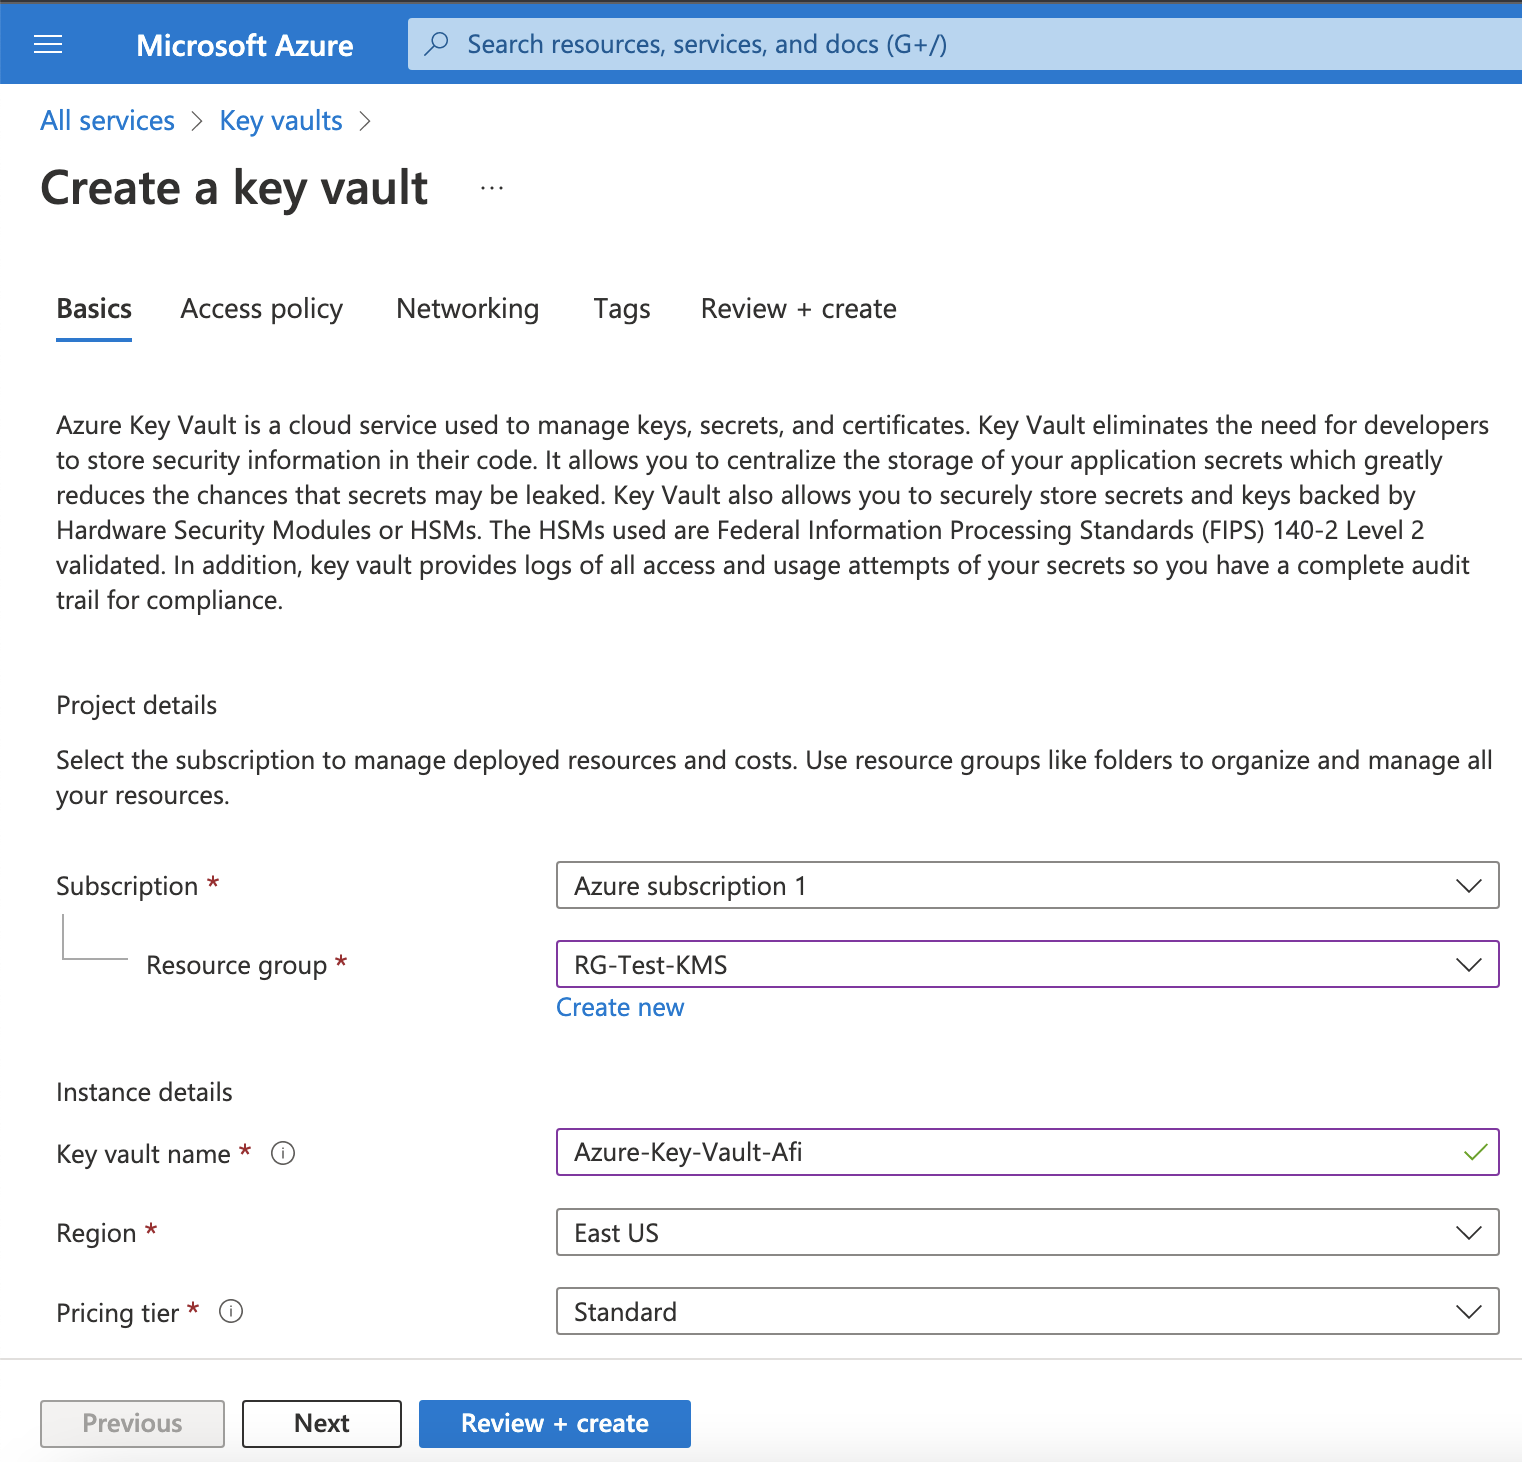
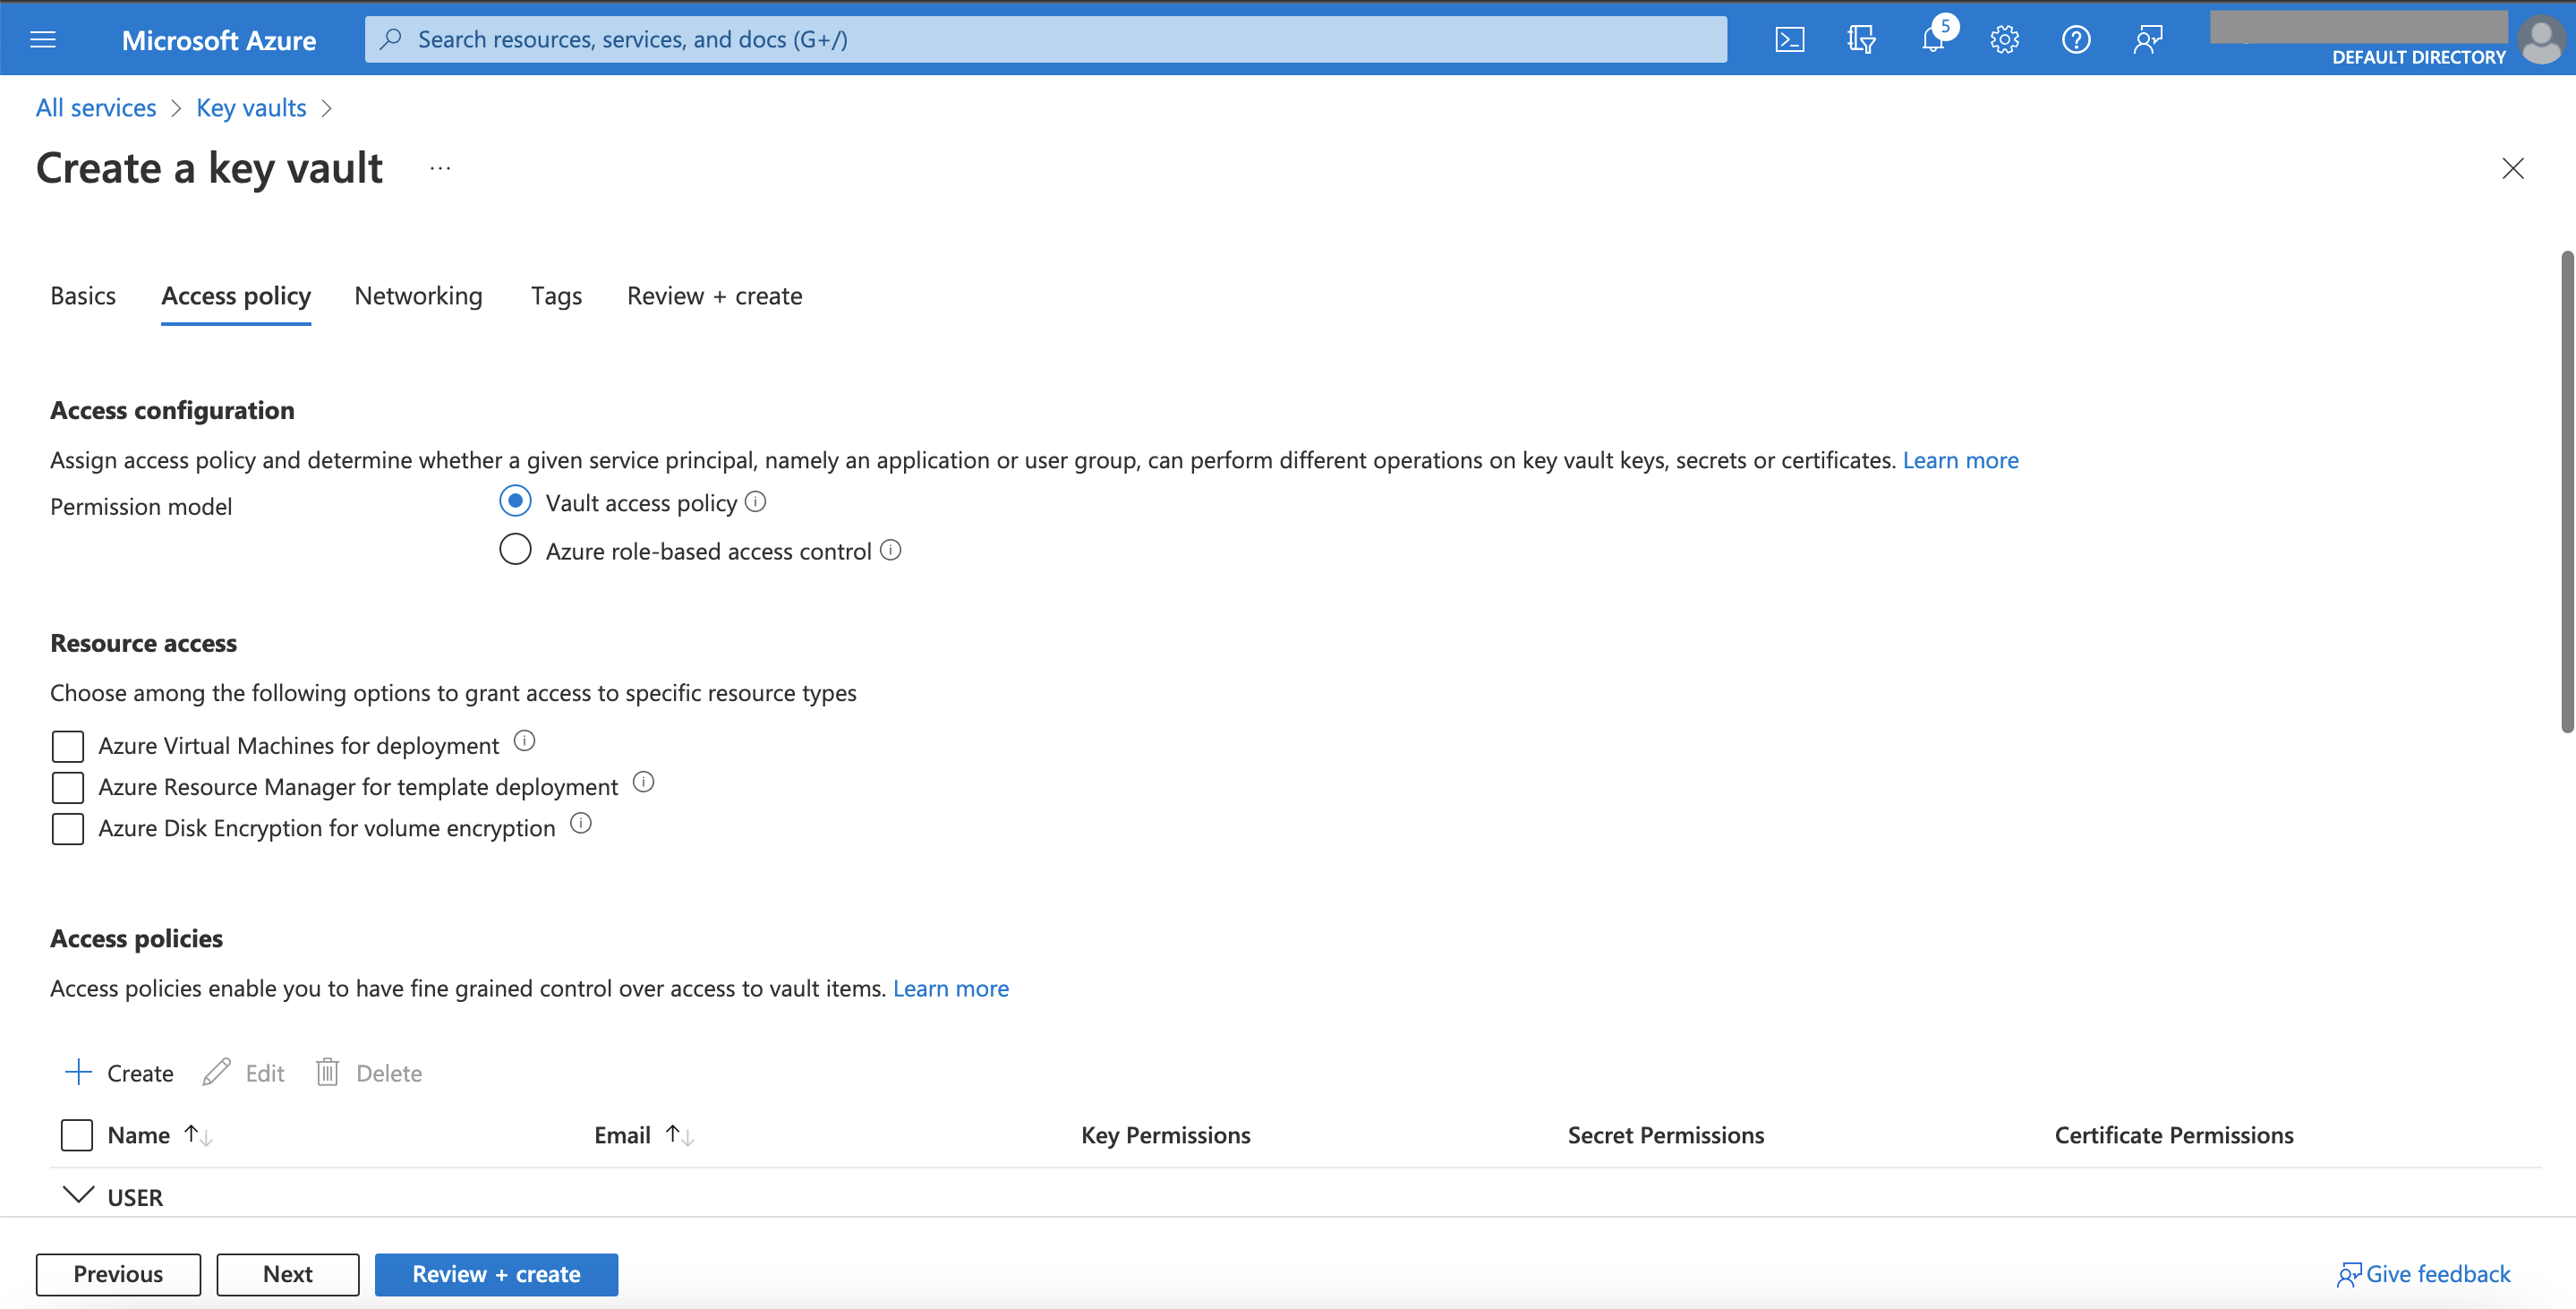
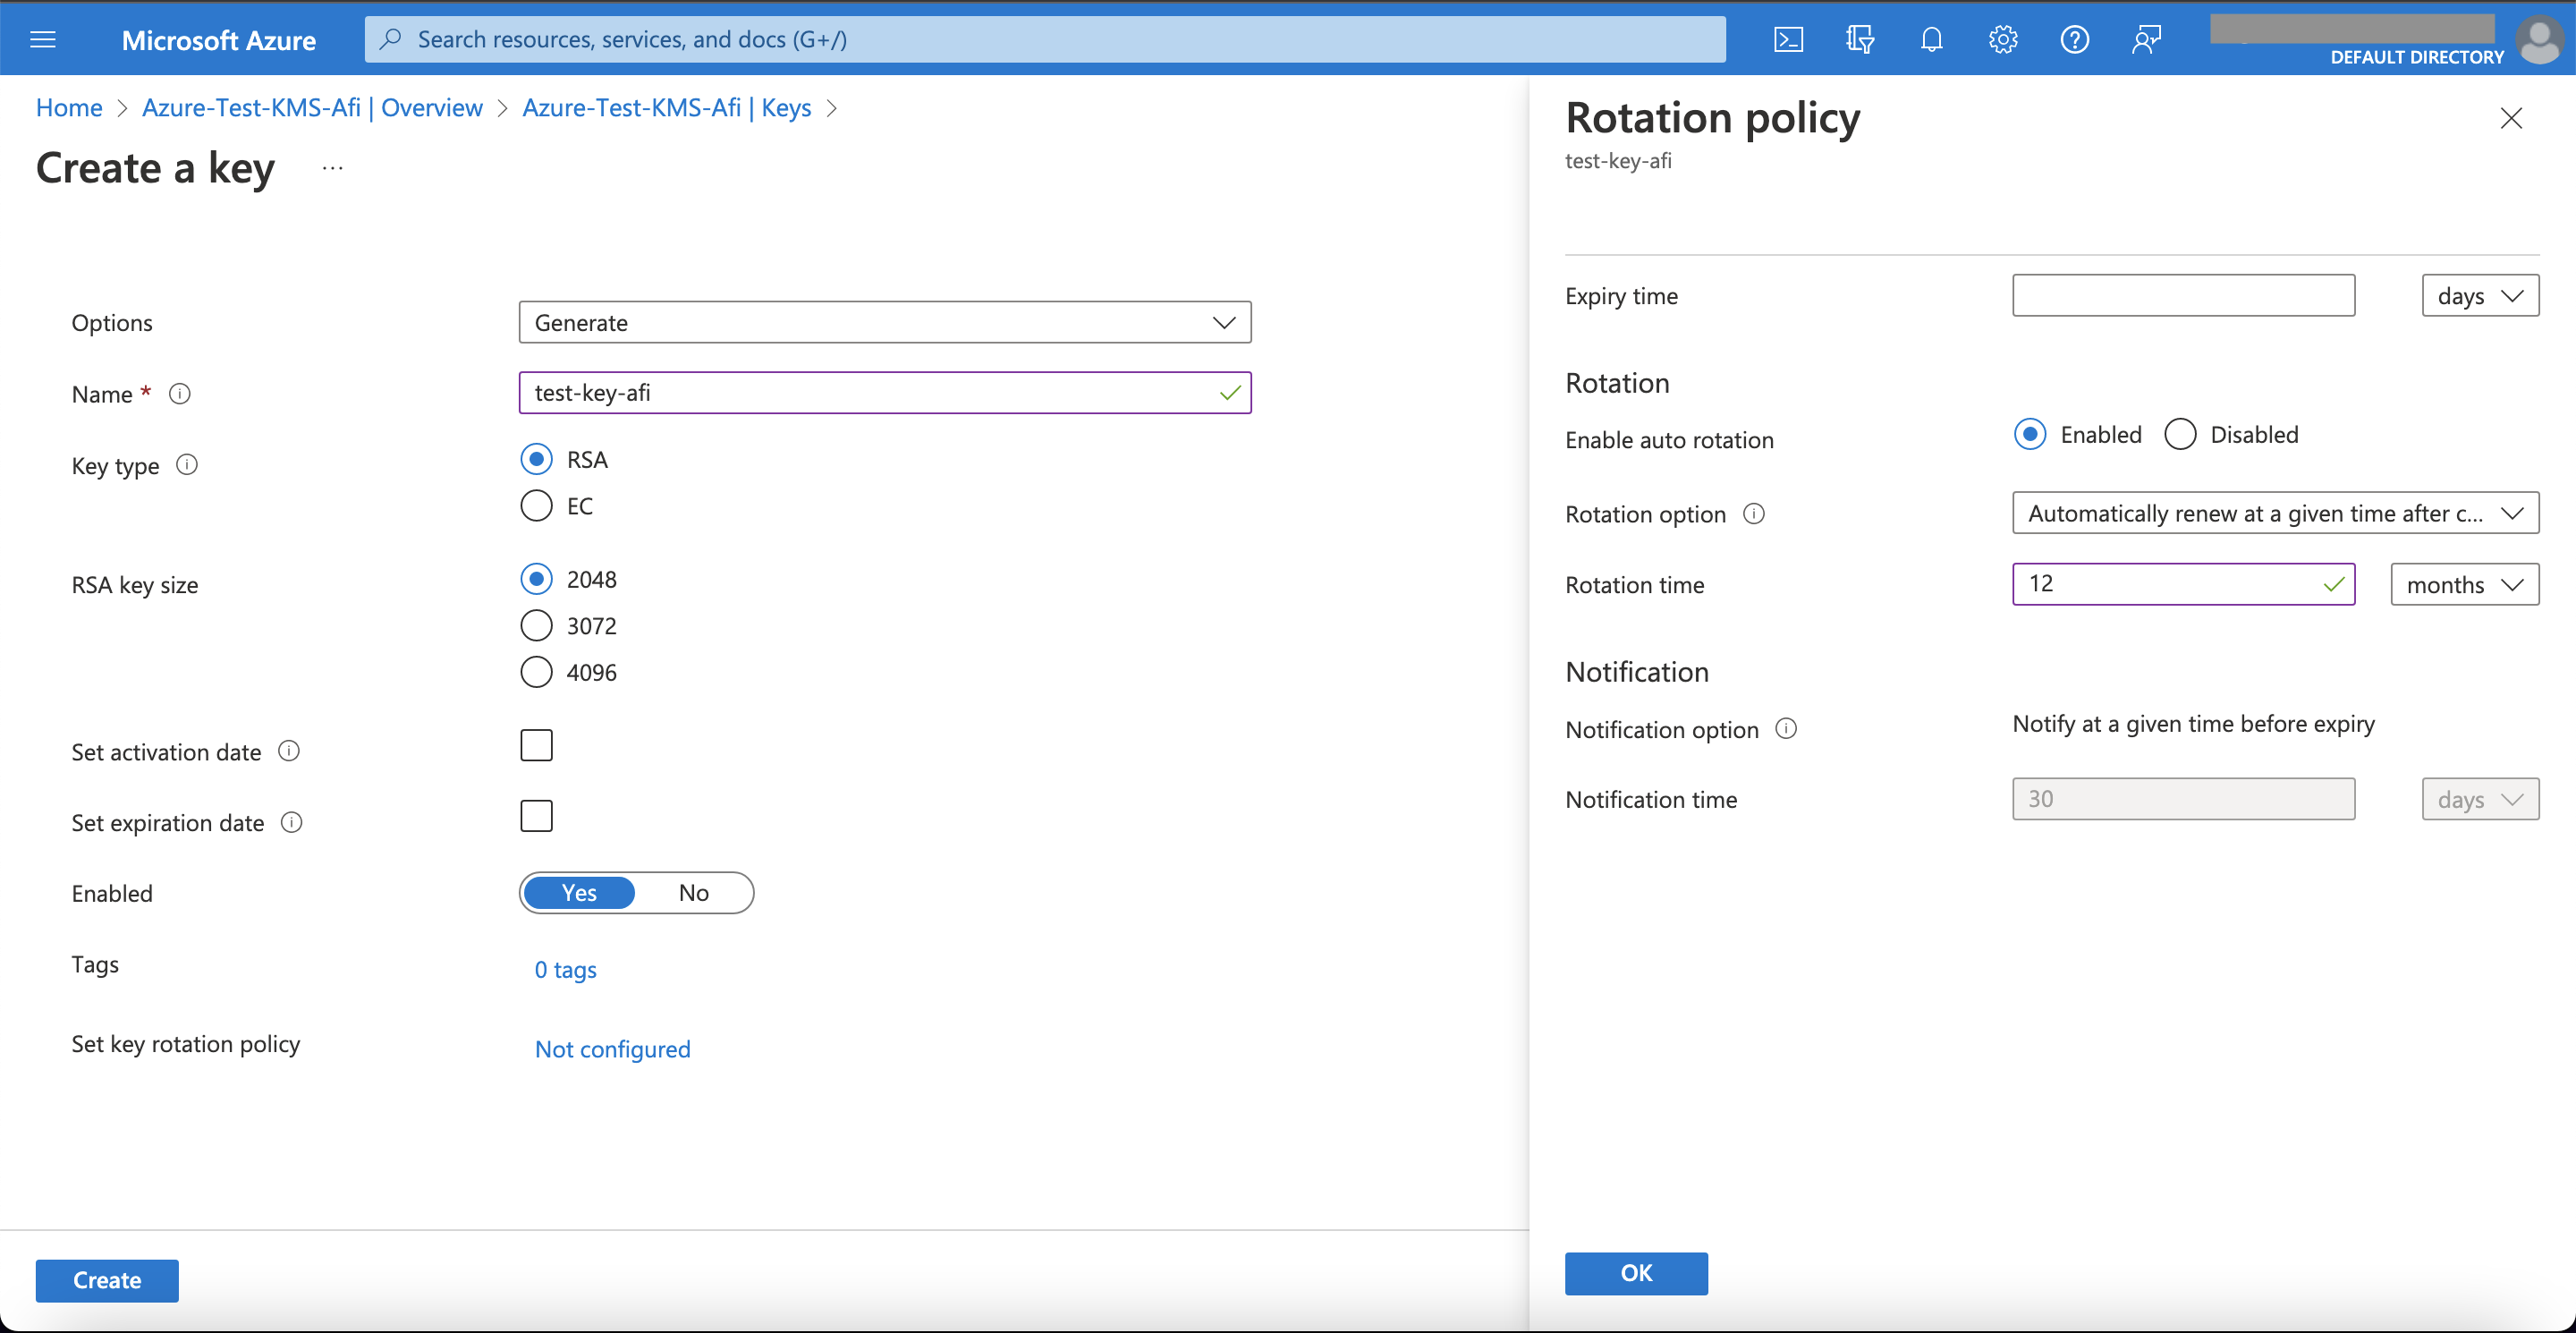
To create a KMS key, go the Keys section inside the vault and click on the Generate/Import key button:
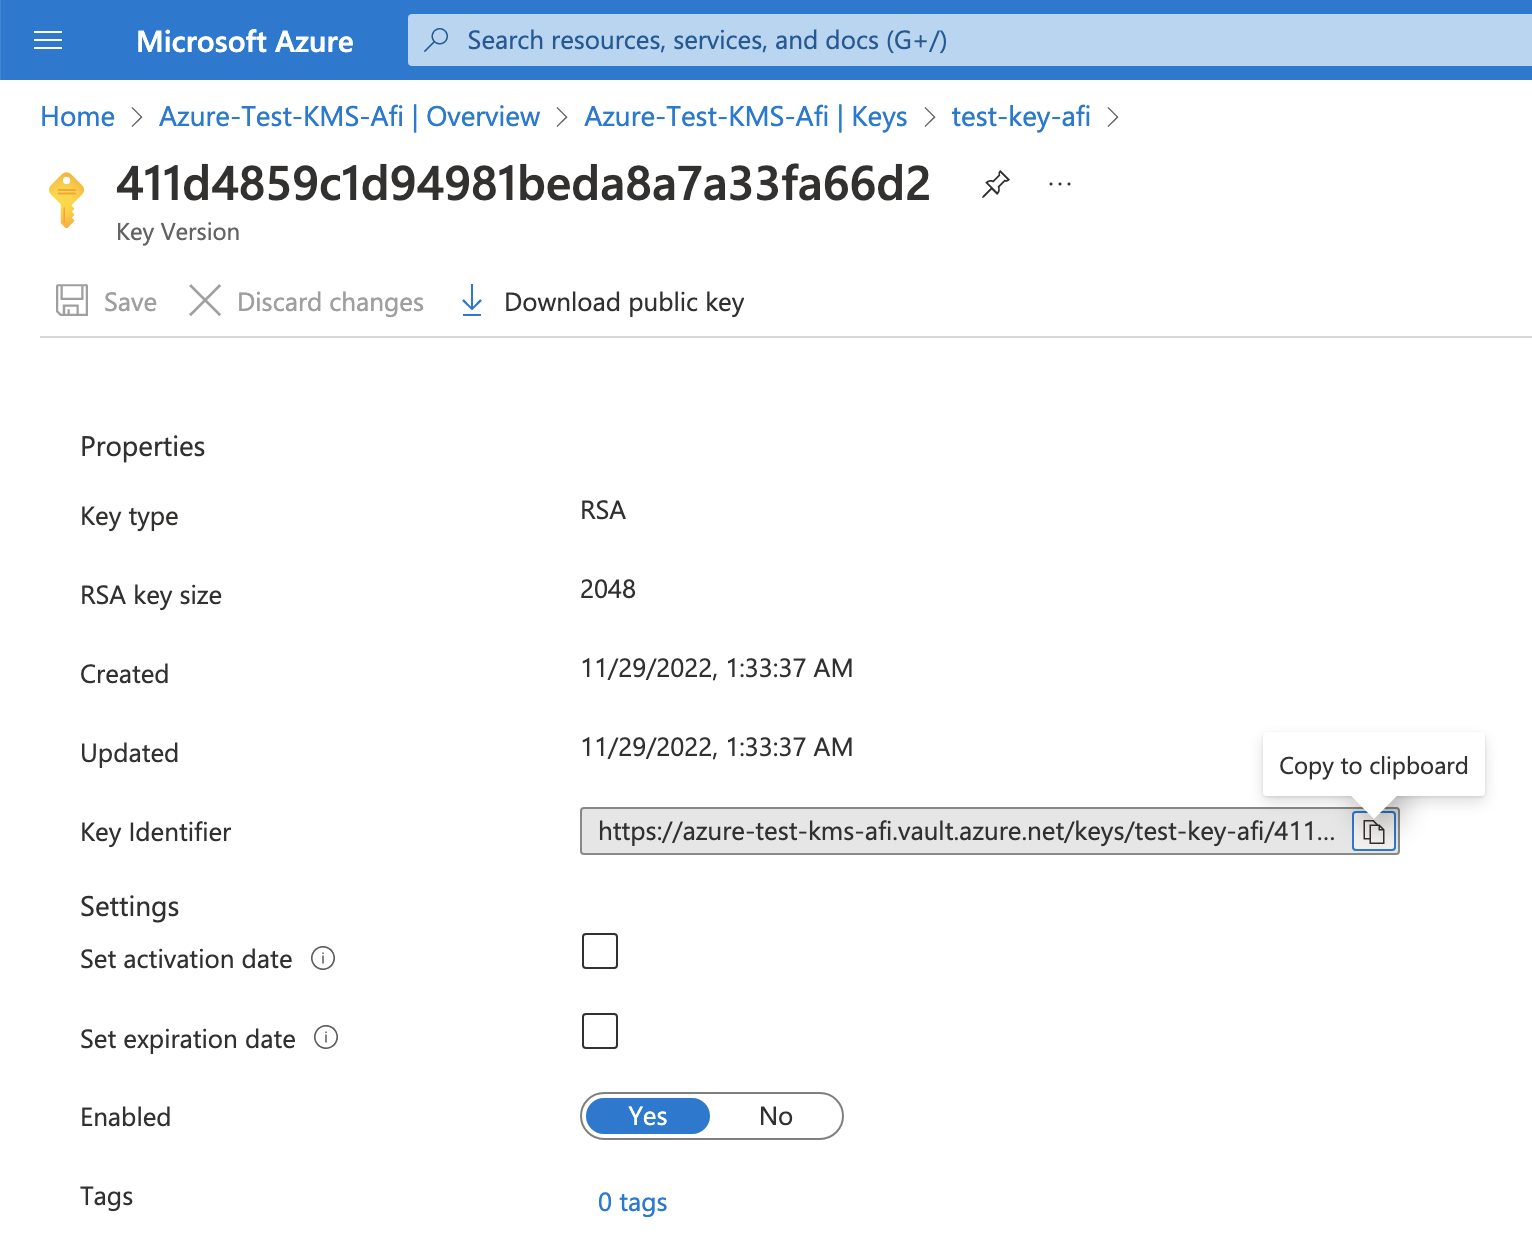
When the key is created, copy its identifier to continue the configuration on the Afi side:
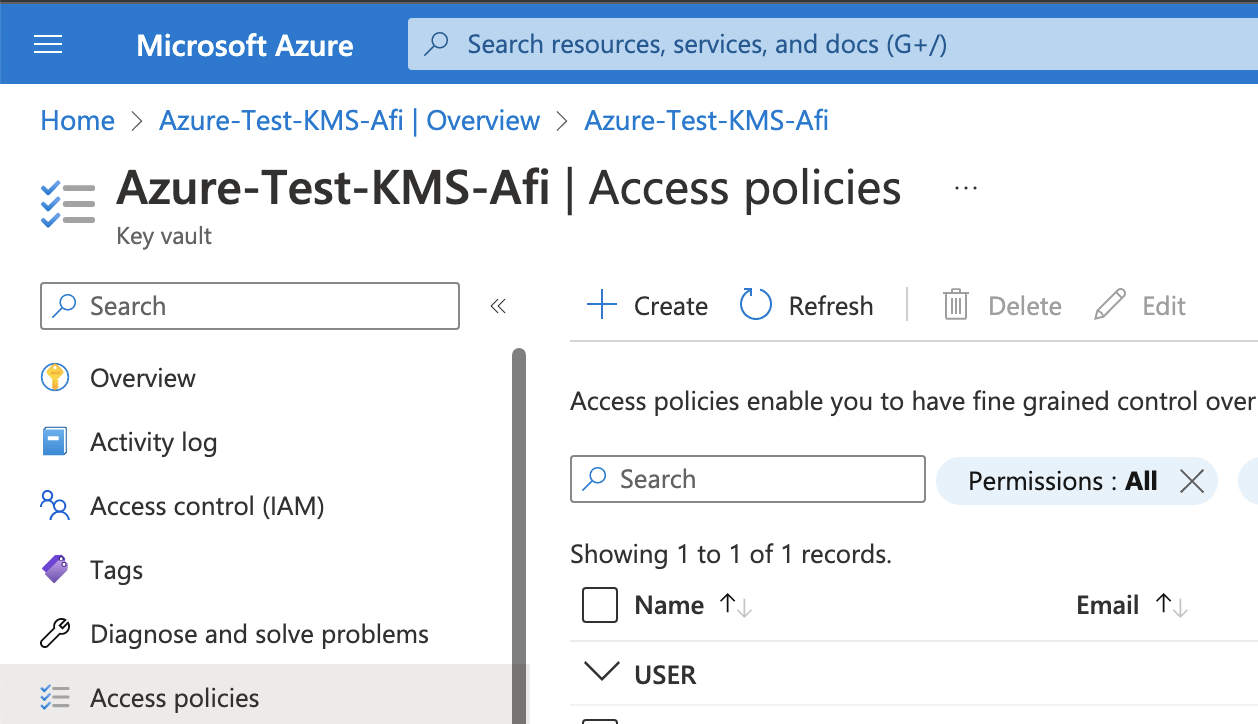
After that you need to create an access policy that will allow the recently created Entra ID application to access the key (go to the Access policies section inside the vault and click on the Create button):
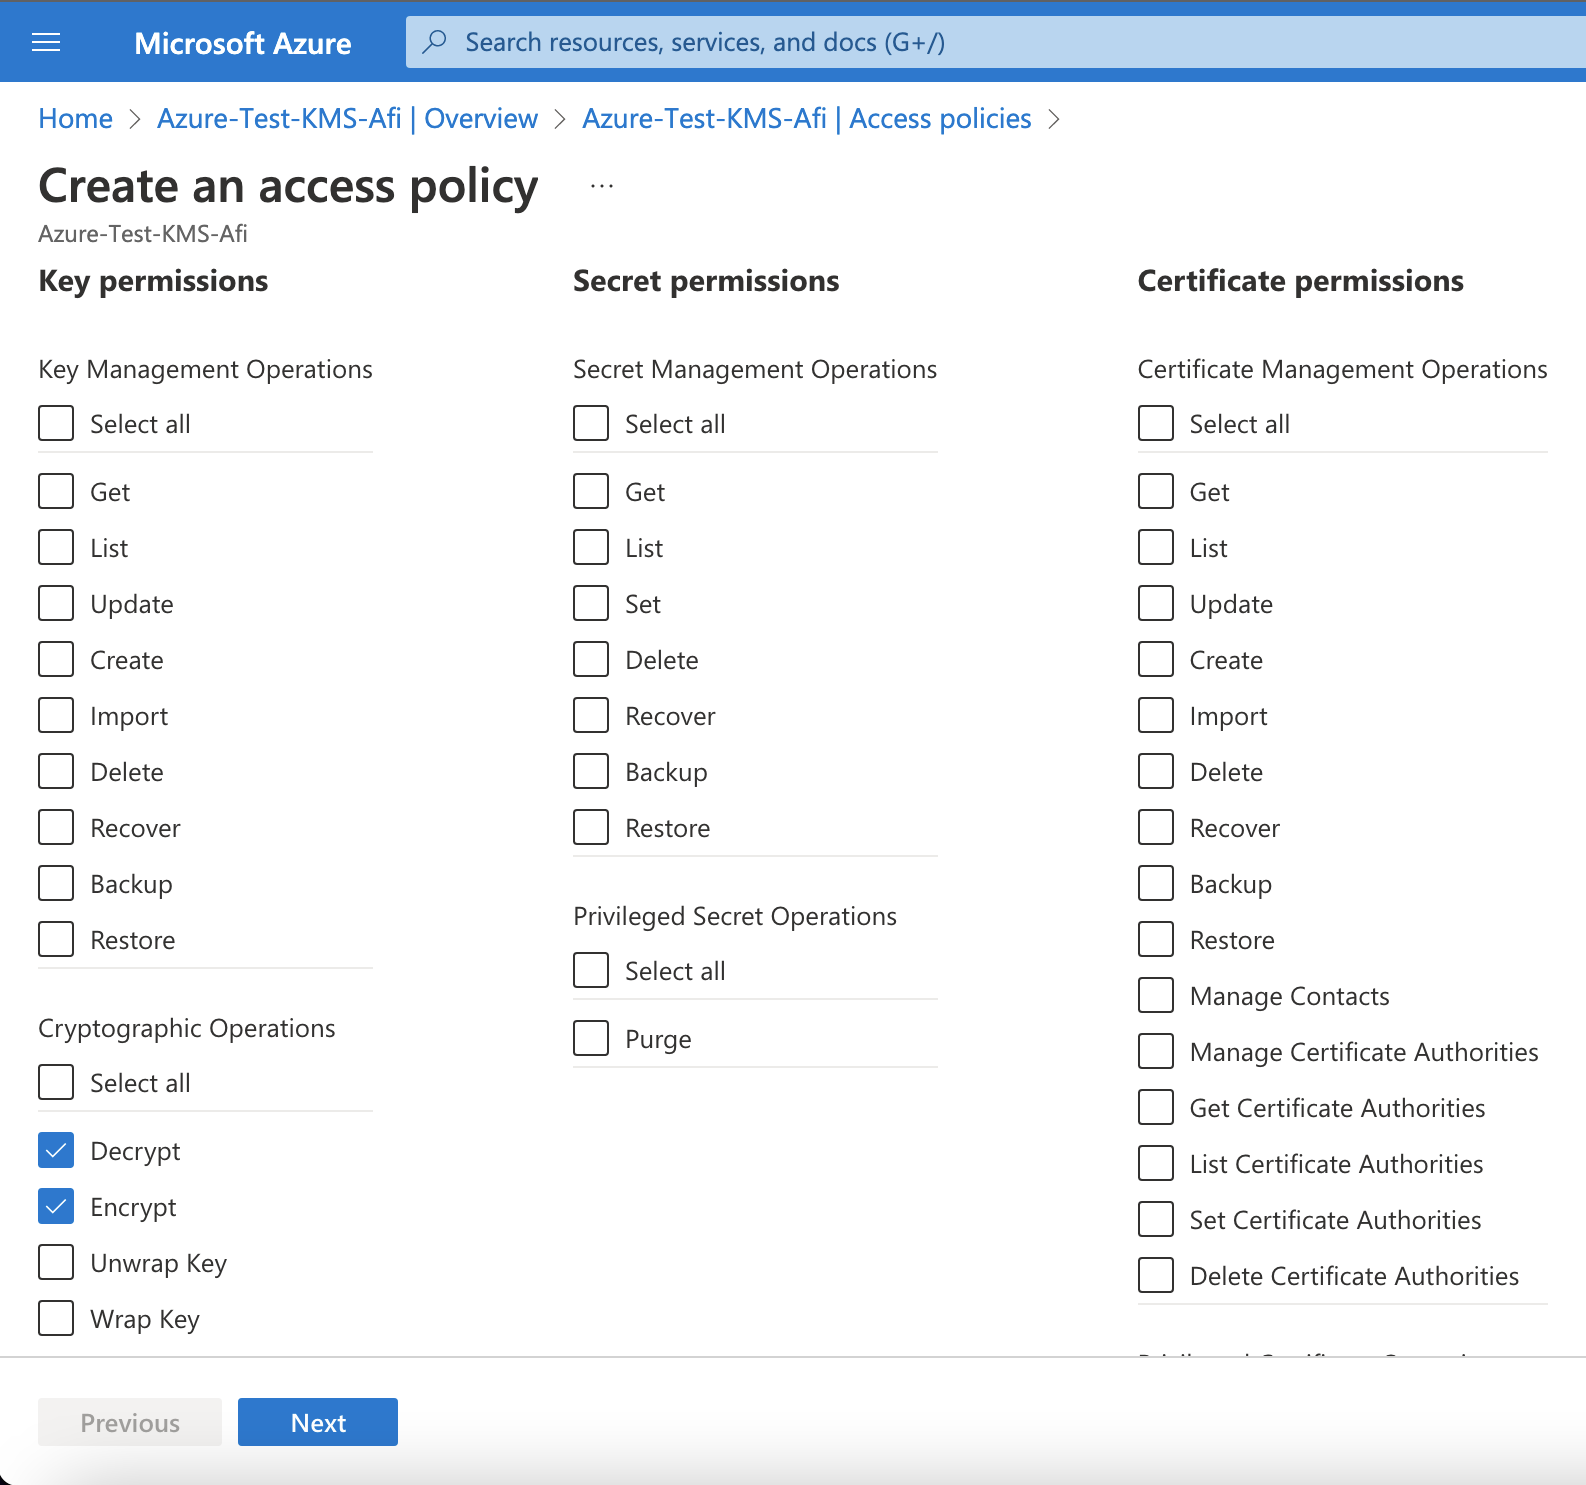
Select Decrypt and Encrypt key permissions during the policy creation:
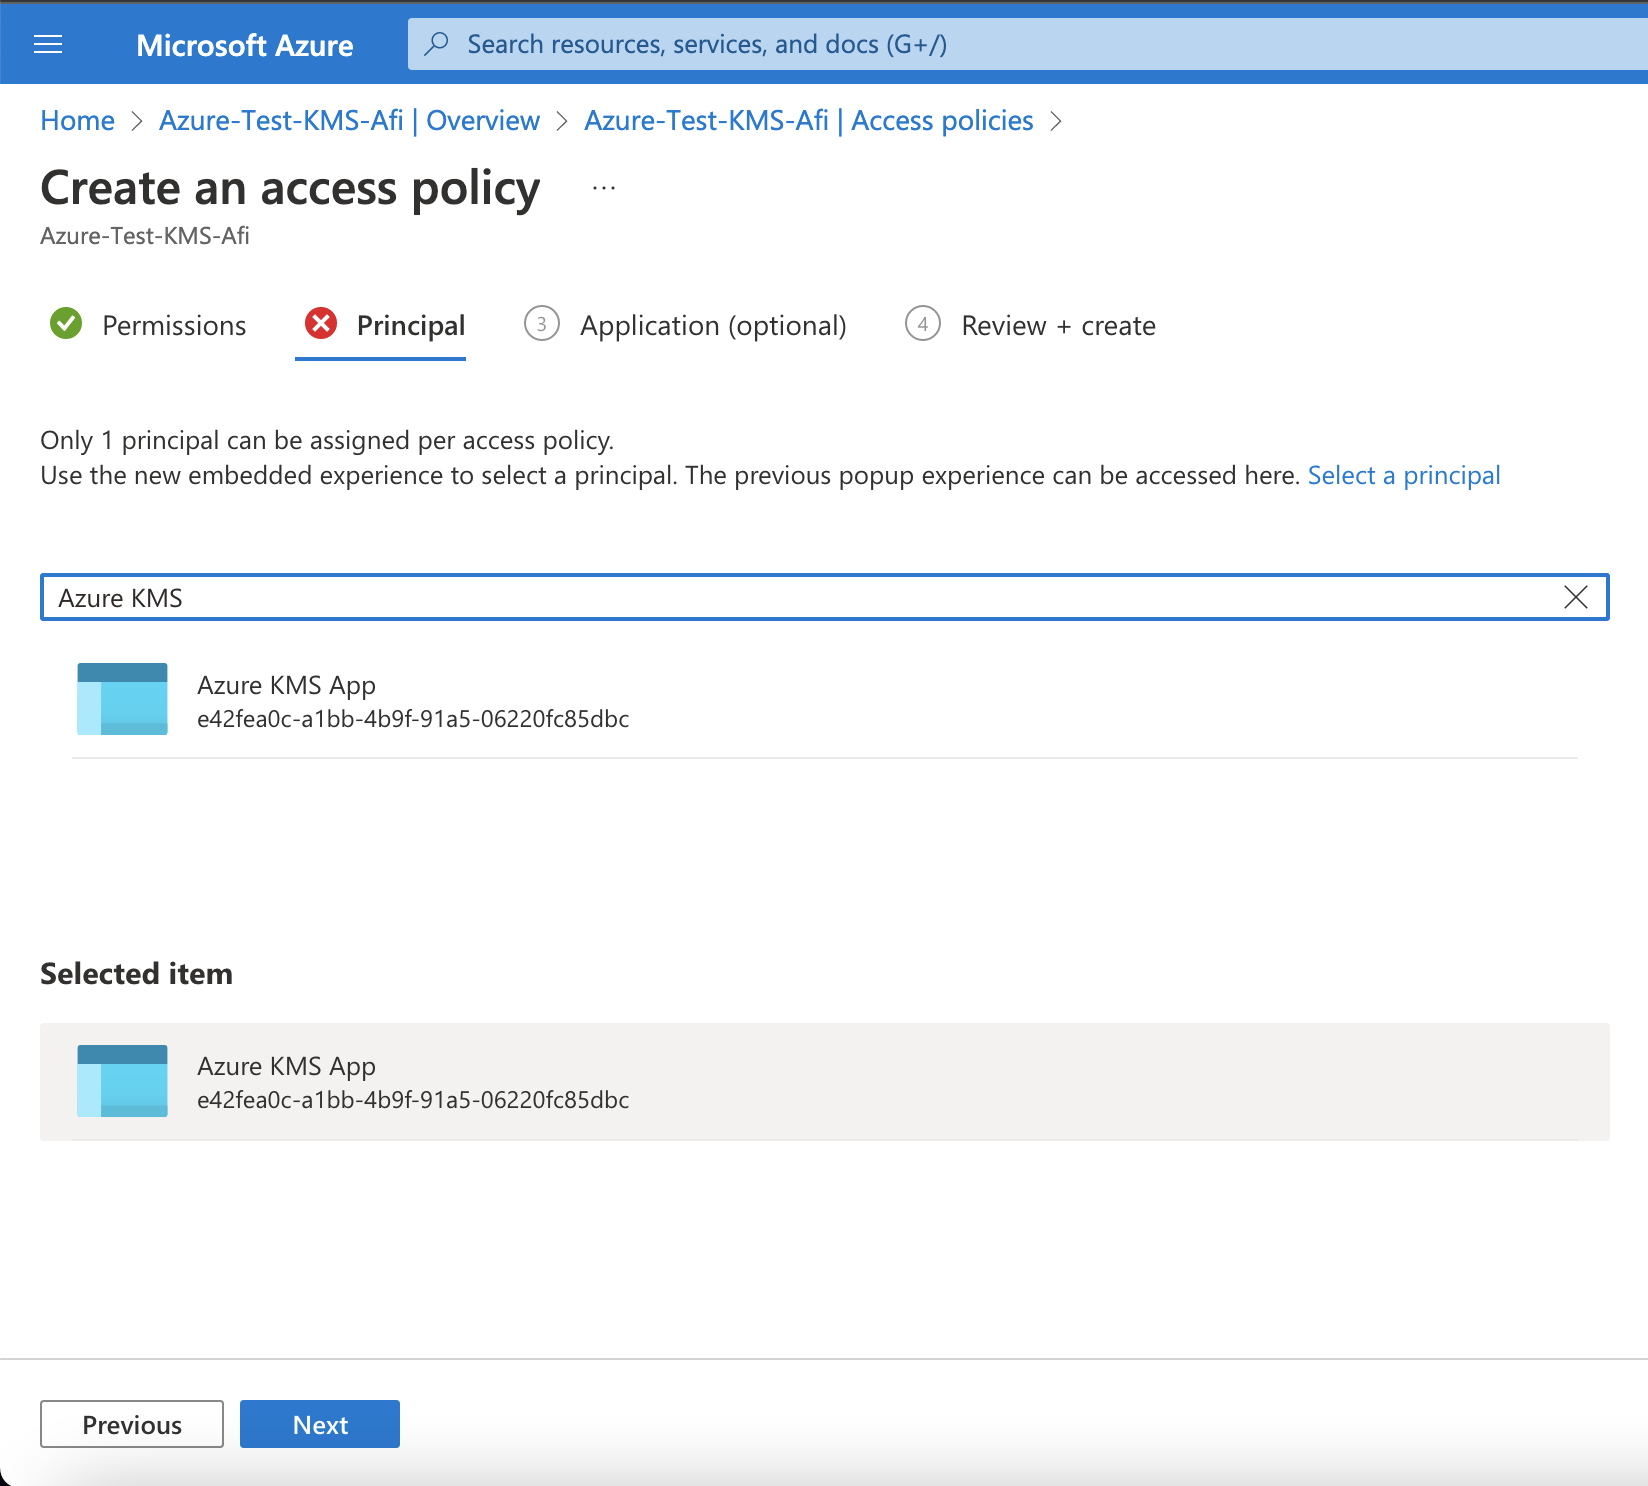
Select the recently created application as a principal (the next Application step is optional and should be skipped):
Create Afi encryption key protected with Azure KMS
Create an Azure KMS key secret in the Afi portal. Go to the Service → Settings → Secrets tab in the Afi portal and create an Azure KMS key secret (use the KMS key identifier from Step 3 and the application credentials created in Step 2).
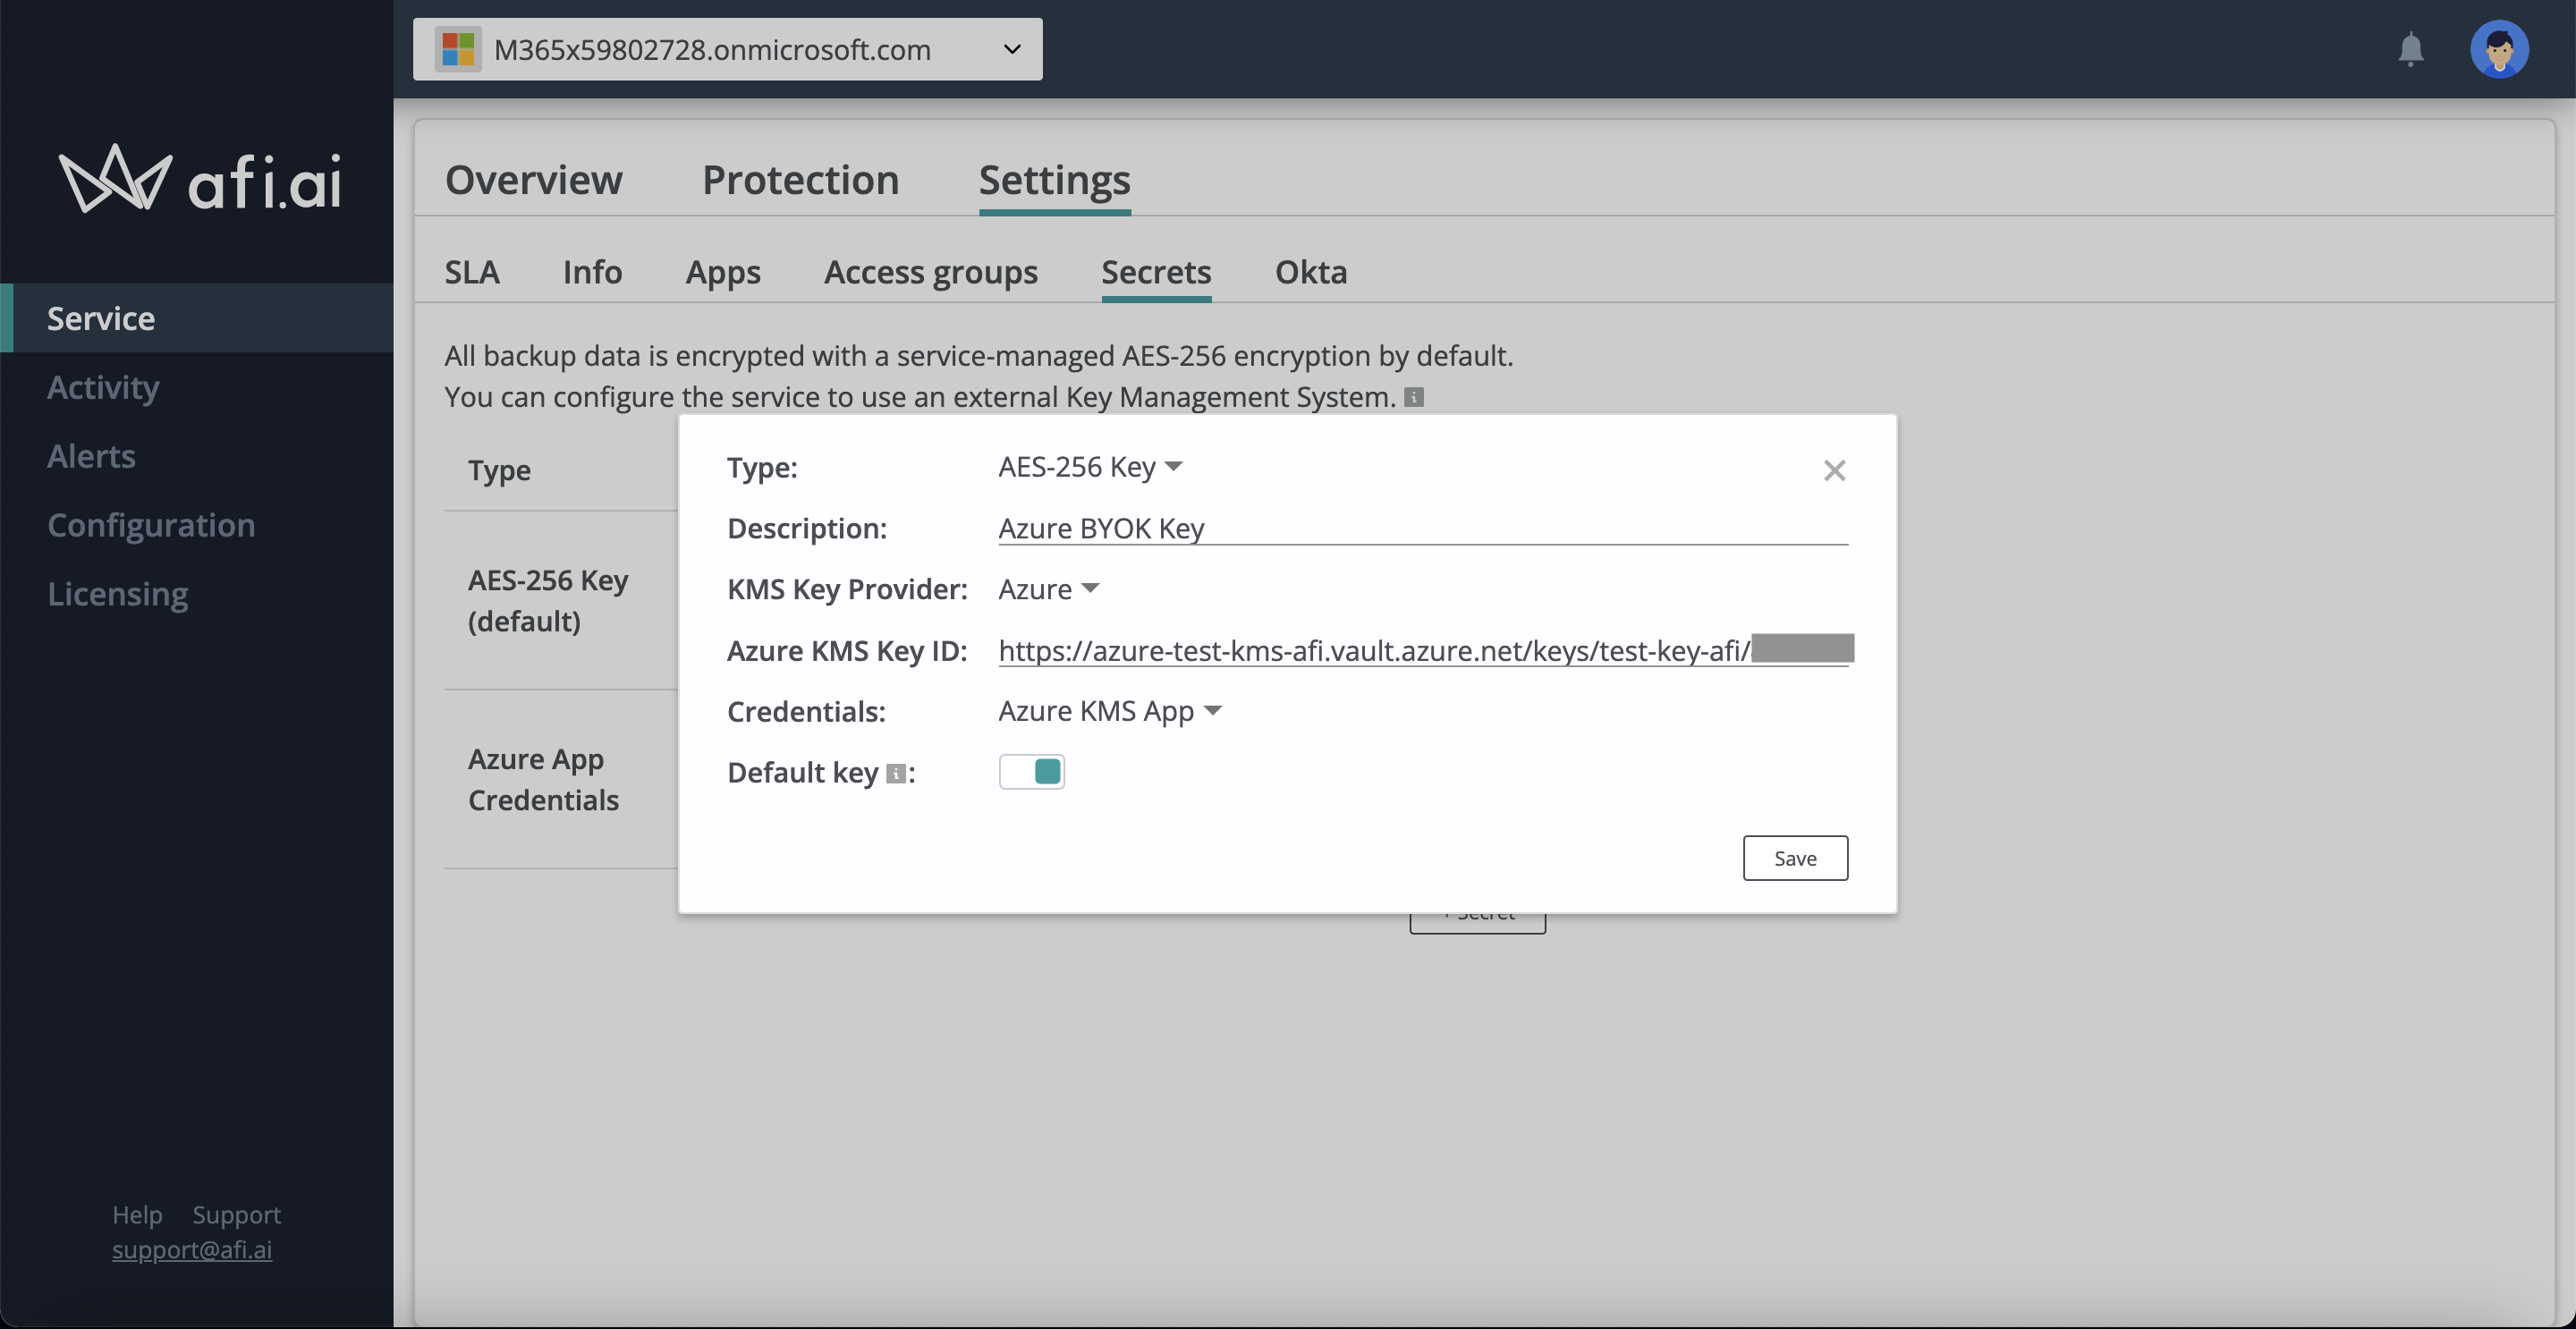
Add an Azure KMS key secret as an encryption key for backup policies. Go the Service → Settings → SLA tab and select the configured Azure KMS key secret as an encryption key for the backup policies in your domain, then protect the resources in your domain with these policies:
