Setting up an account
With Afi Backup for Microsoft 365, you can configure periodic backups of your Microsoft 365 resources in a few easy steps.
Create an Afi account
Please follow the Afi onboarding guide to set up your Afi account. After an account is created and your Microsoft 365 tenant is added, you can proceed with protecting resources (users, sites, etc.) and running your first backups.
Protect resources
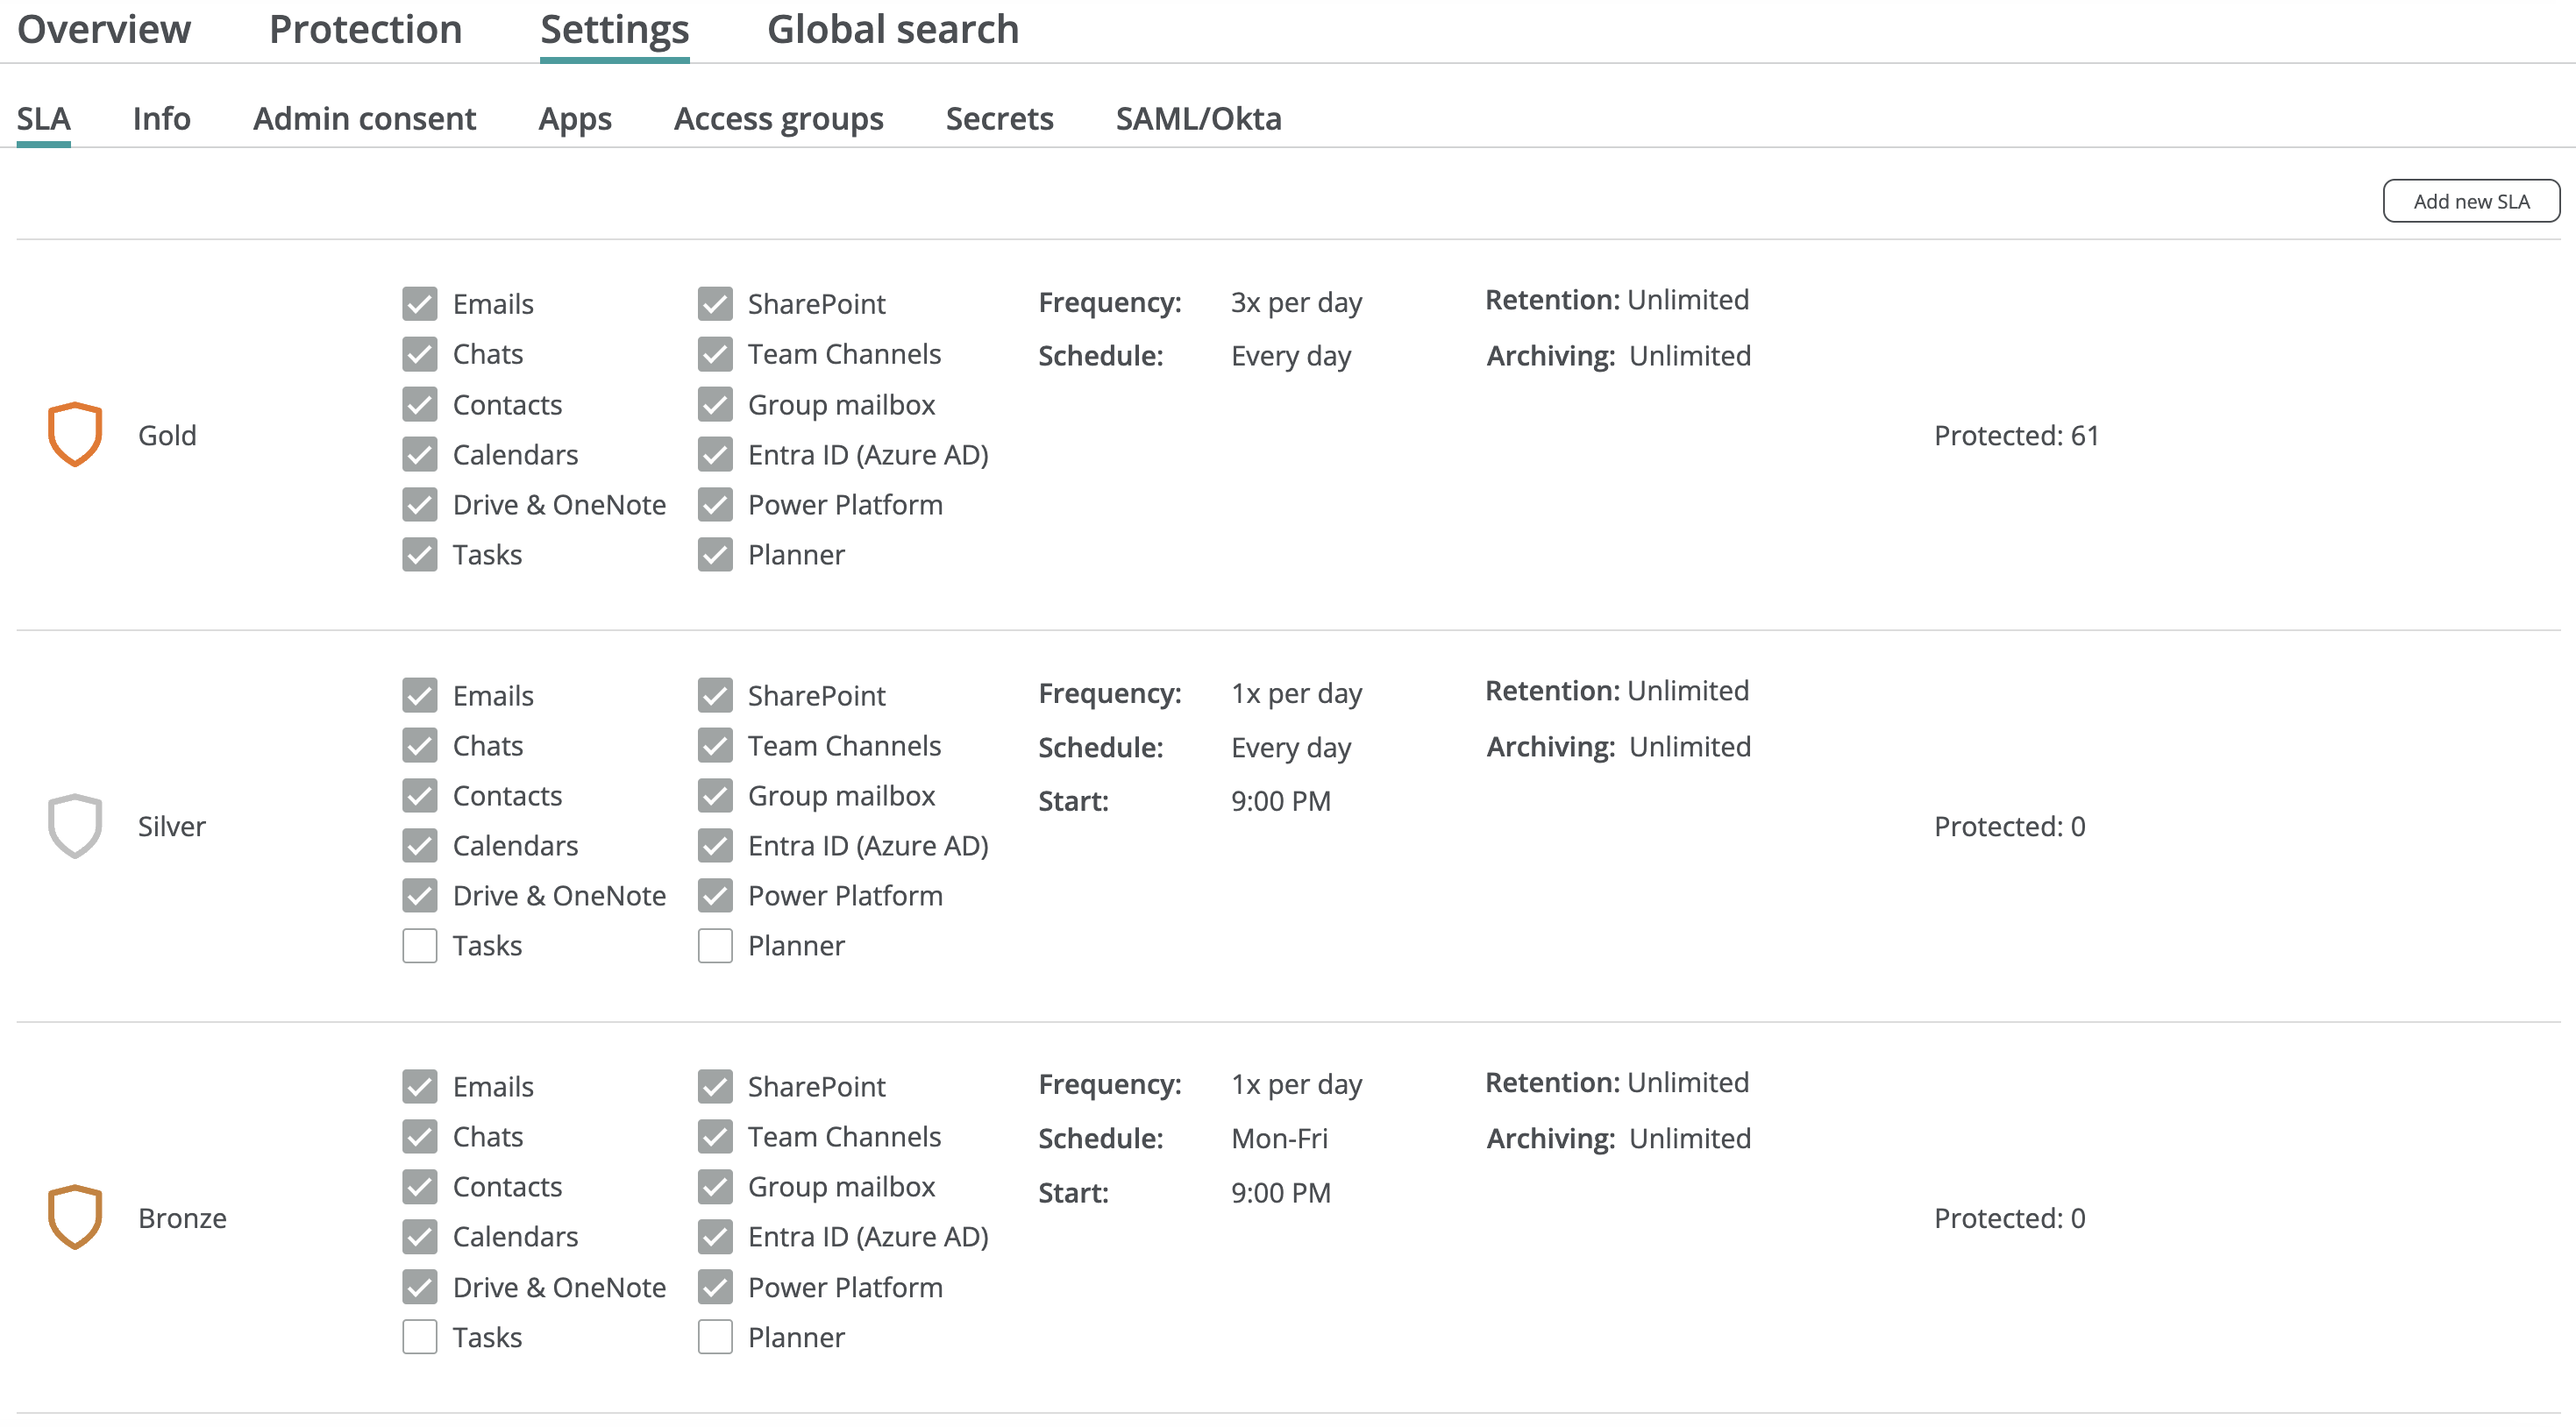
To start protecting your data, go to the Service → Protection screen and choose resources (User/Shared/Room Mailboxes, SharePoint sites, Groups, Teams, Entra ID (Azure Active Directory), or Power Platform) which you want to back up and their protection policies (SLAs). Protection policy defines what Microsoft 365 data will be backed up, how often backups are scheduled and how long backup data is retained.
Afi Backup for Microsoft 365 provides several predefined backup policies that you can use right away or modify/create new policies:
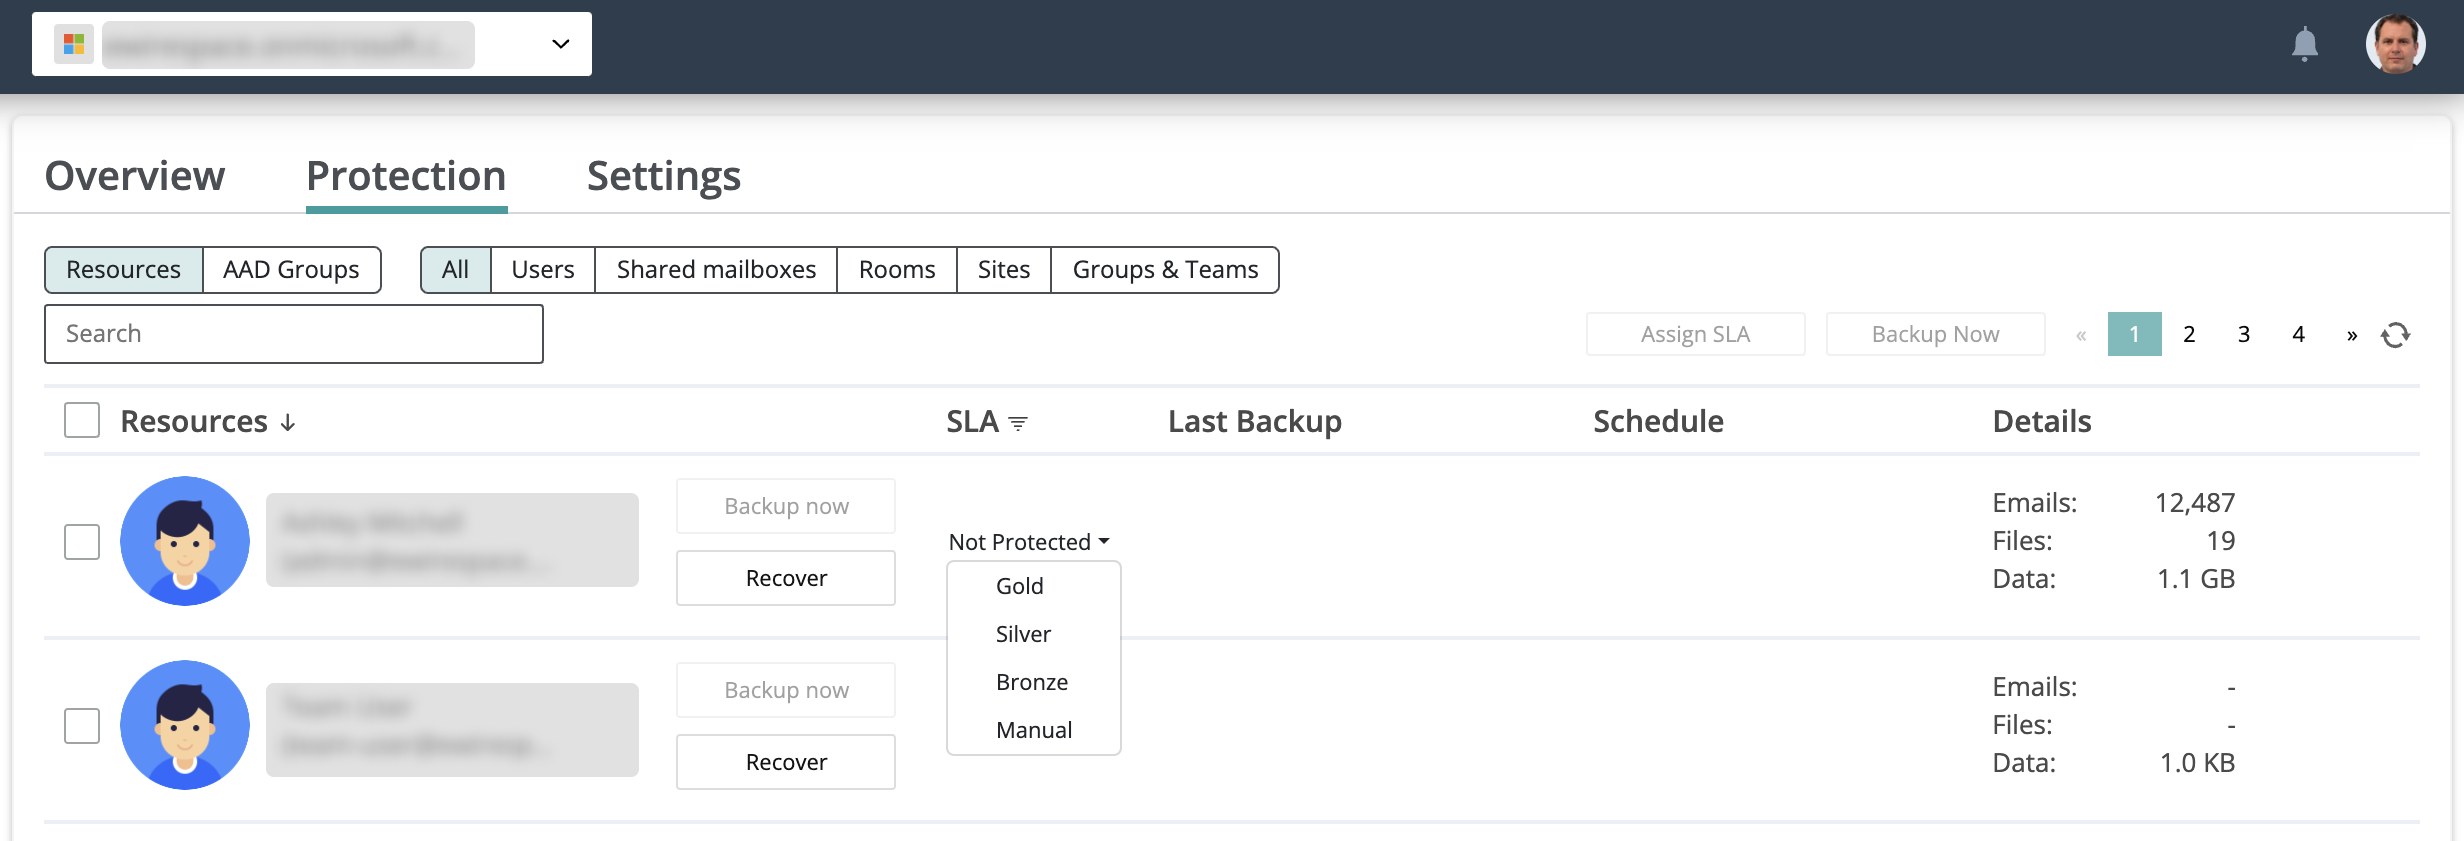
Then assign protection policies to all resources in the Microsoft 365 tenant or select specific resources or Entra ID (AAD) groups to be protected.
Assign SLA to a specific resource
Assign SLA to an Entra ID (AAD) group

Backup
When using protection SLA policies with a periodic backup schedule (for example, the default Bronze, Silver, and Gold policies), backups are performed automatically according to the schedule defined in the corresponding SLA policies.
Afi displays the time of the next scheduled backup on the Service → Protection tab for each protected resource. With the Manual backup schedule (for example, the default Manual policy), backups are not performed automatically and should instead be triggered manually.
Run backup
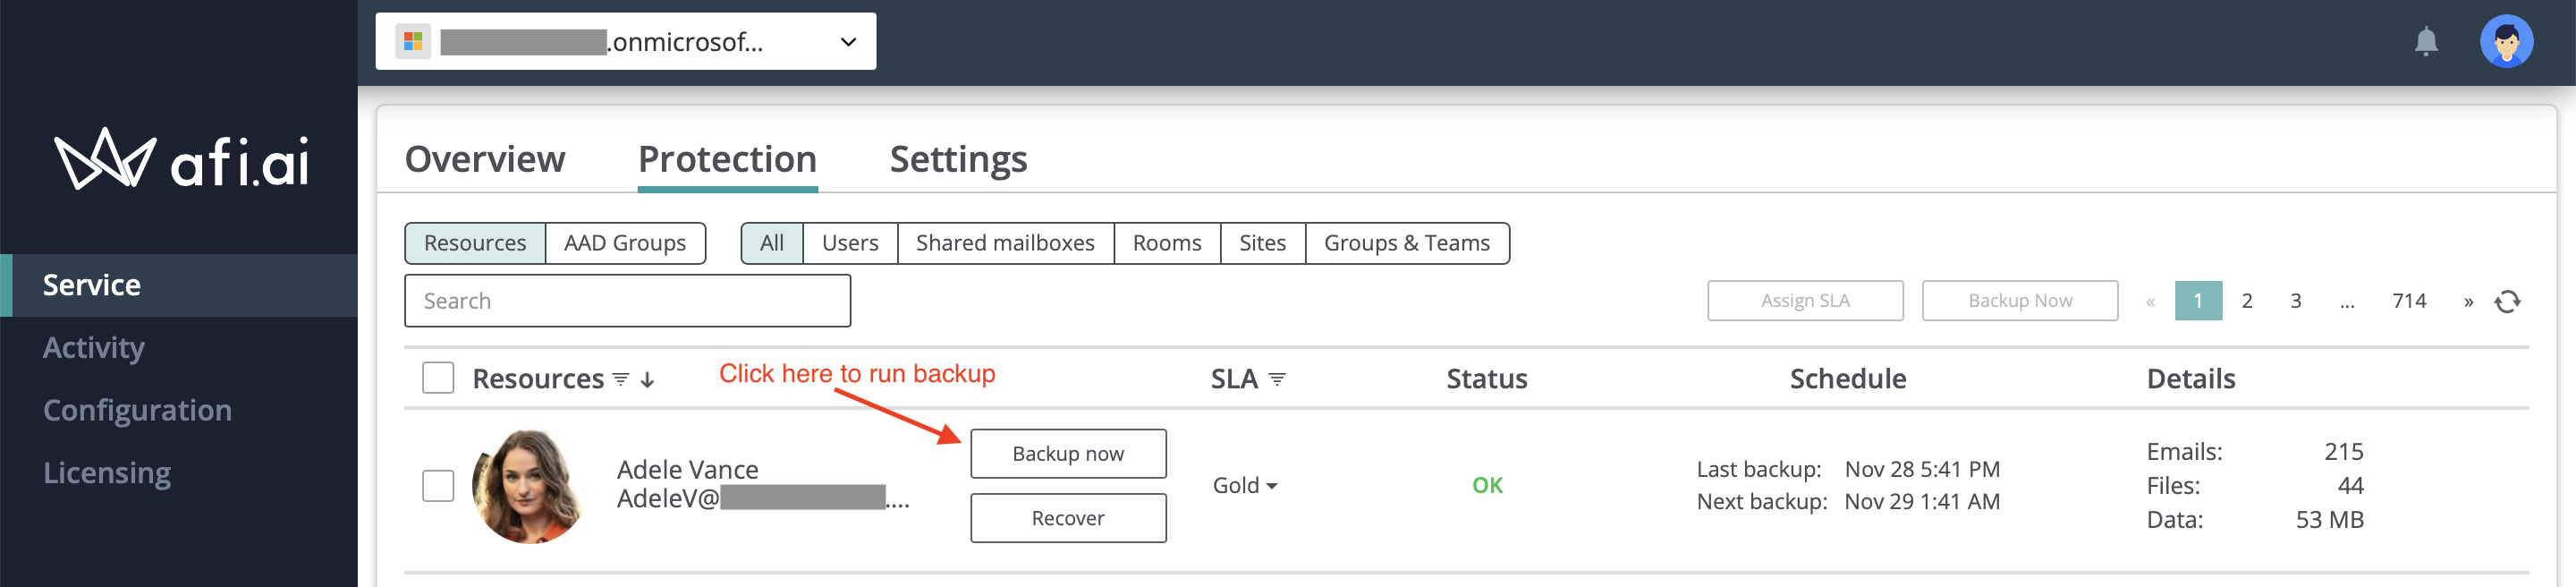
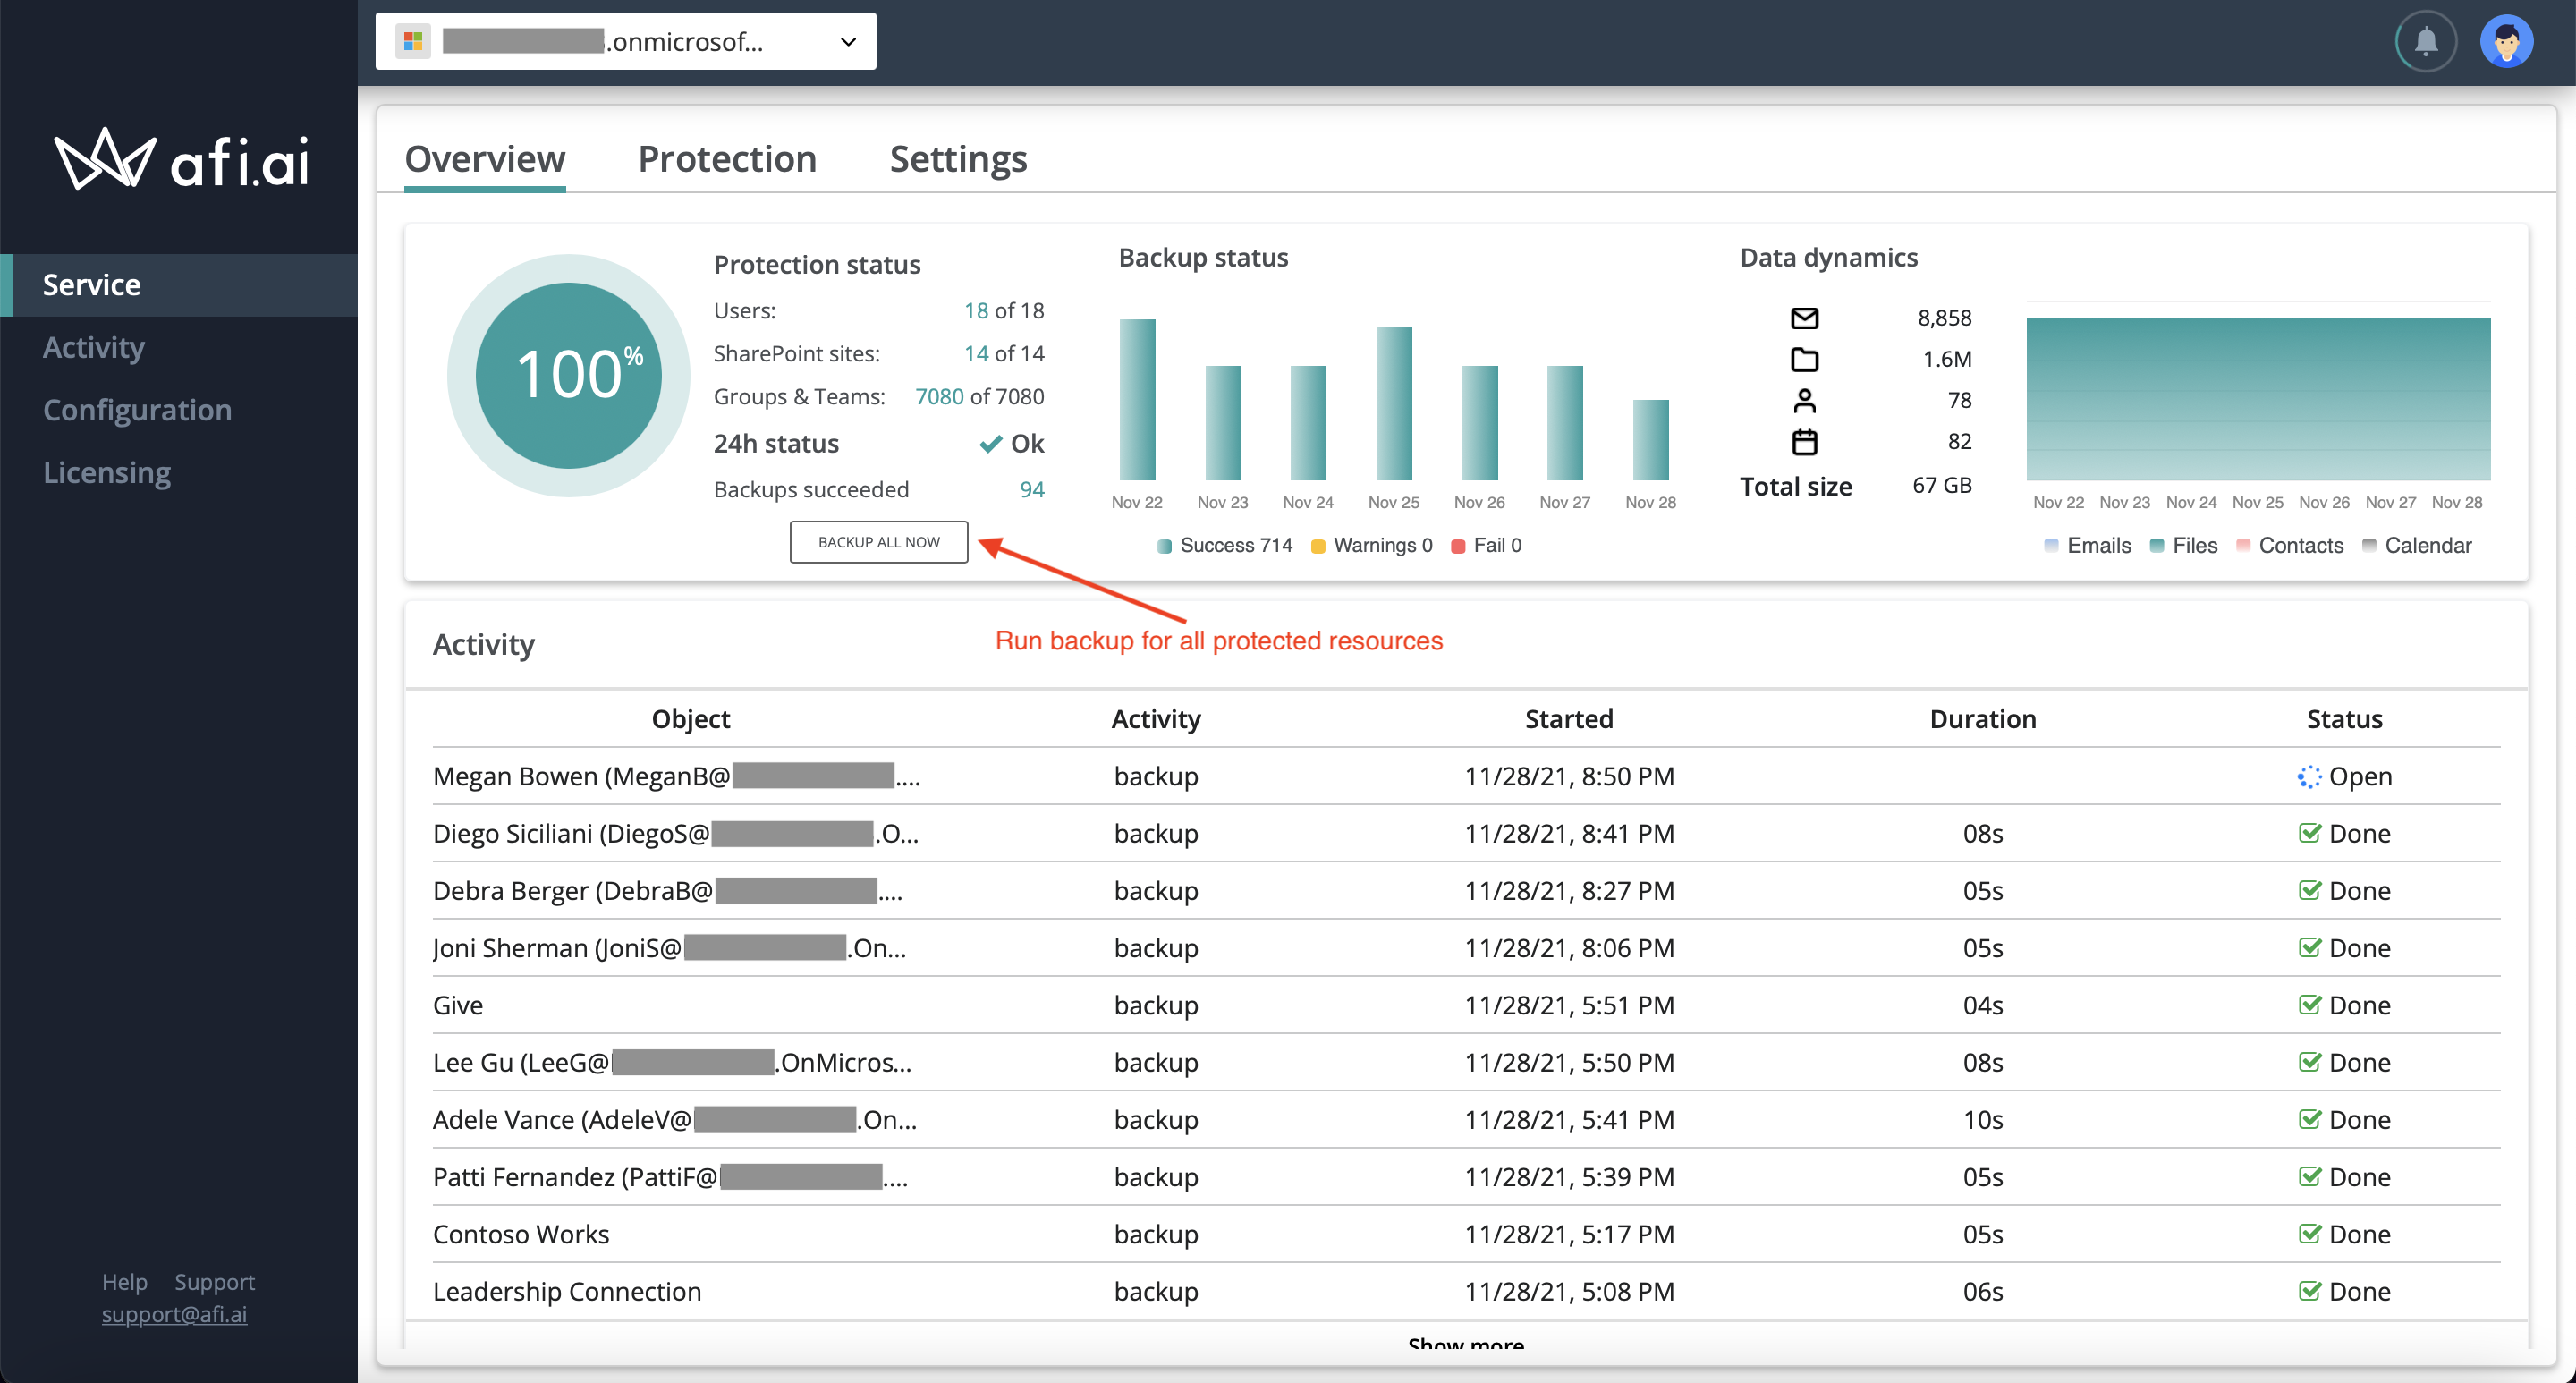
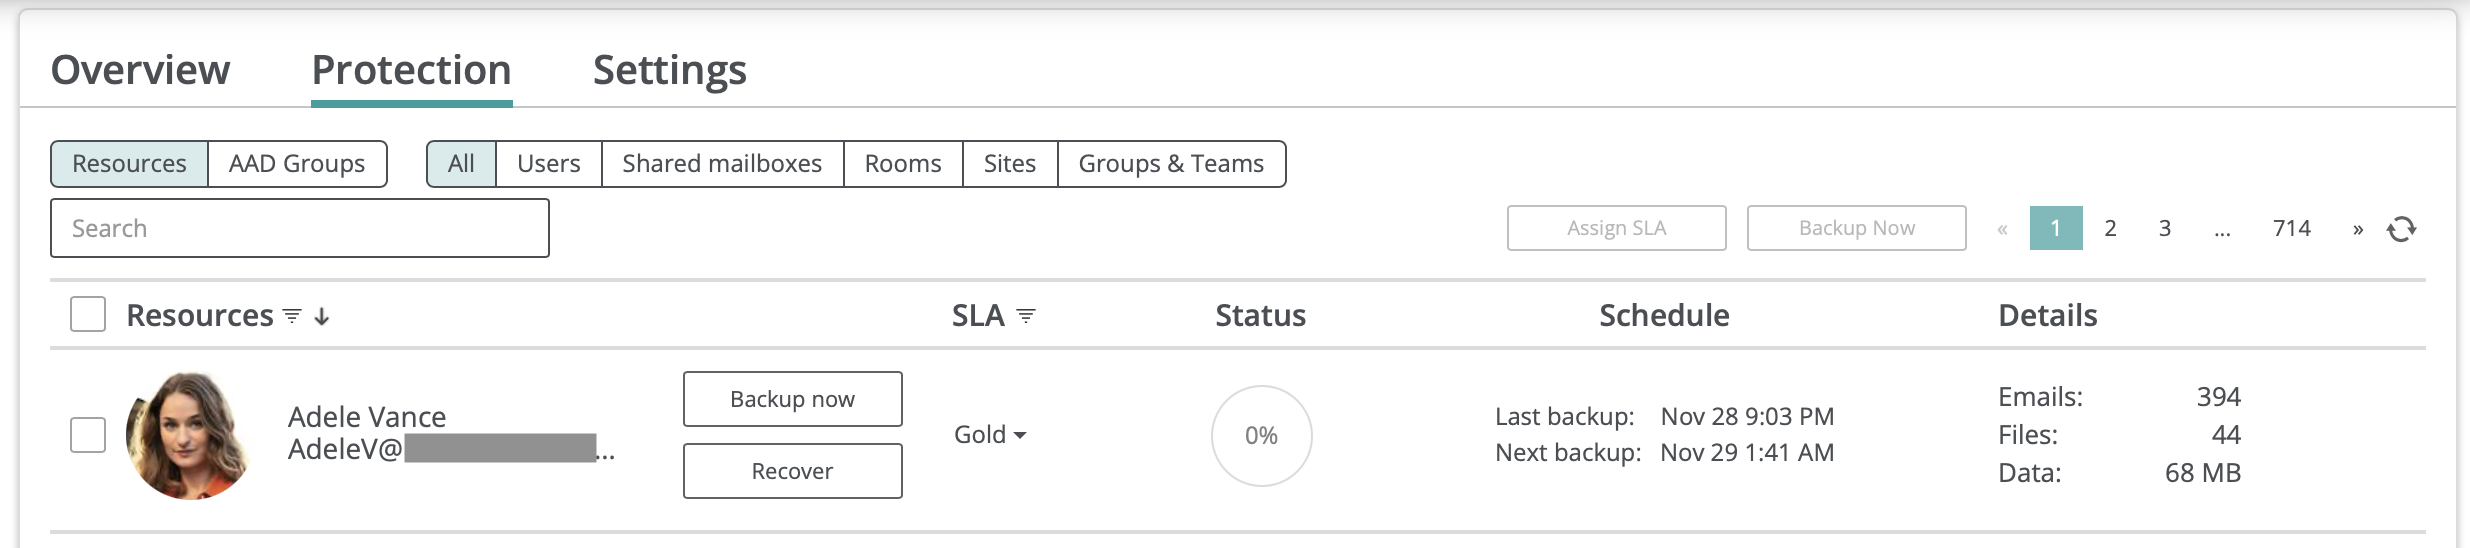
You can trigger an out-of-schedule backup for any protected resource, such as a user or site, by clicking Backup for that resource on the Protection tab. To run backups for all protected resources in the tenant, click Backup all now on the Overview tab.
Monitor backup progress
You can monitor backup status on the Service → Protection tab (see the progress wheel in the Status column) and on the Activity → Tasks tab:
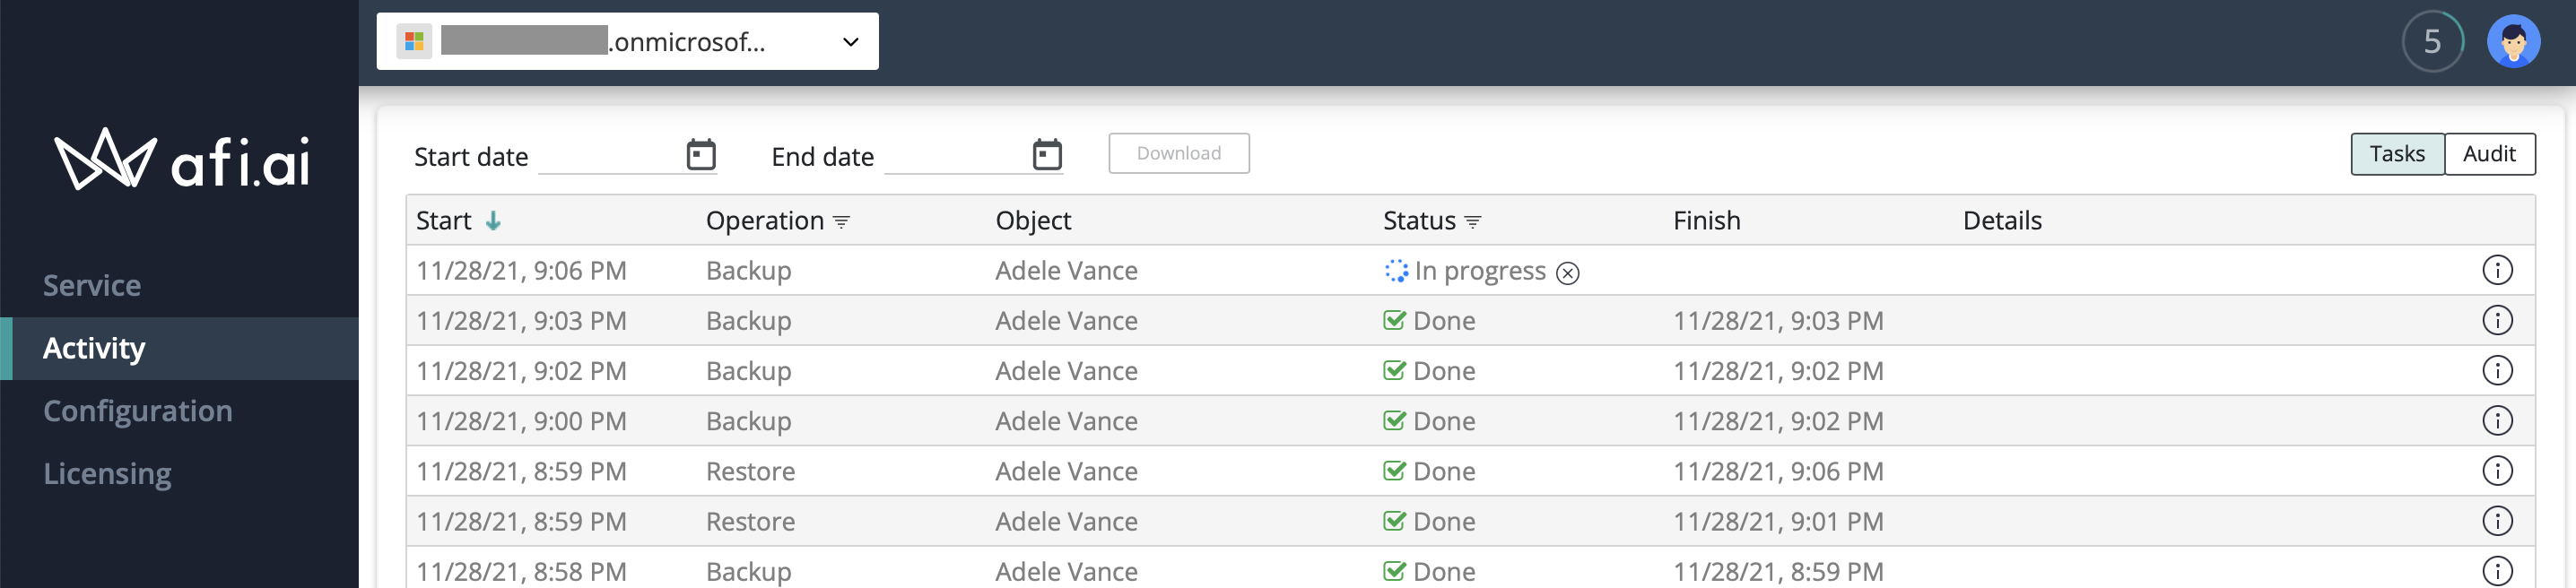
To simplify progress monitoring, you can filter tasks with In Progress status on the Activity → Tasks tab:

After a backup is completed, you can access the backup data by clicking the Recover button next to the resource name on the Service → Protection screen.
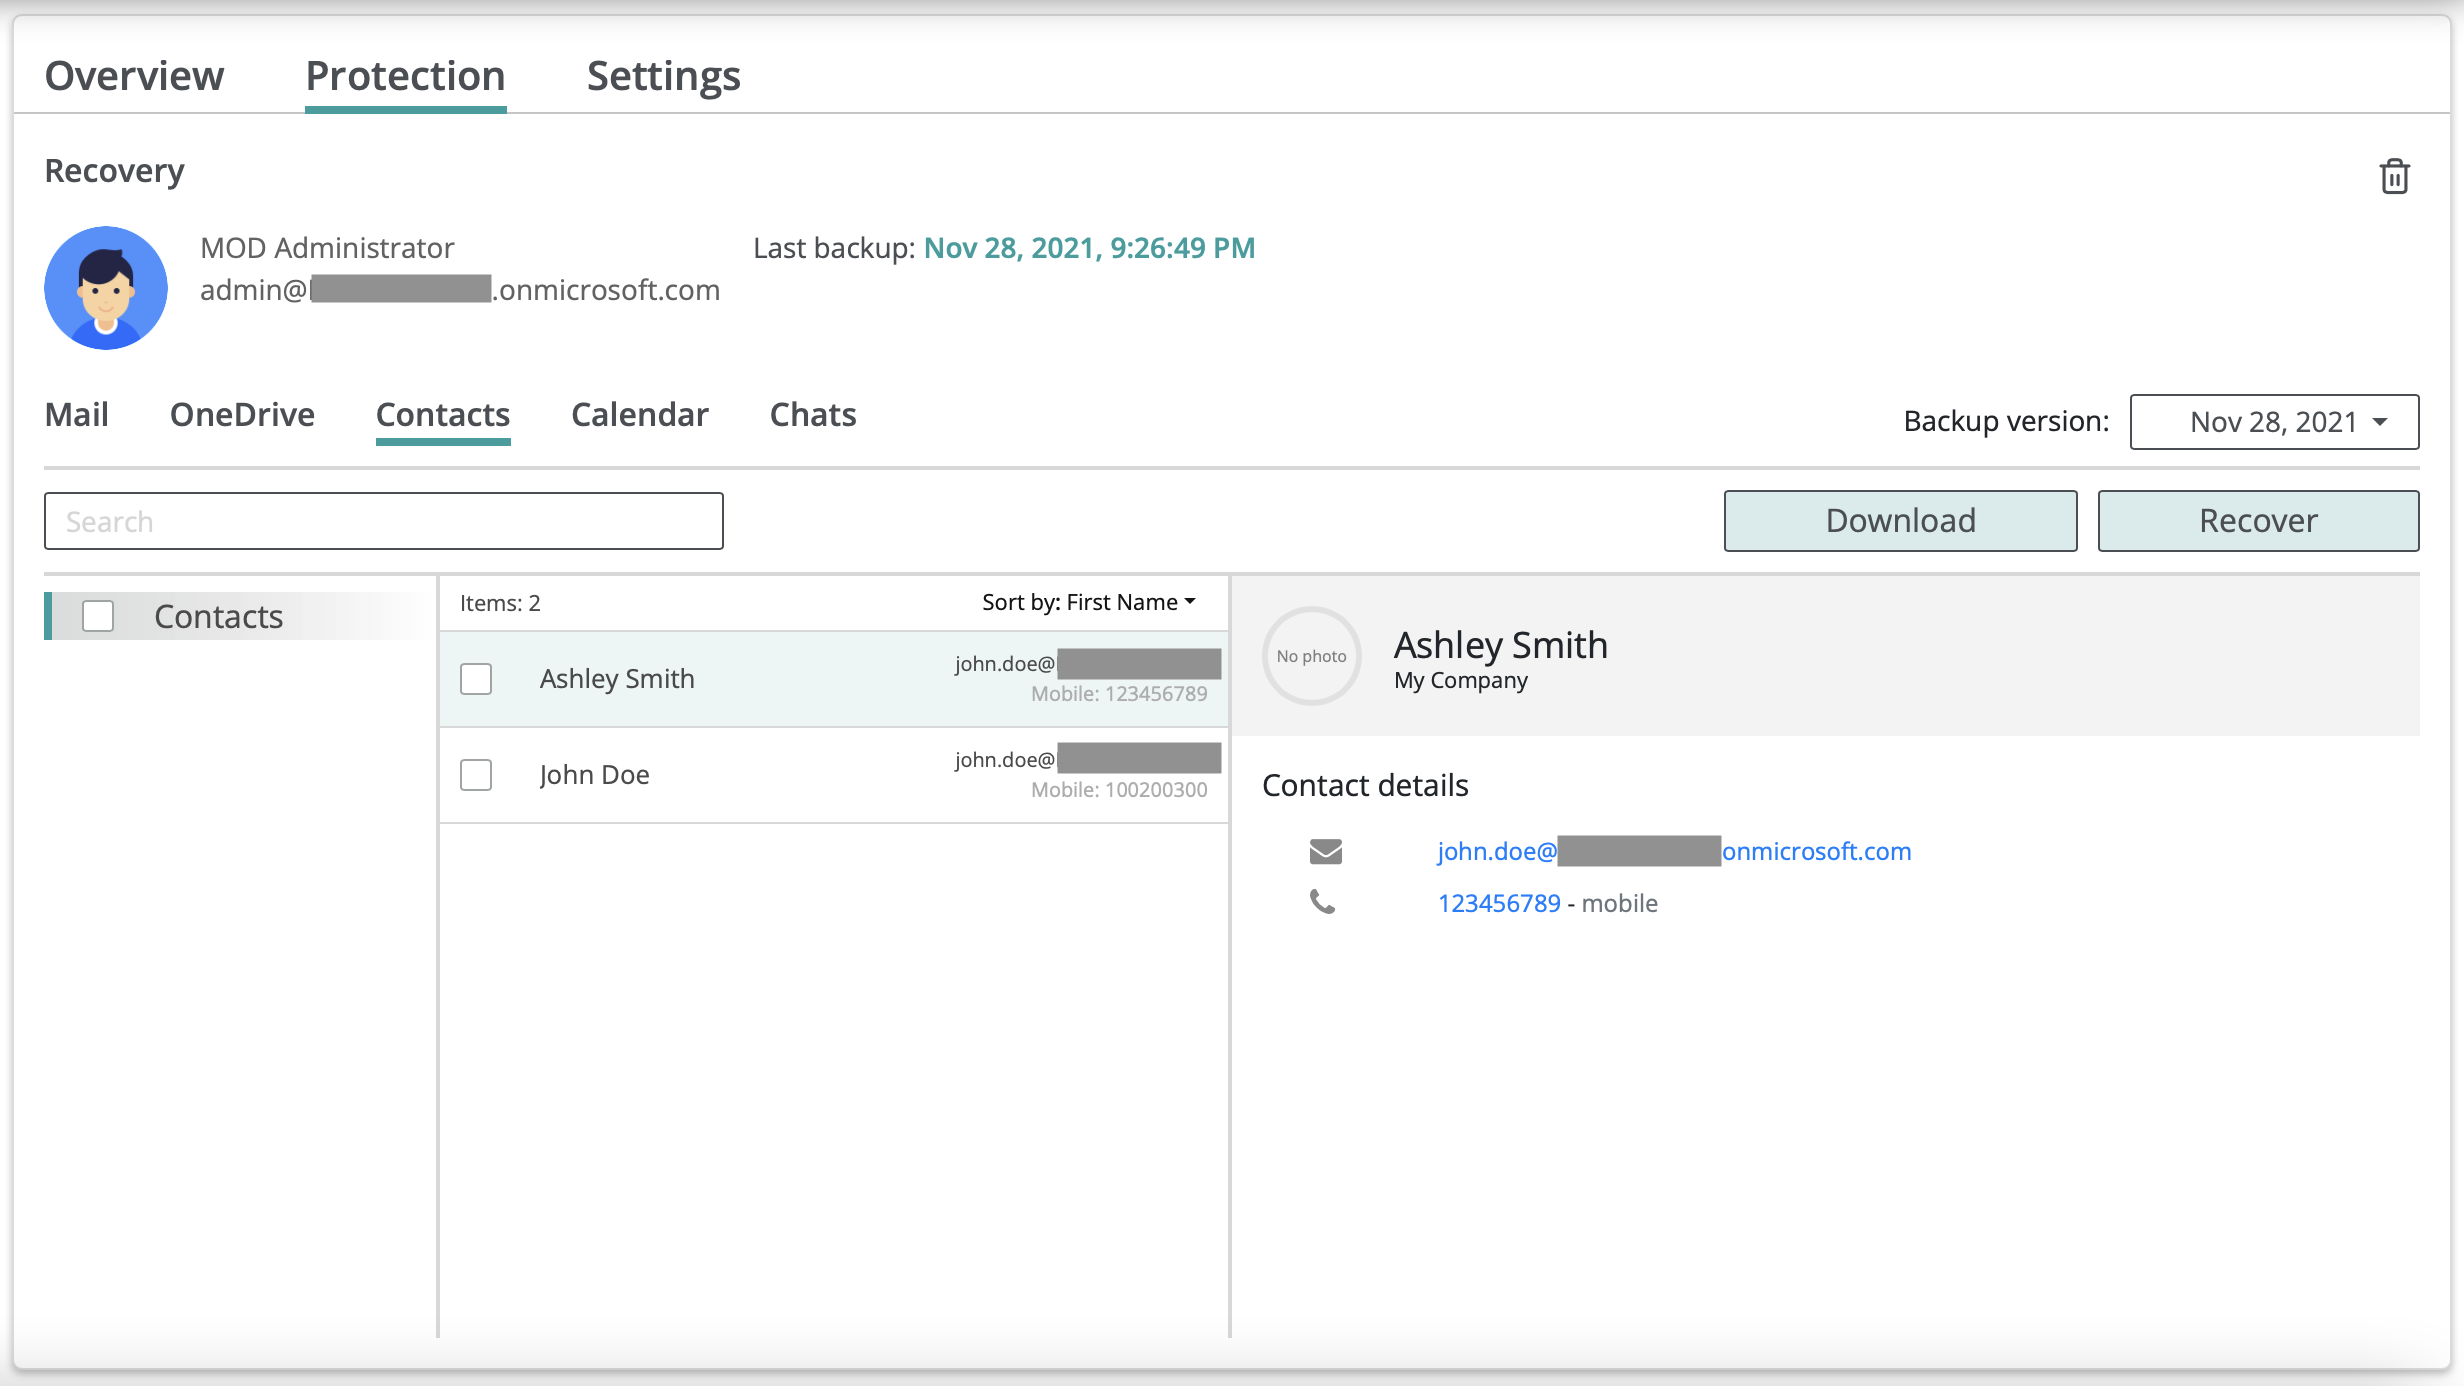
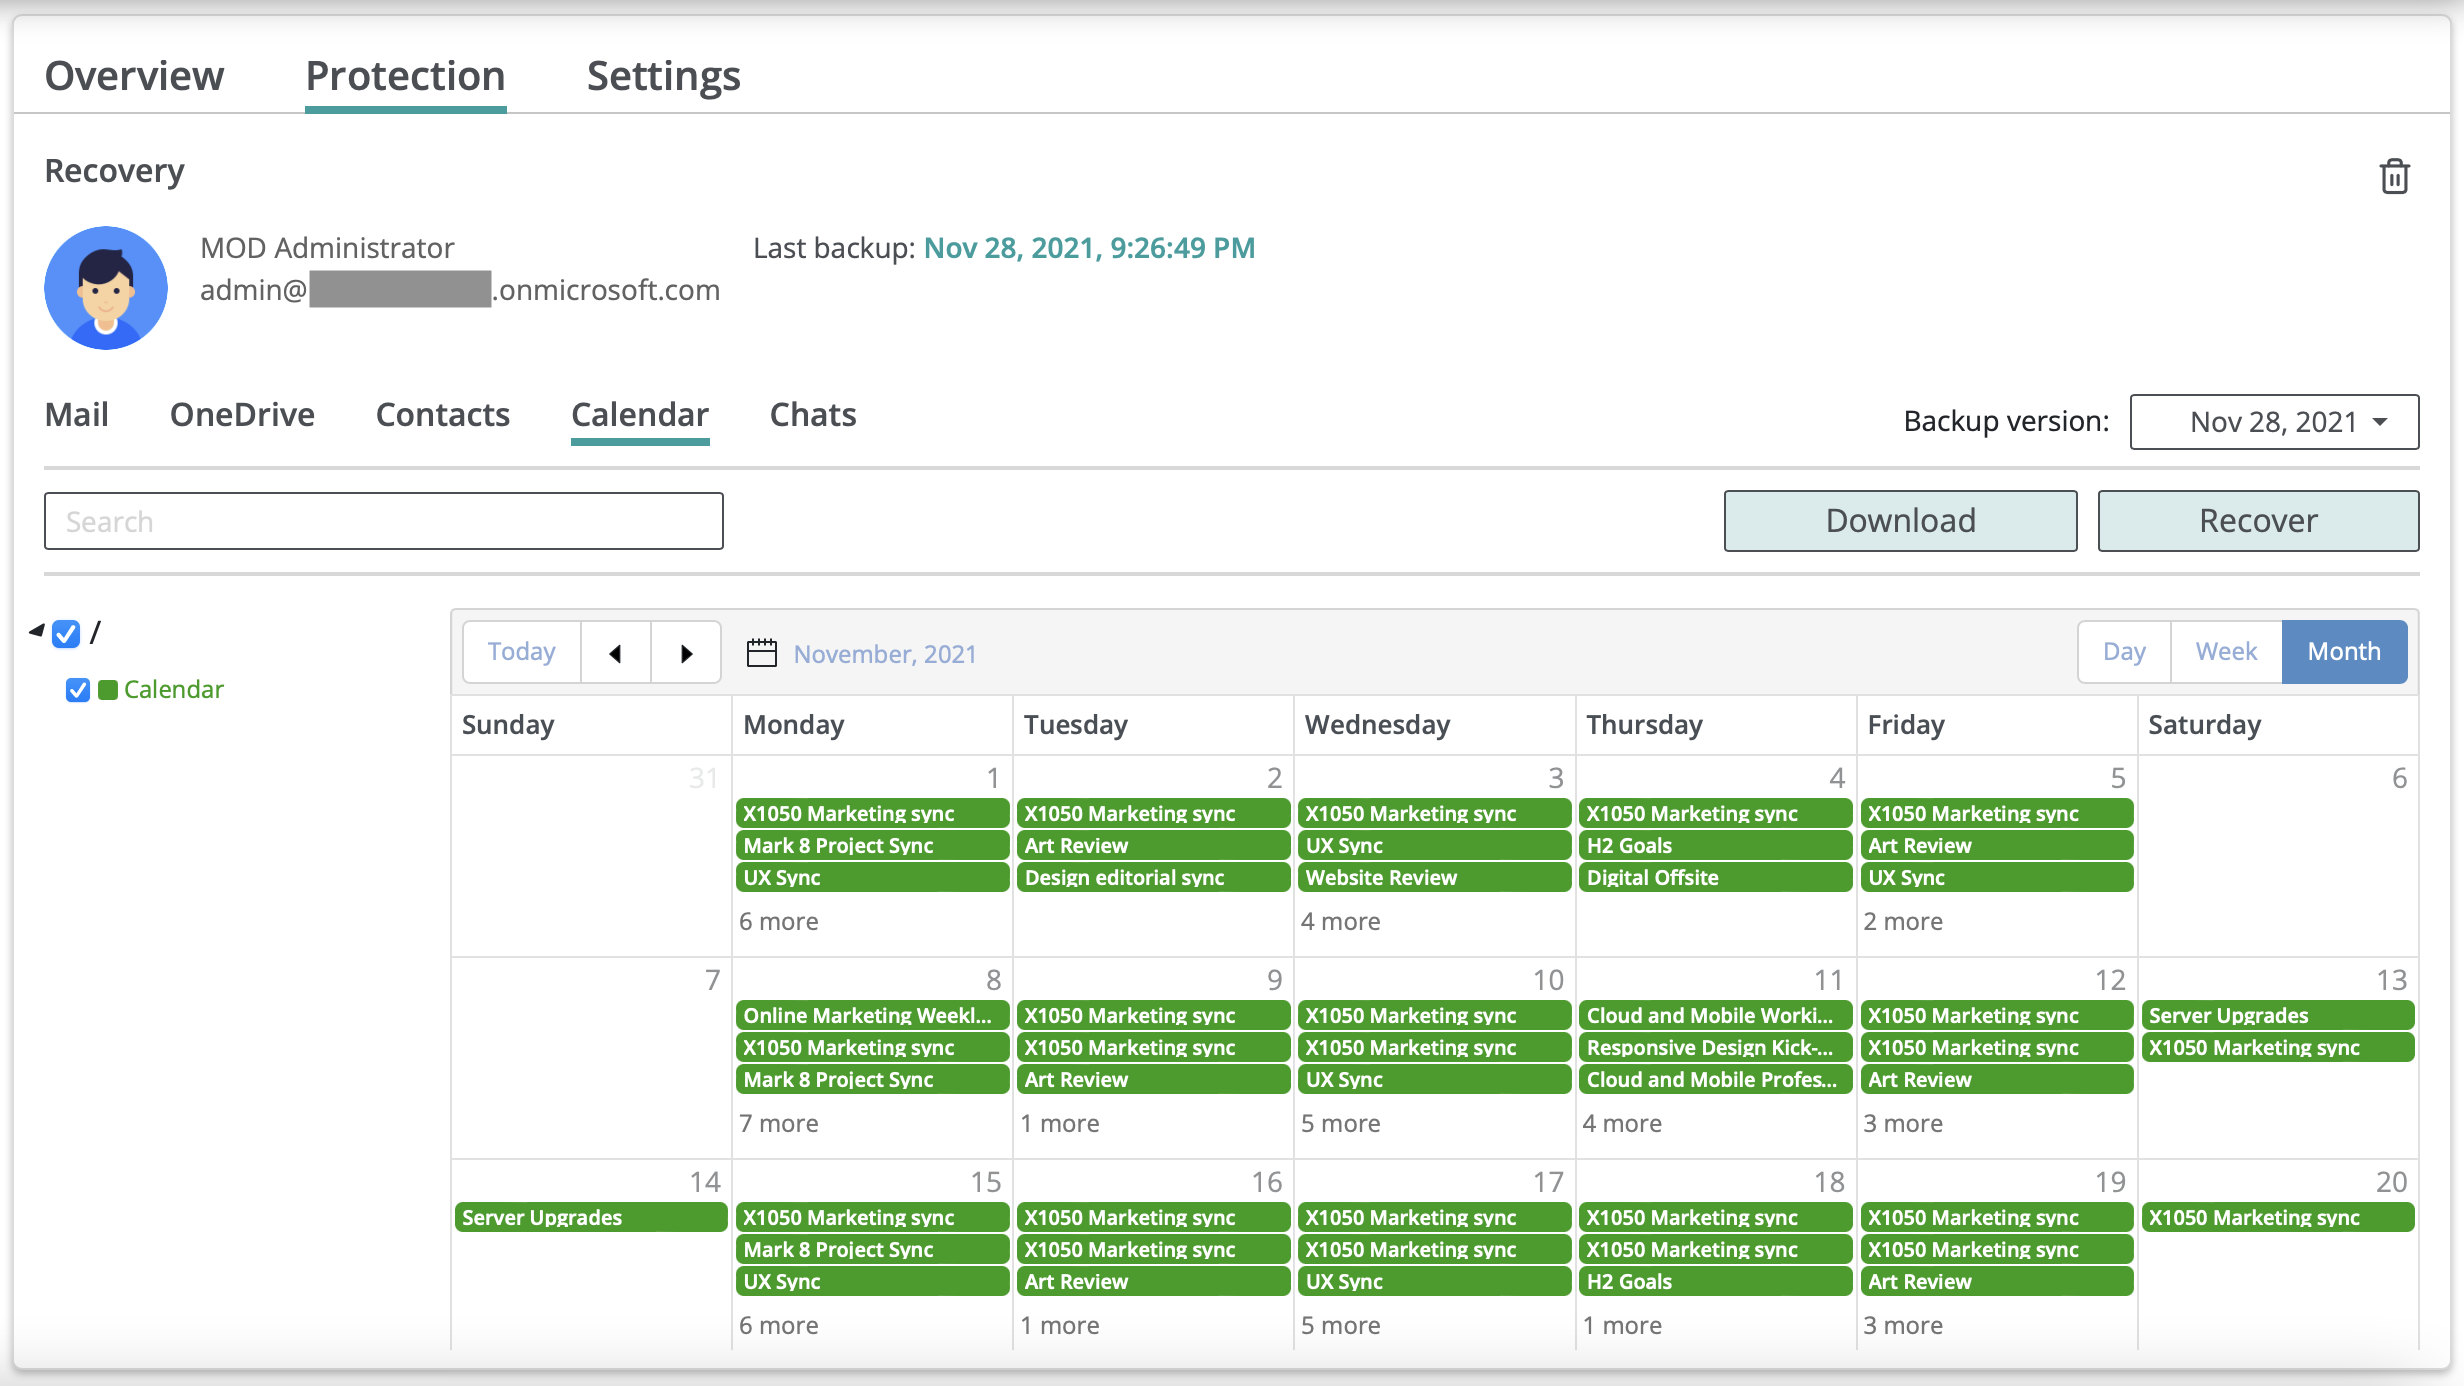
Data browsing and preview
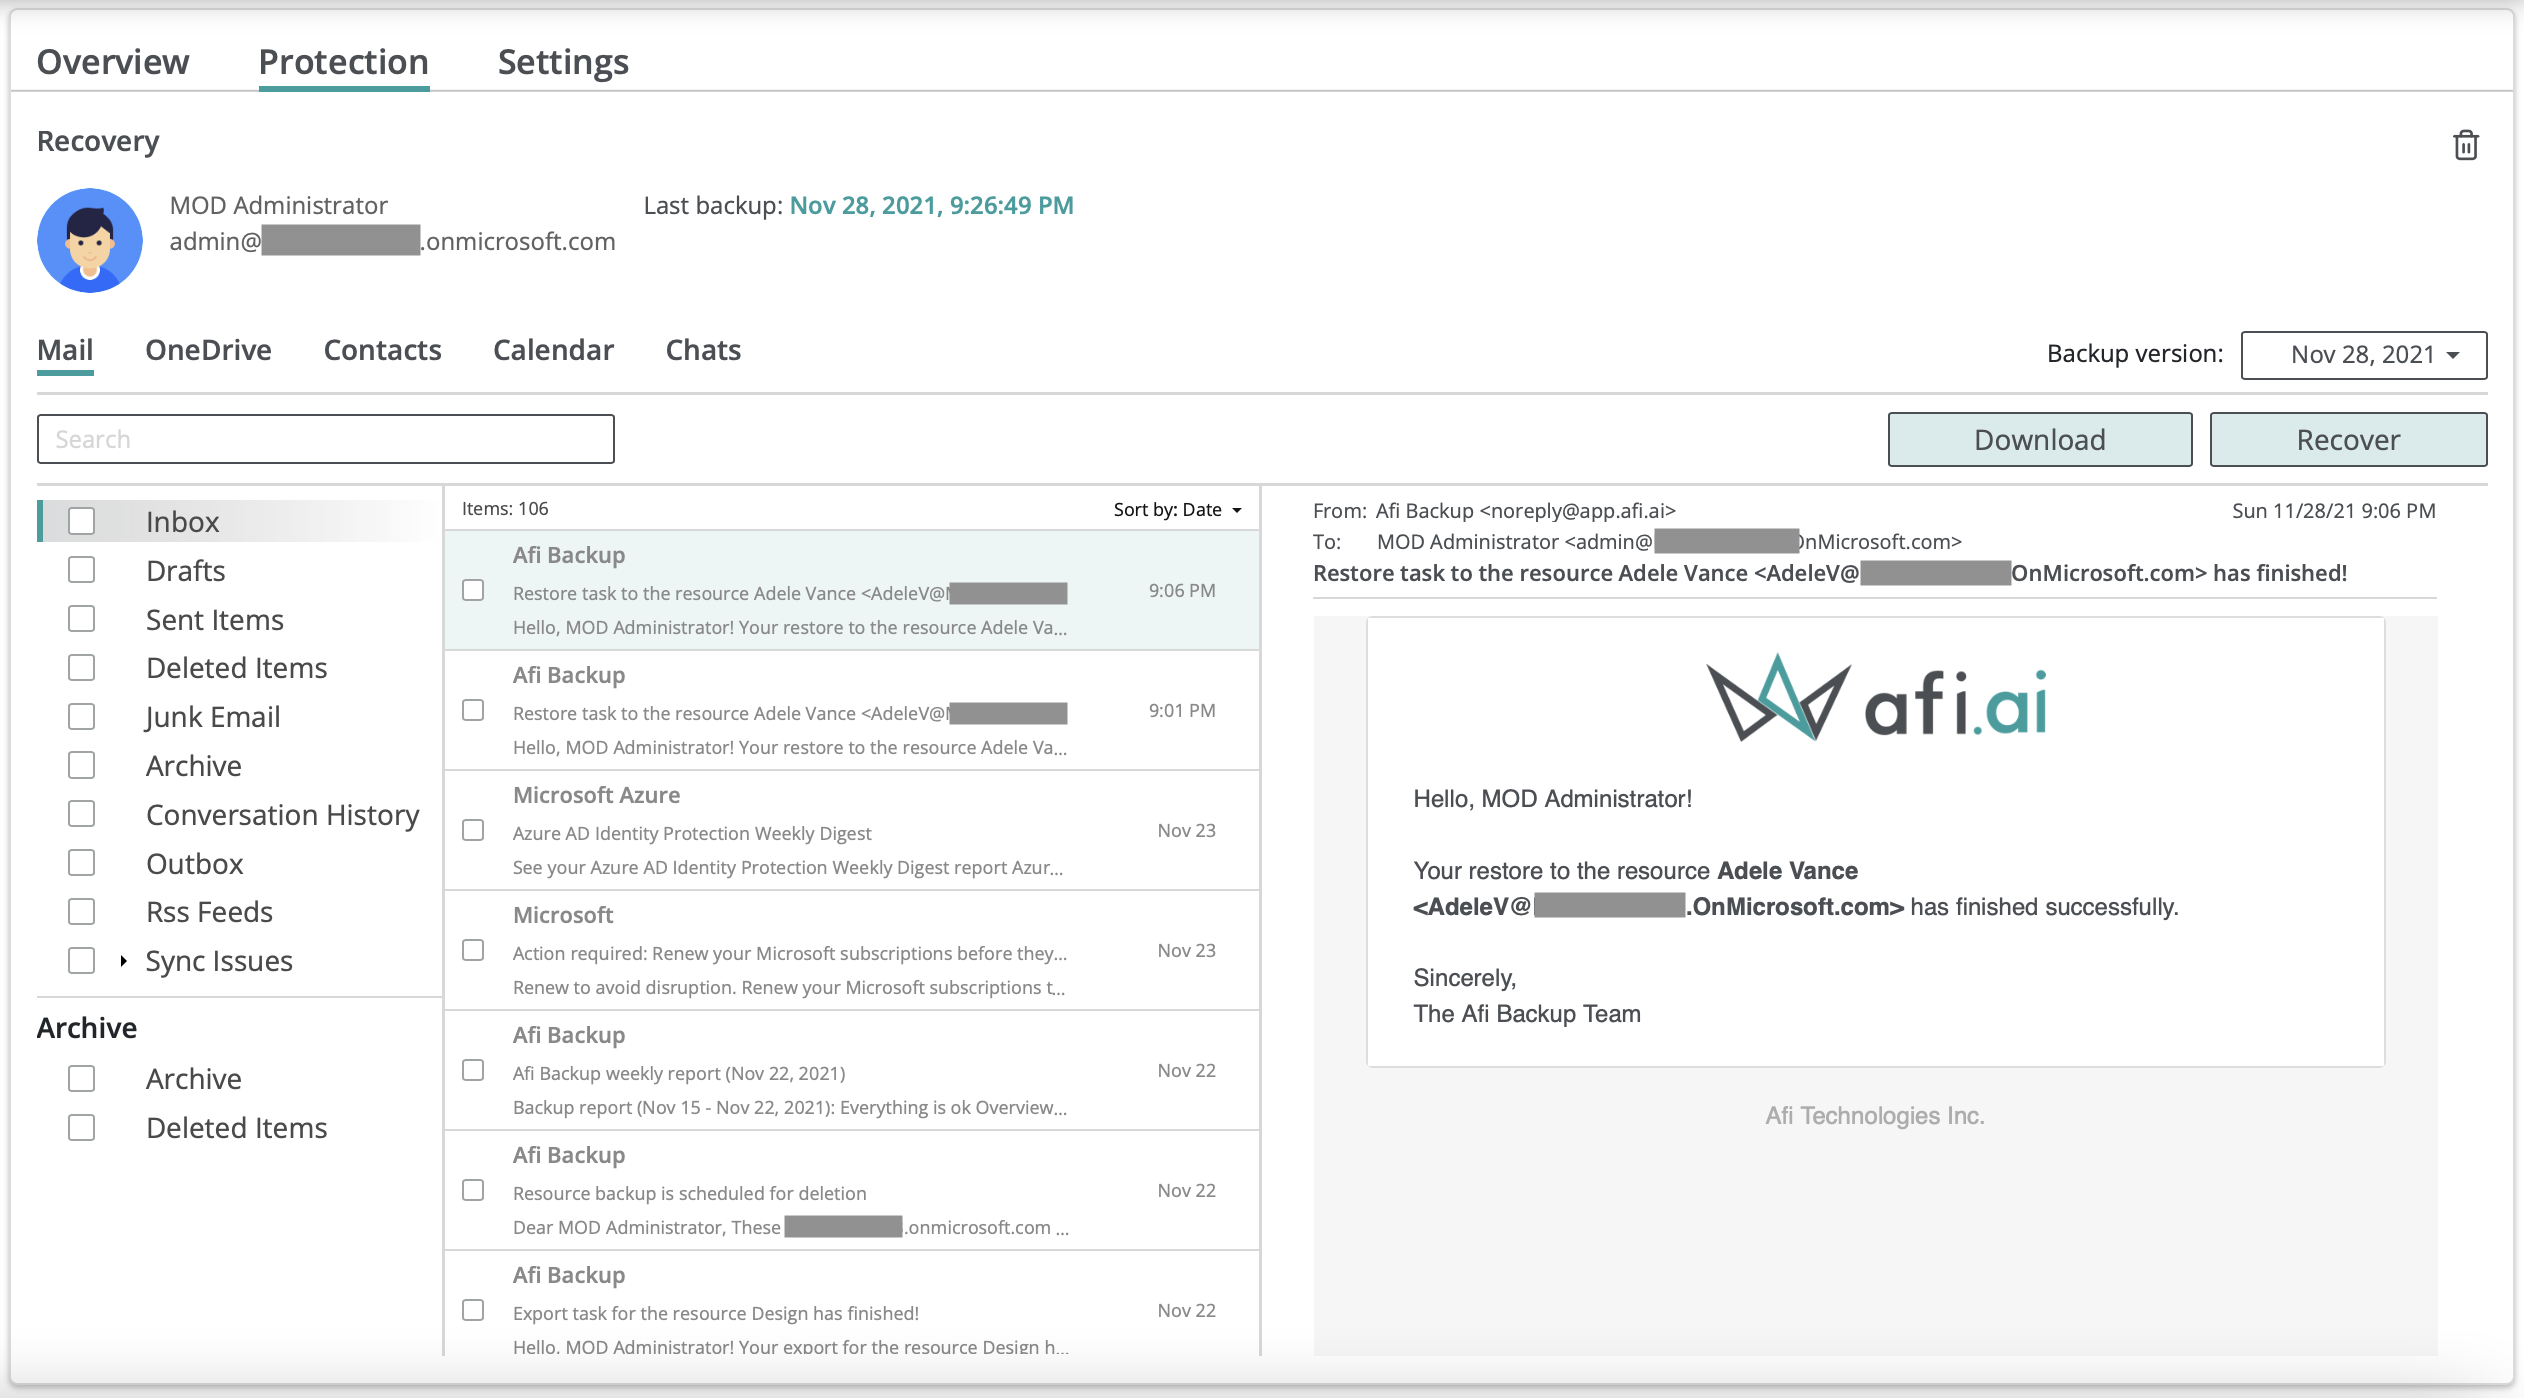
The recovery screen enables live preview, search and browsing for the backup data:
- User, shared, room, and group mailboxes (including emails, contacts, calendar, and tasks)
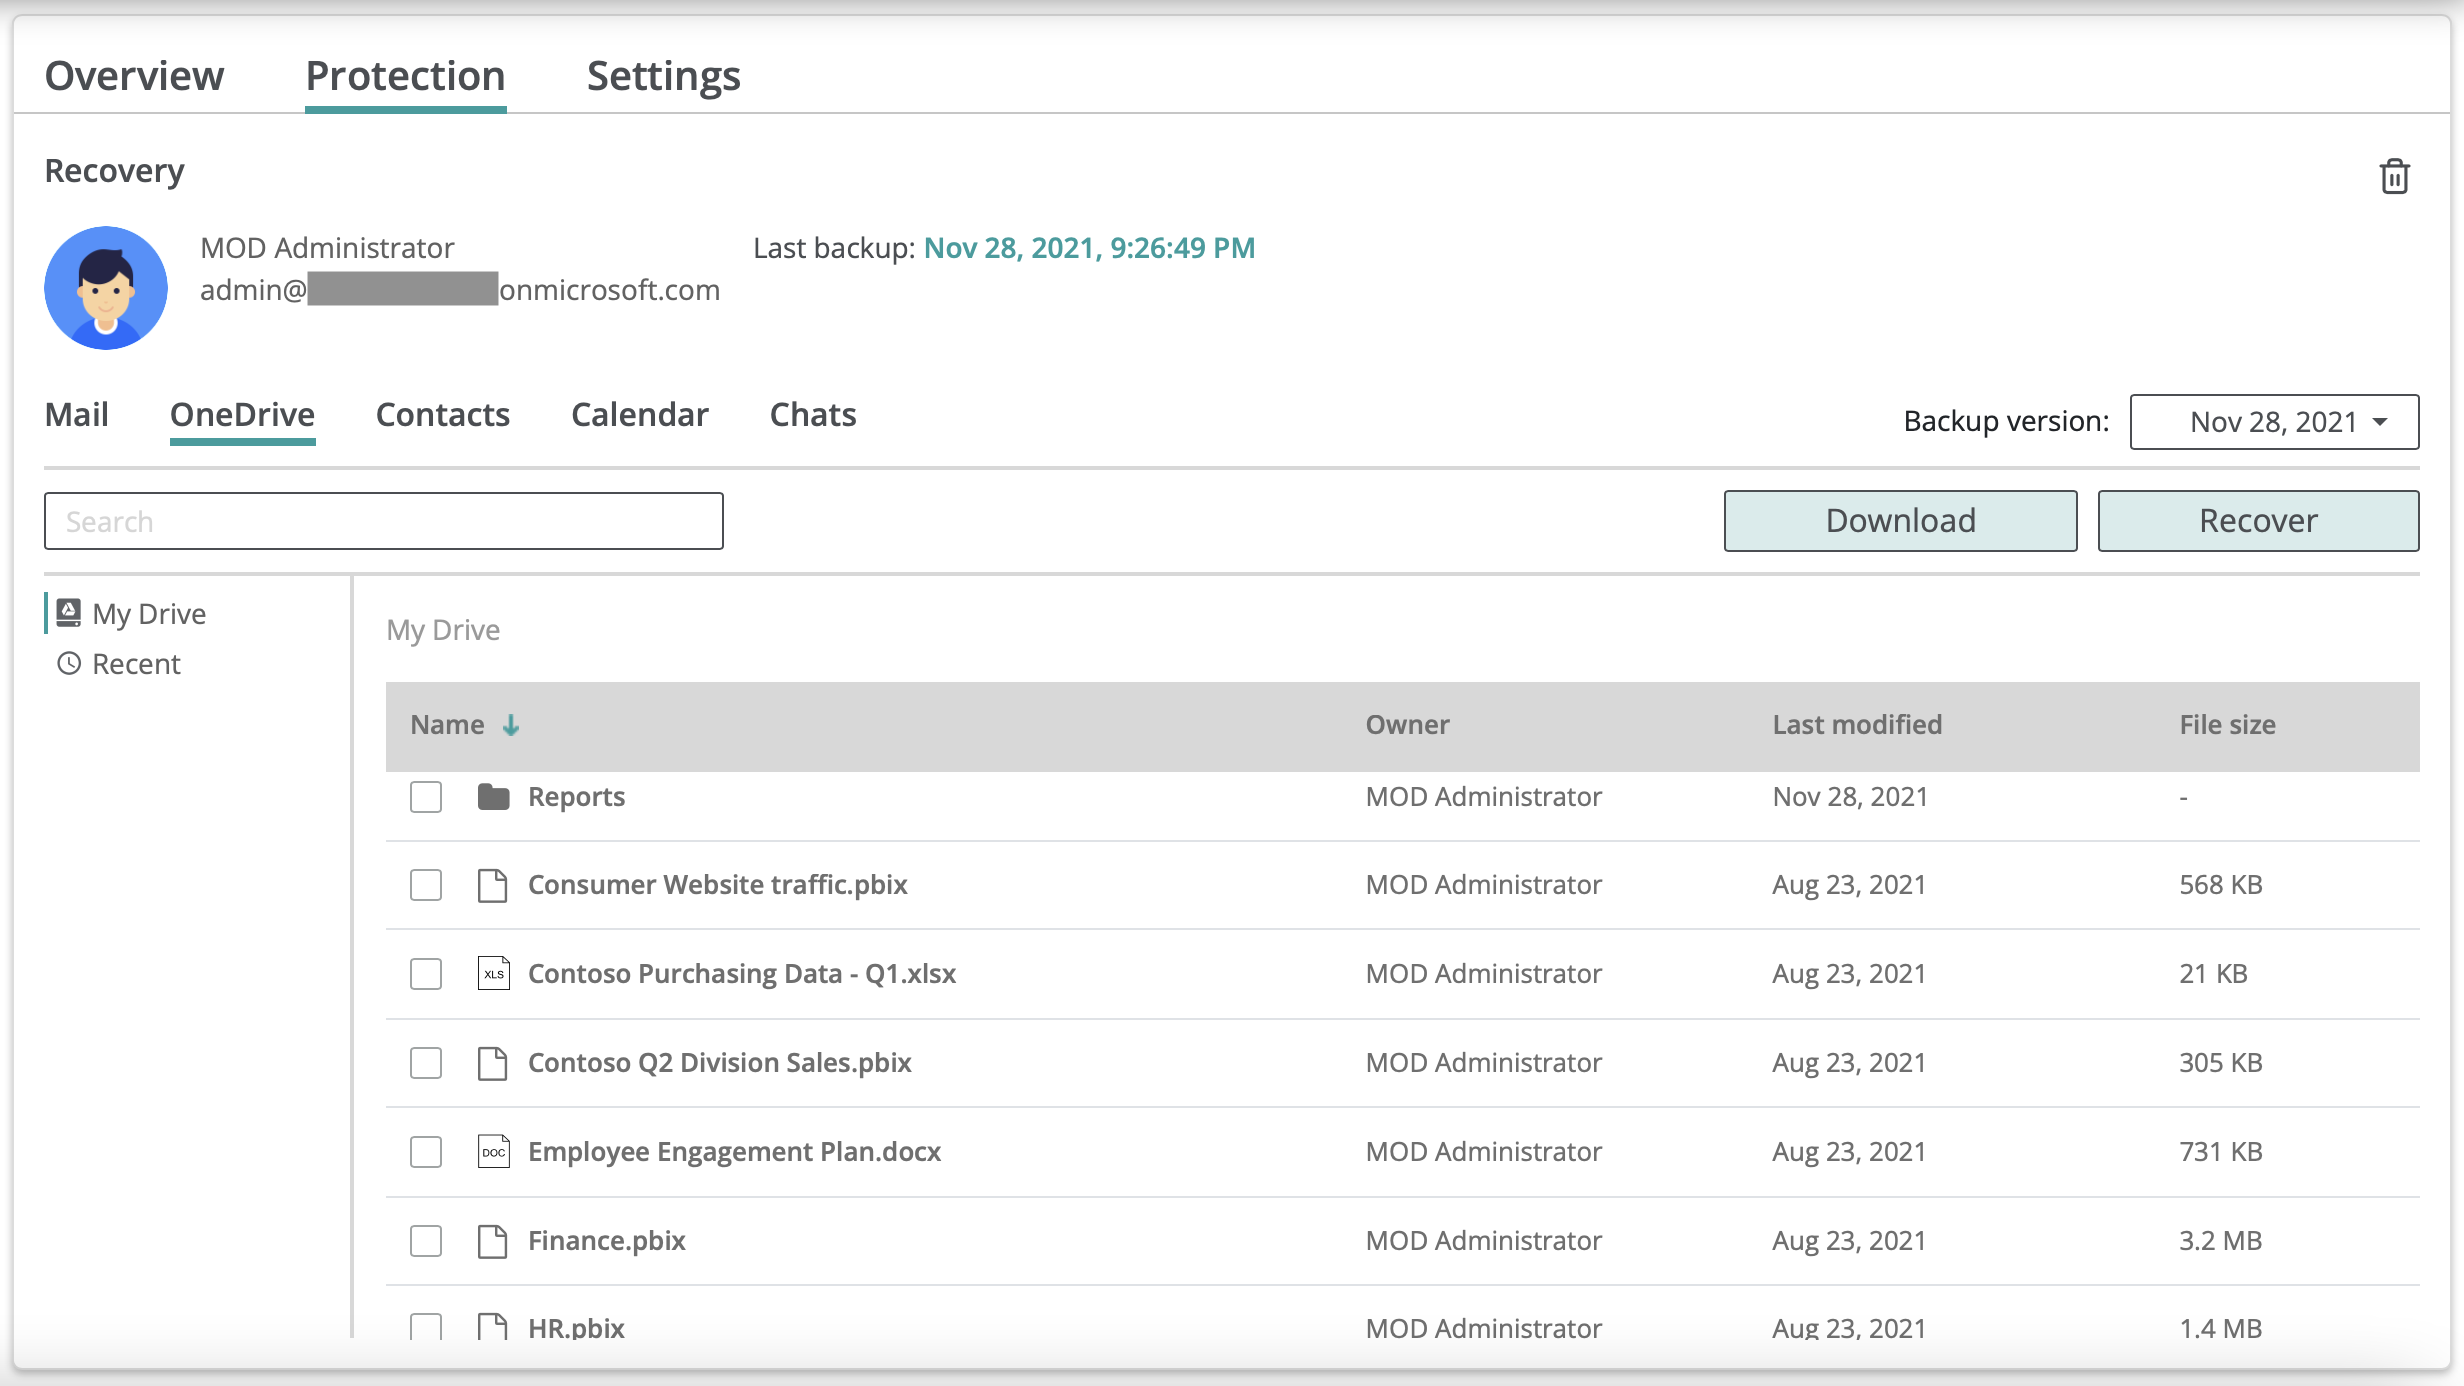
- OneDrive and SharePoint file/folder structure
- MS Teams chats and channels
- Copilot user chats
- Planner plans and tasks
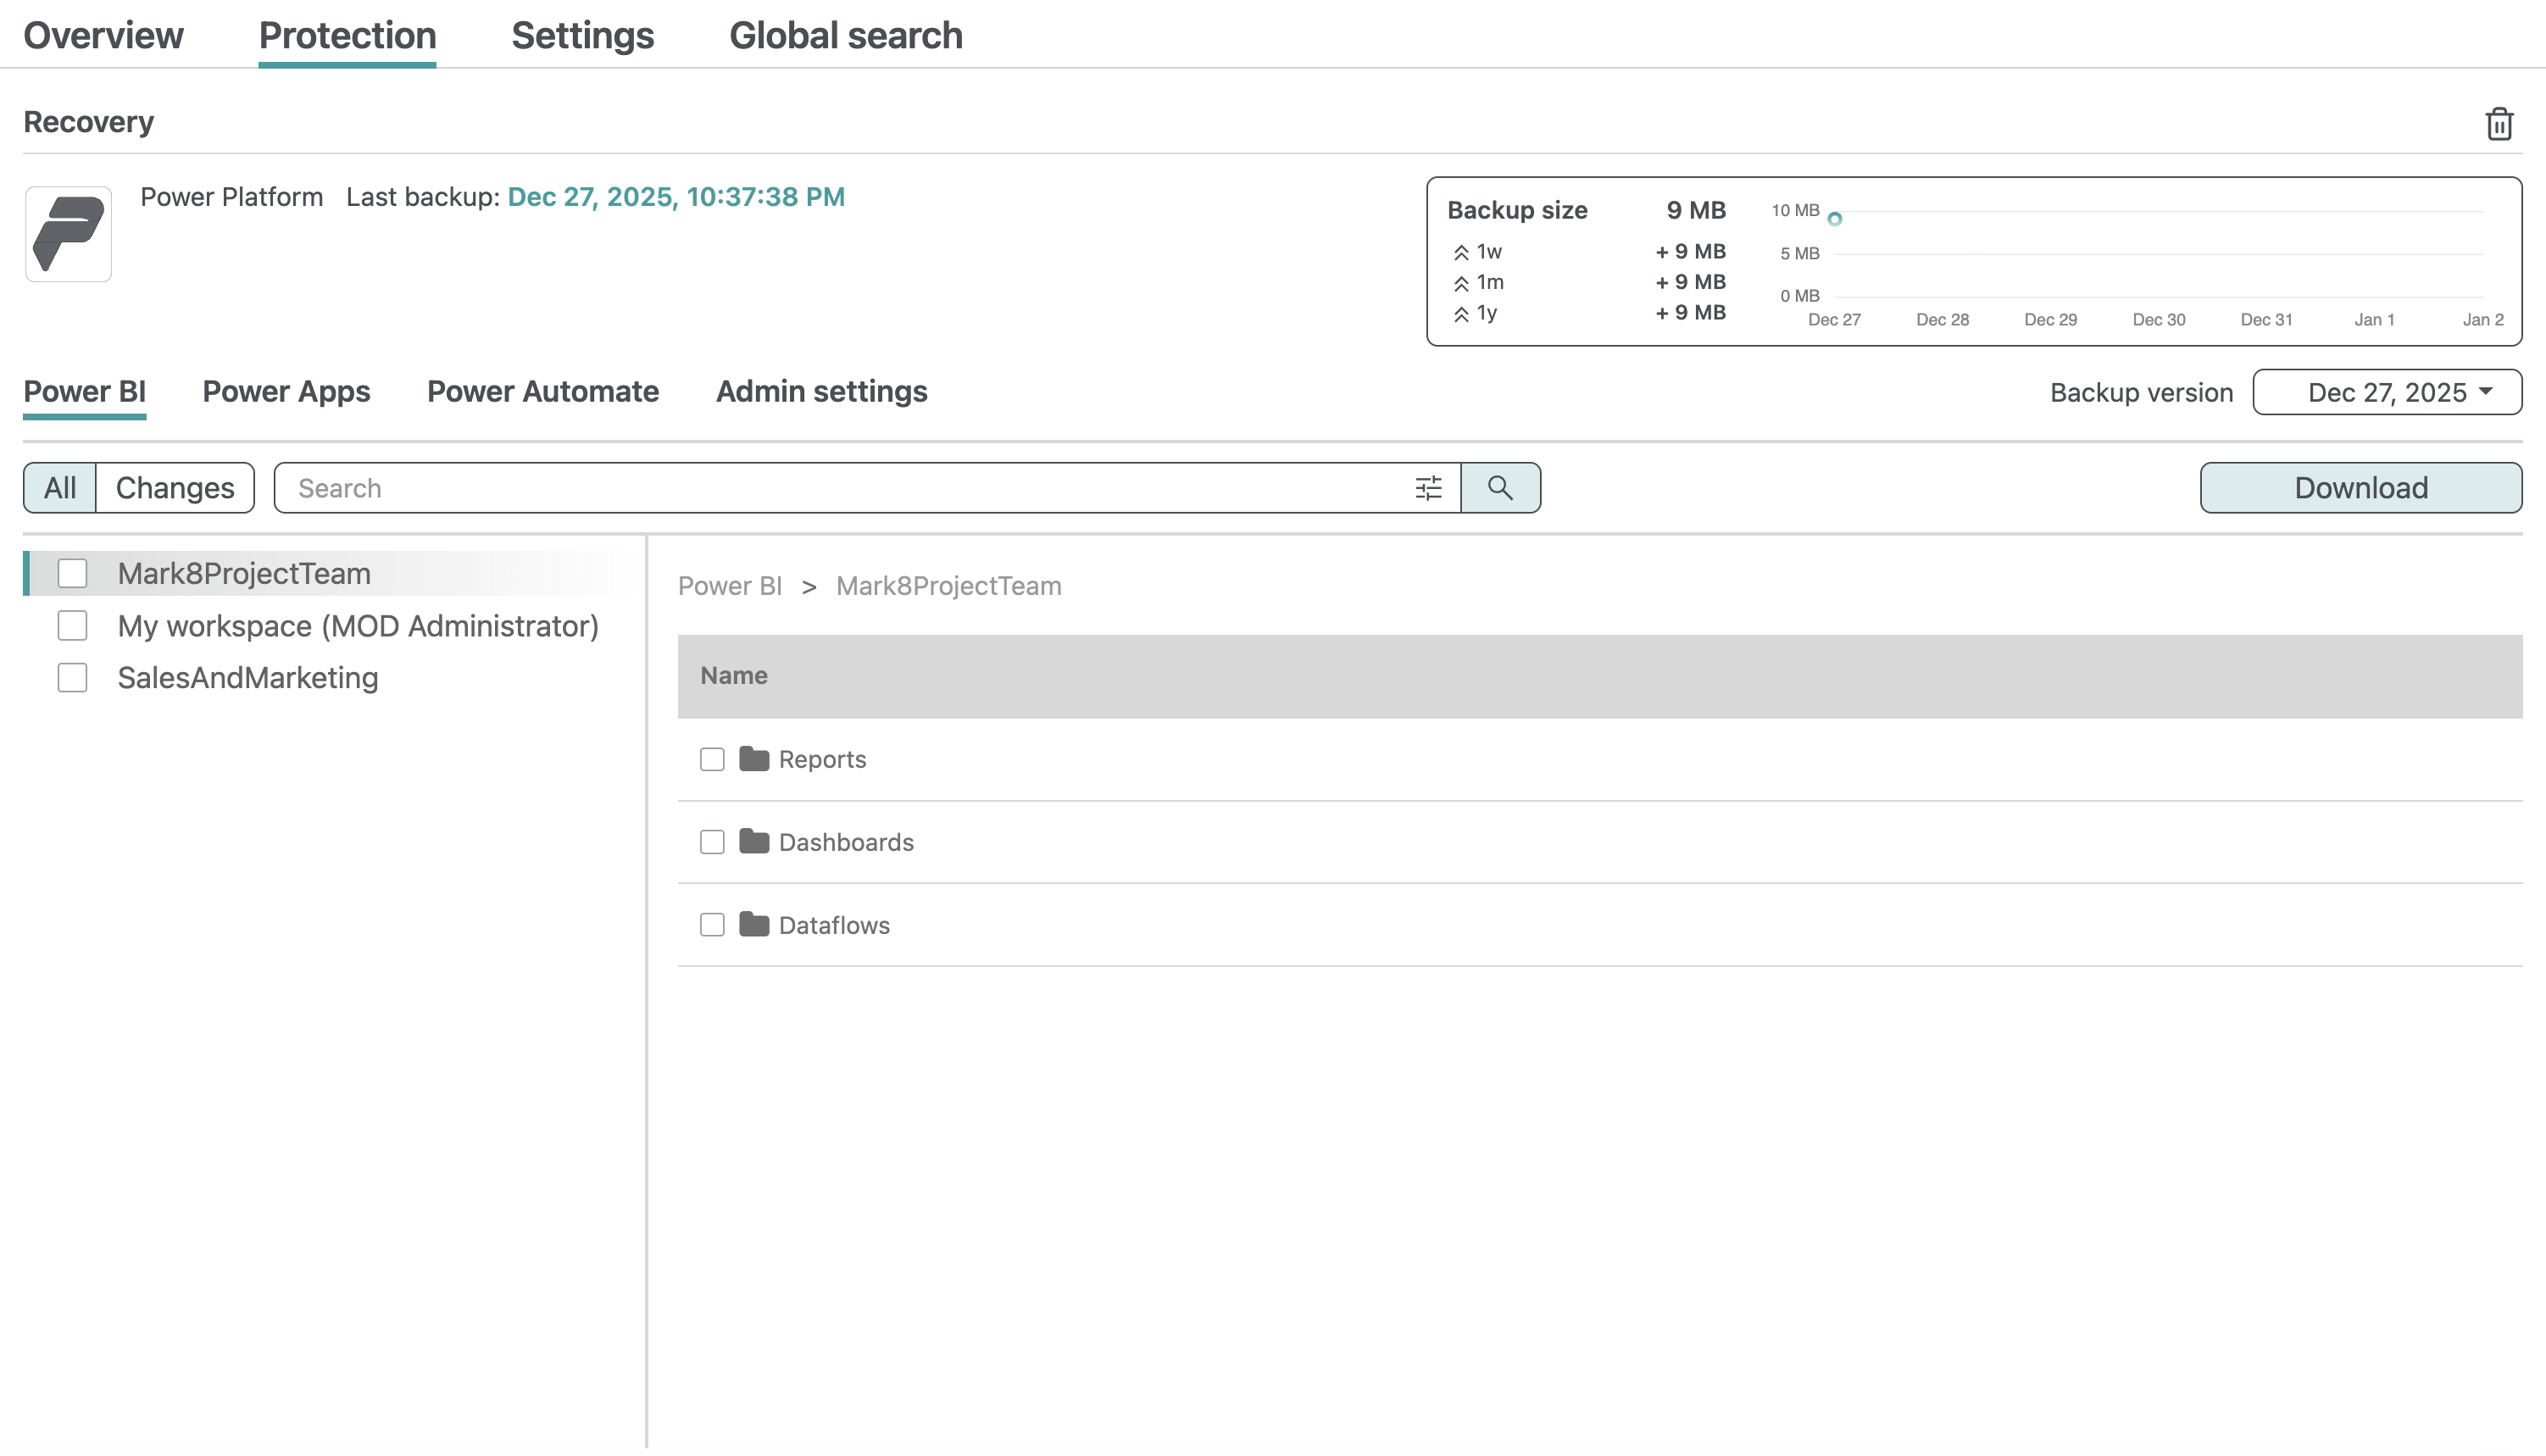
- Power BI and Power Platform data and configuration
- Entra ID configuration
User, shared, and room mailboxes
User, shared, and room mailbox backups include the following workloads depending on the backup configuration and data availability:
- Exchange (emails, contacts, calendar, and tasks)
- OneDrive (is backed up for user mailboxes)
- Team Chats
- Copilot
Info
To back up Exchange (To Do) tasks and/or Copilot data, enable the corresponding options in the backup SLA policy settings on the Service → Settings → SLA tab.
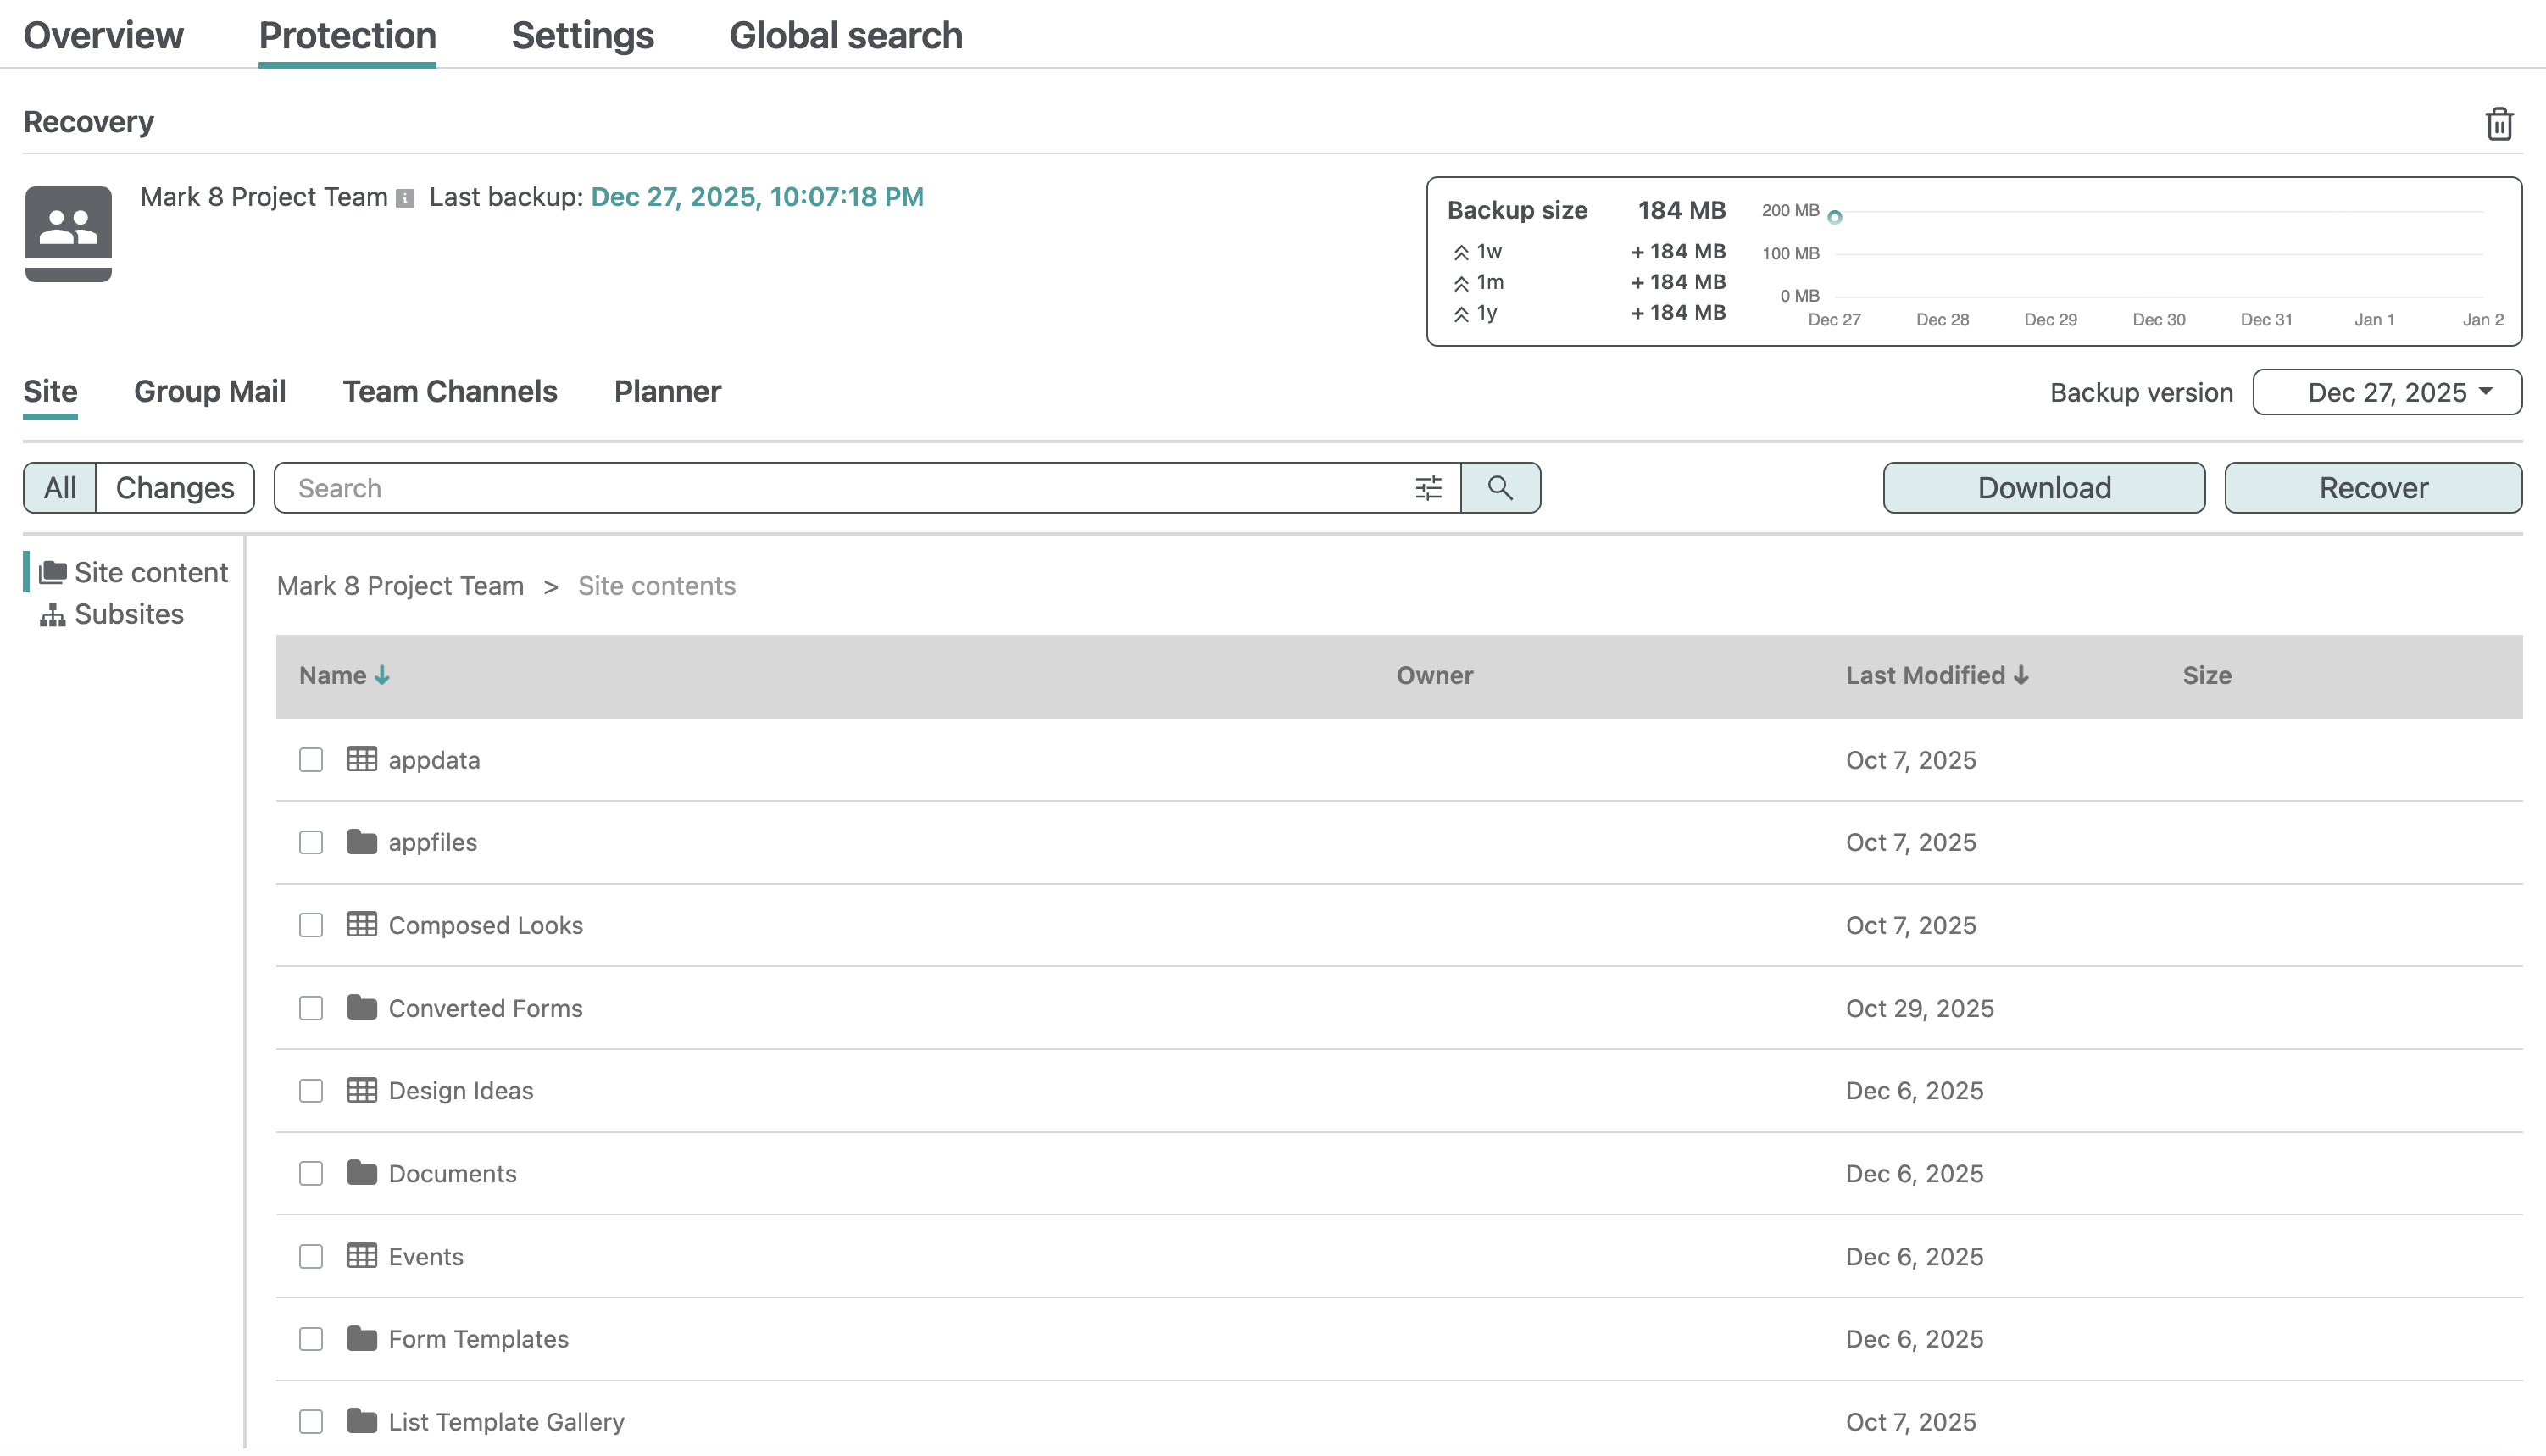
SharePoints sites, Groups & Teams
SharePoint site data is backed up in scope of SharePoint sites and Groups & Teams resources. Groups & Teams backups also include group mailbox as well Team Channels and Planner data.
Info
To back up Planner data, enable the Planner option in the backup SLA policy settings on the Service → Settings → SLA tab.
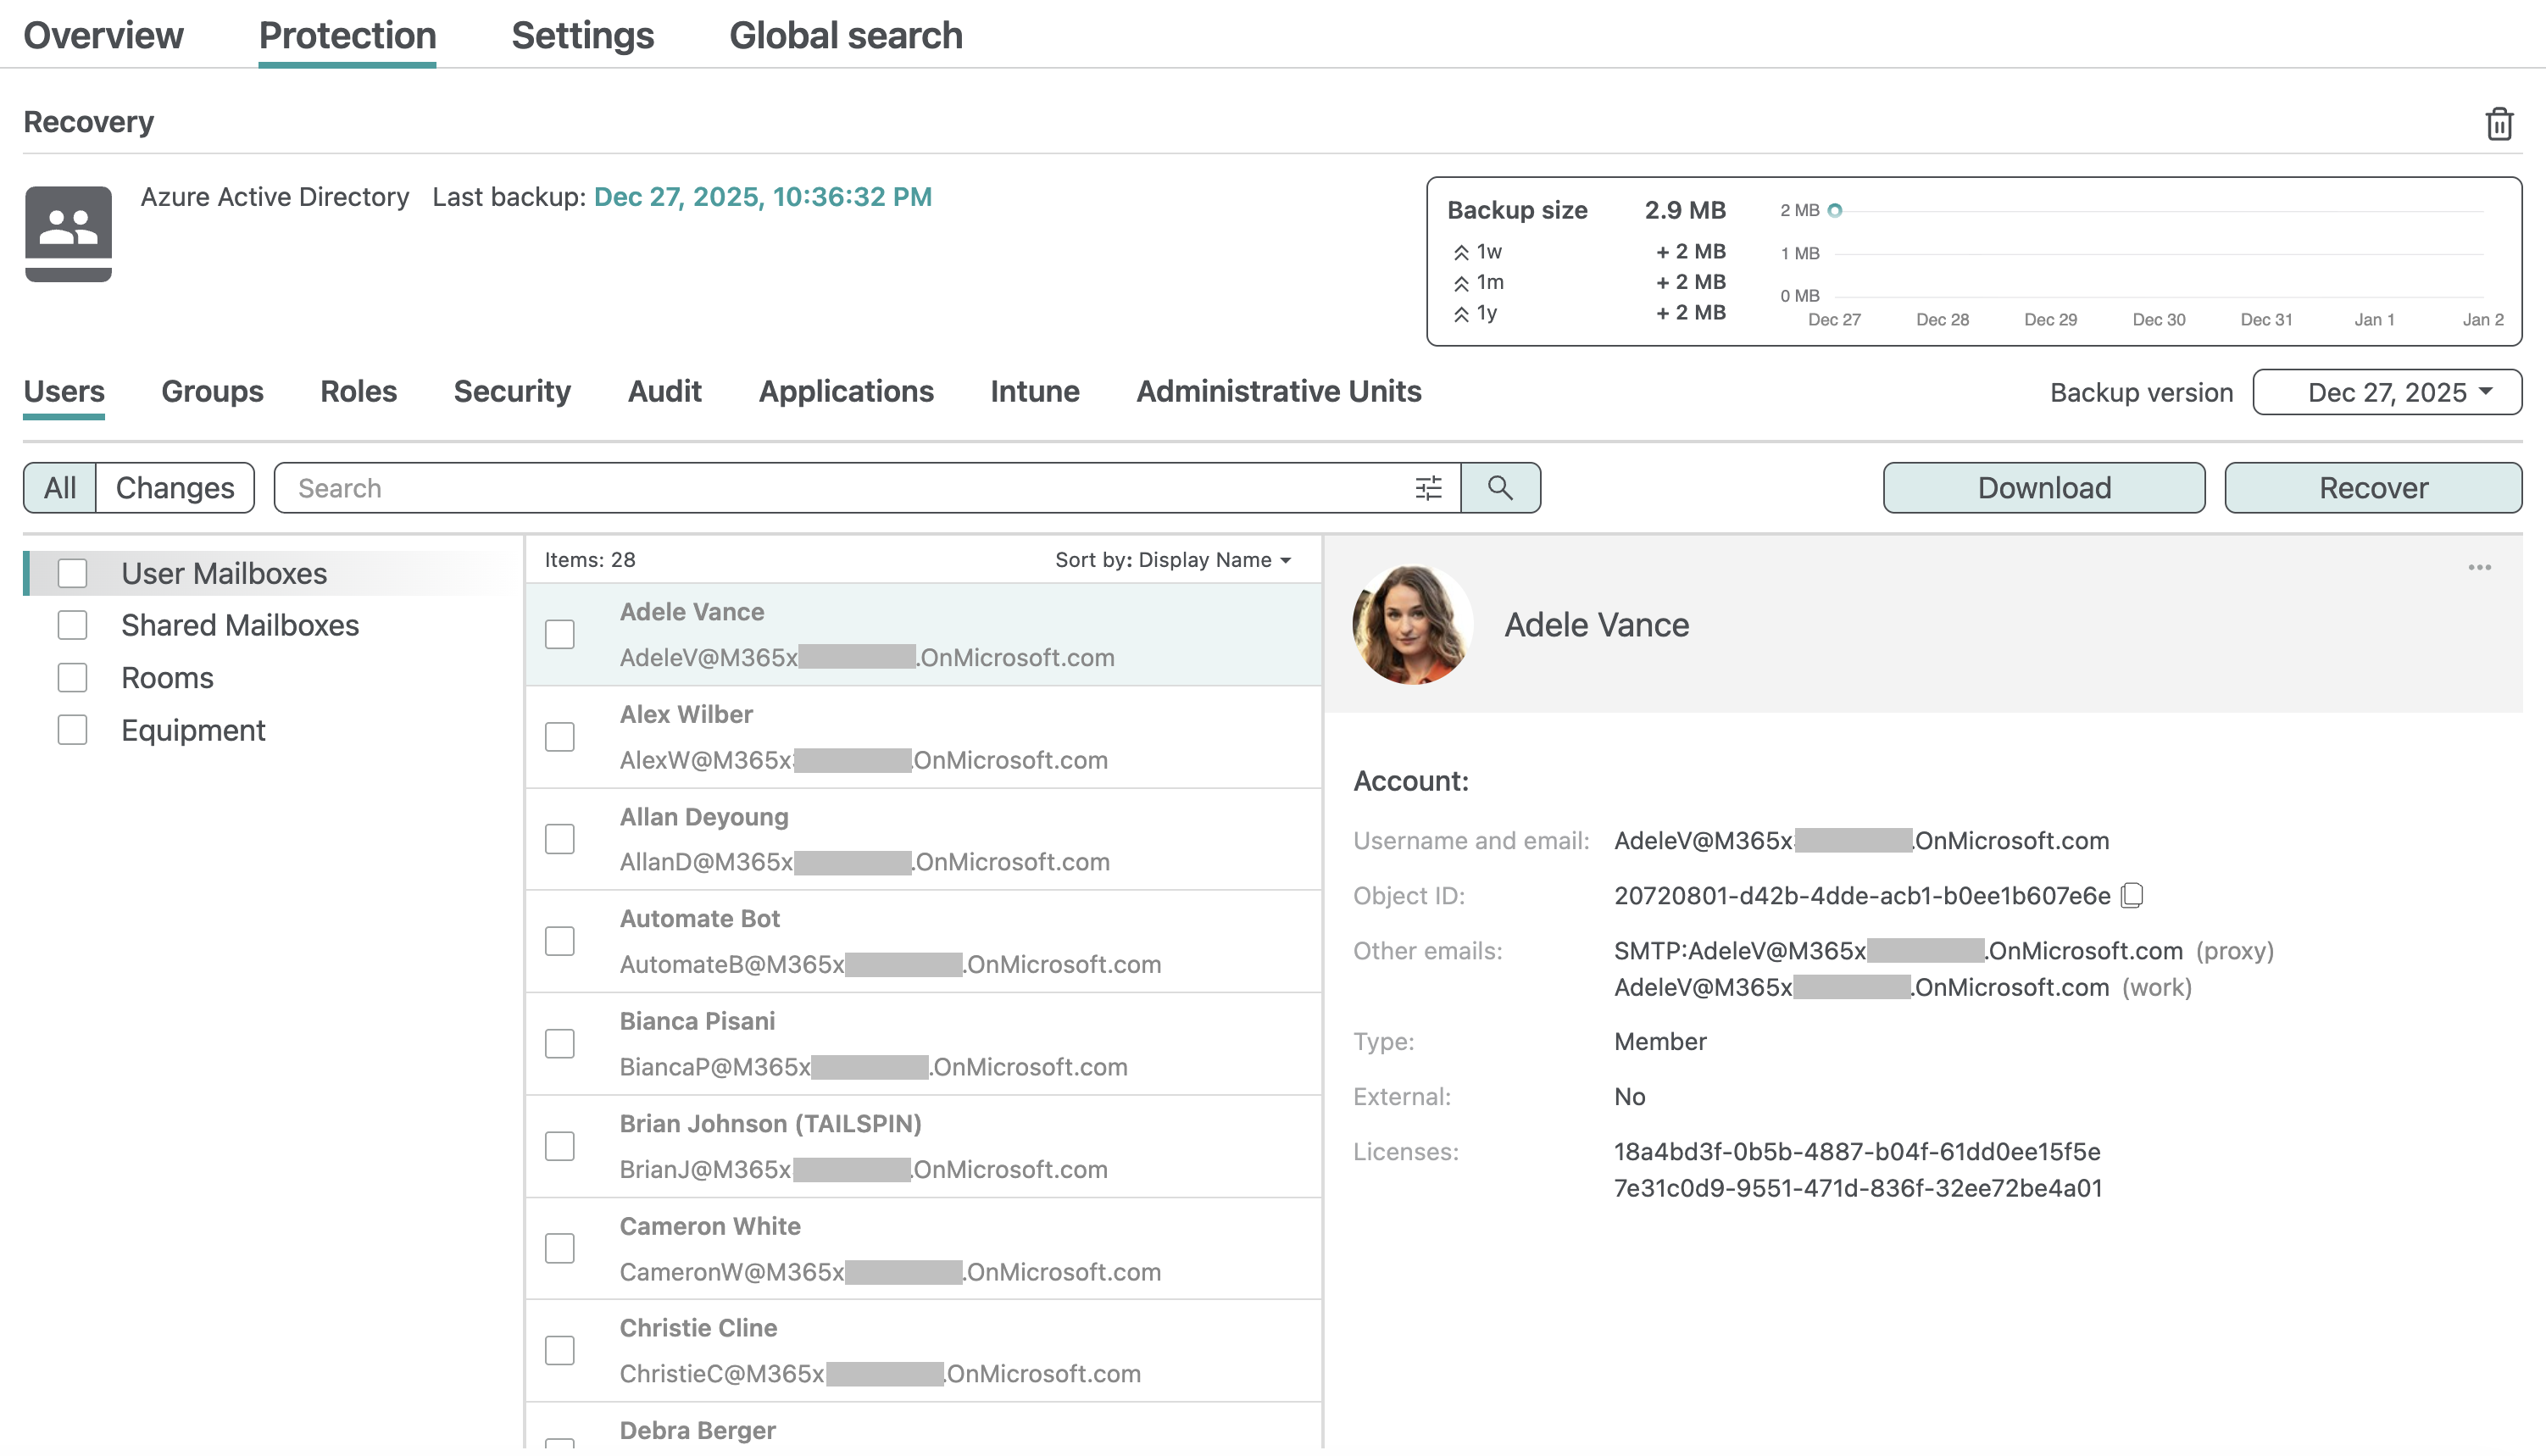
Entra ID (Azure Active Directory)
Entra ID objects and configuration such as users, groups, roles, policies, applications, and devices are available inside the Azure Active Directory resource backup.
Power Platform
Power BI and Power Platform data and configuration backup are available inside the Power Platform resource backup. Please see the following guide for Power Platform backup setup.
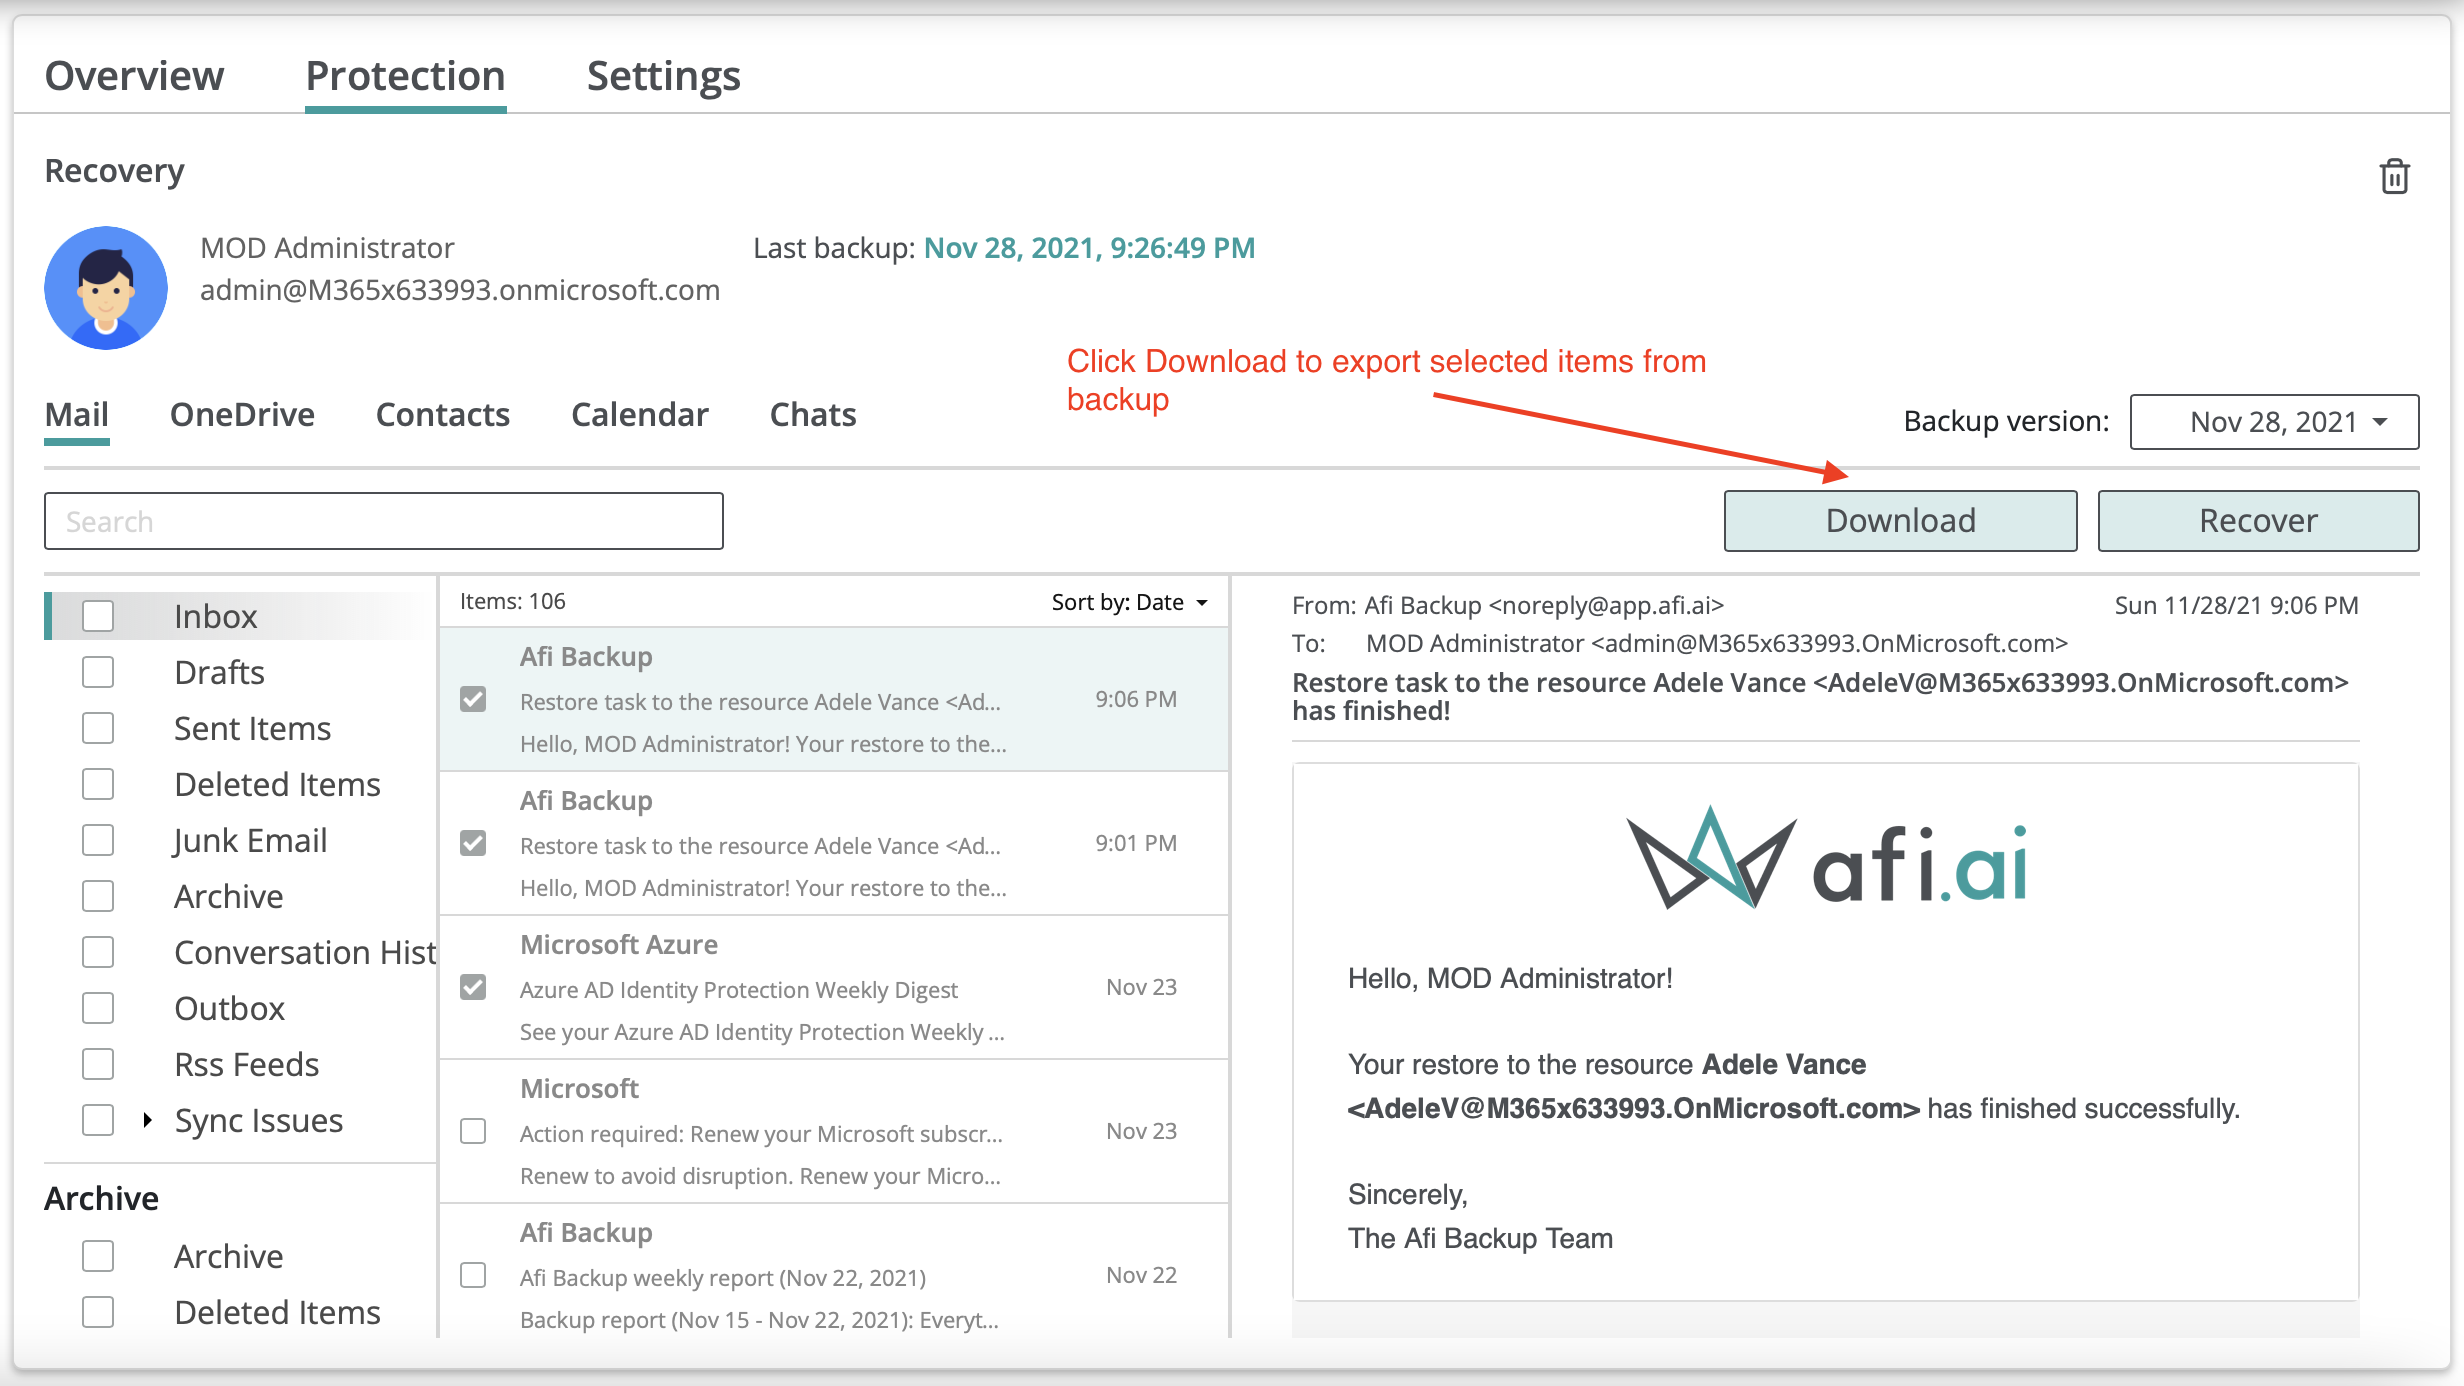
Data download
Afi application allows you to download all the data from a backup in different formats, including:
- Mail data (mail folders, individual emails or an entire mailbox) as PST, MBOX, and EML;
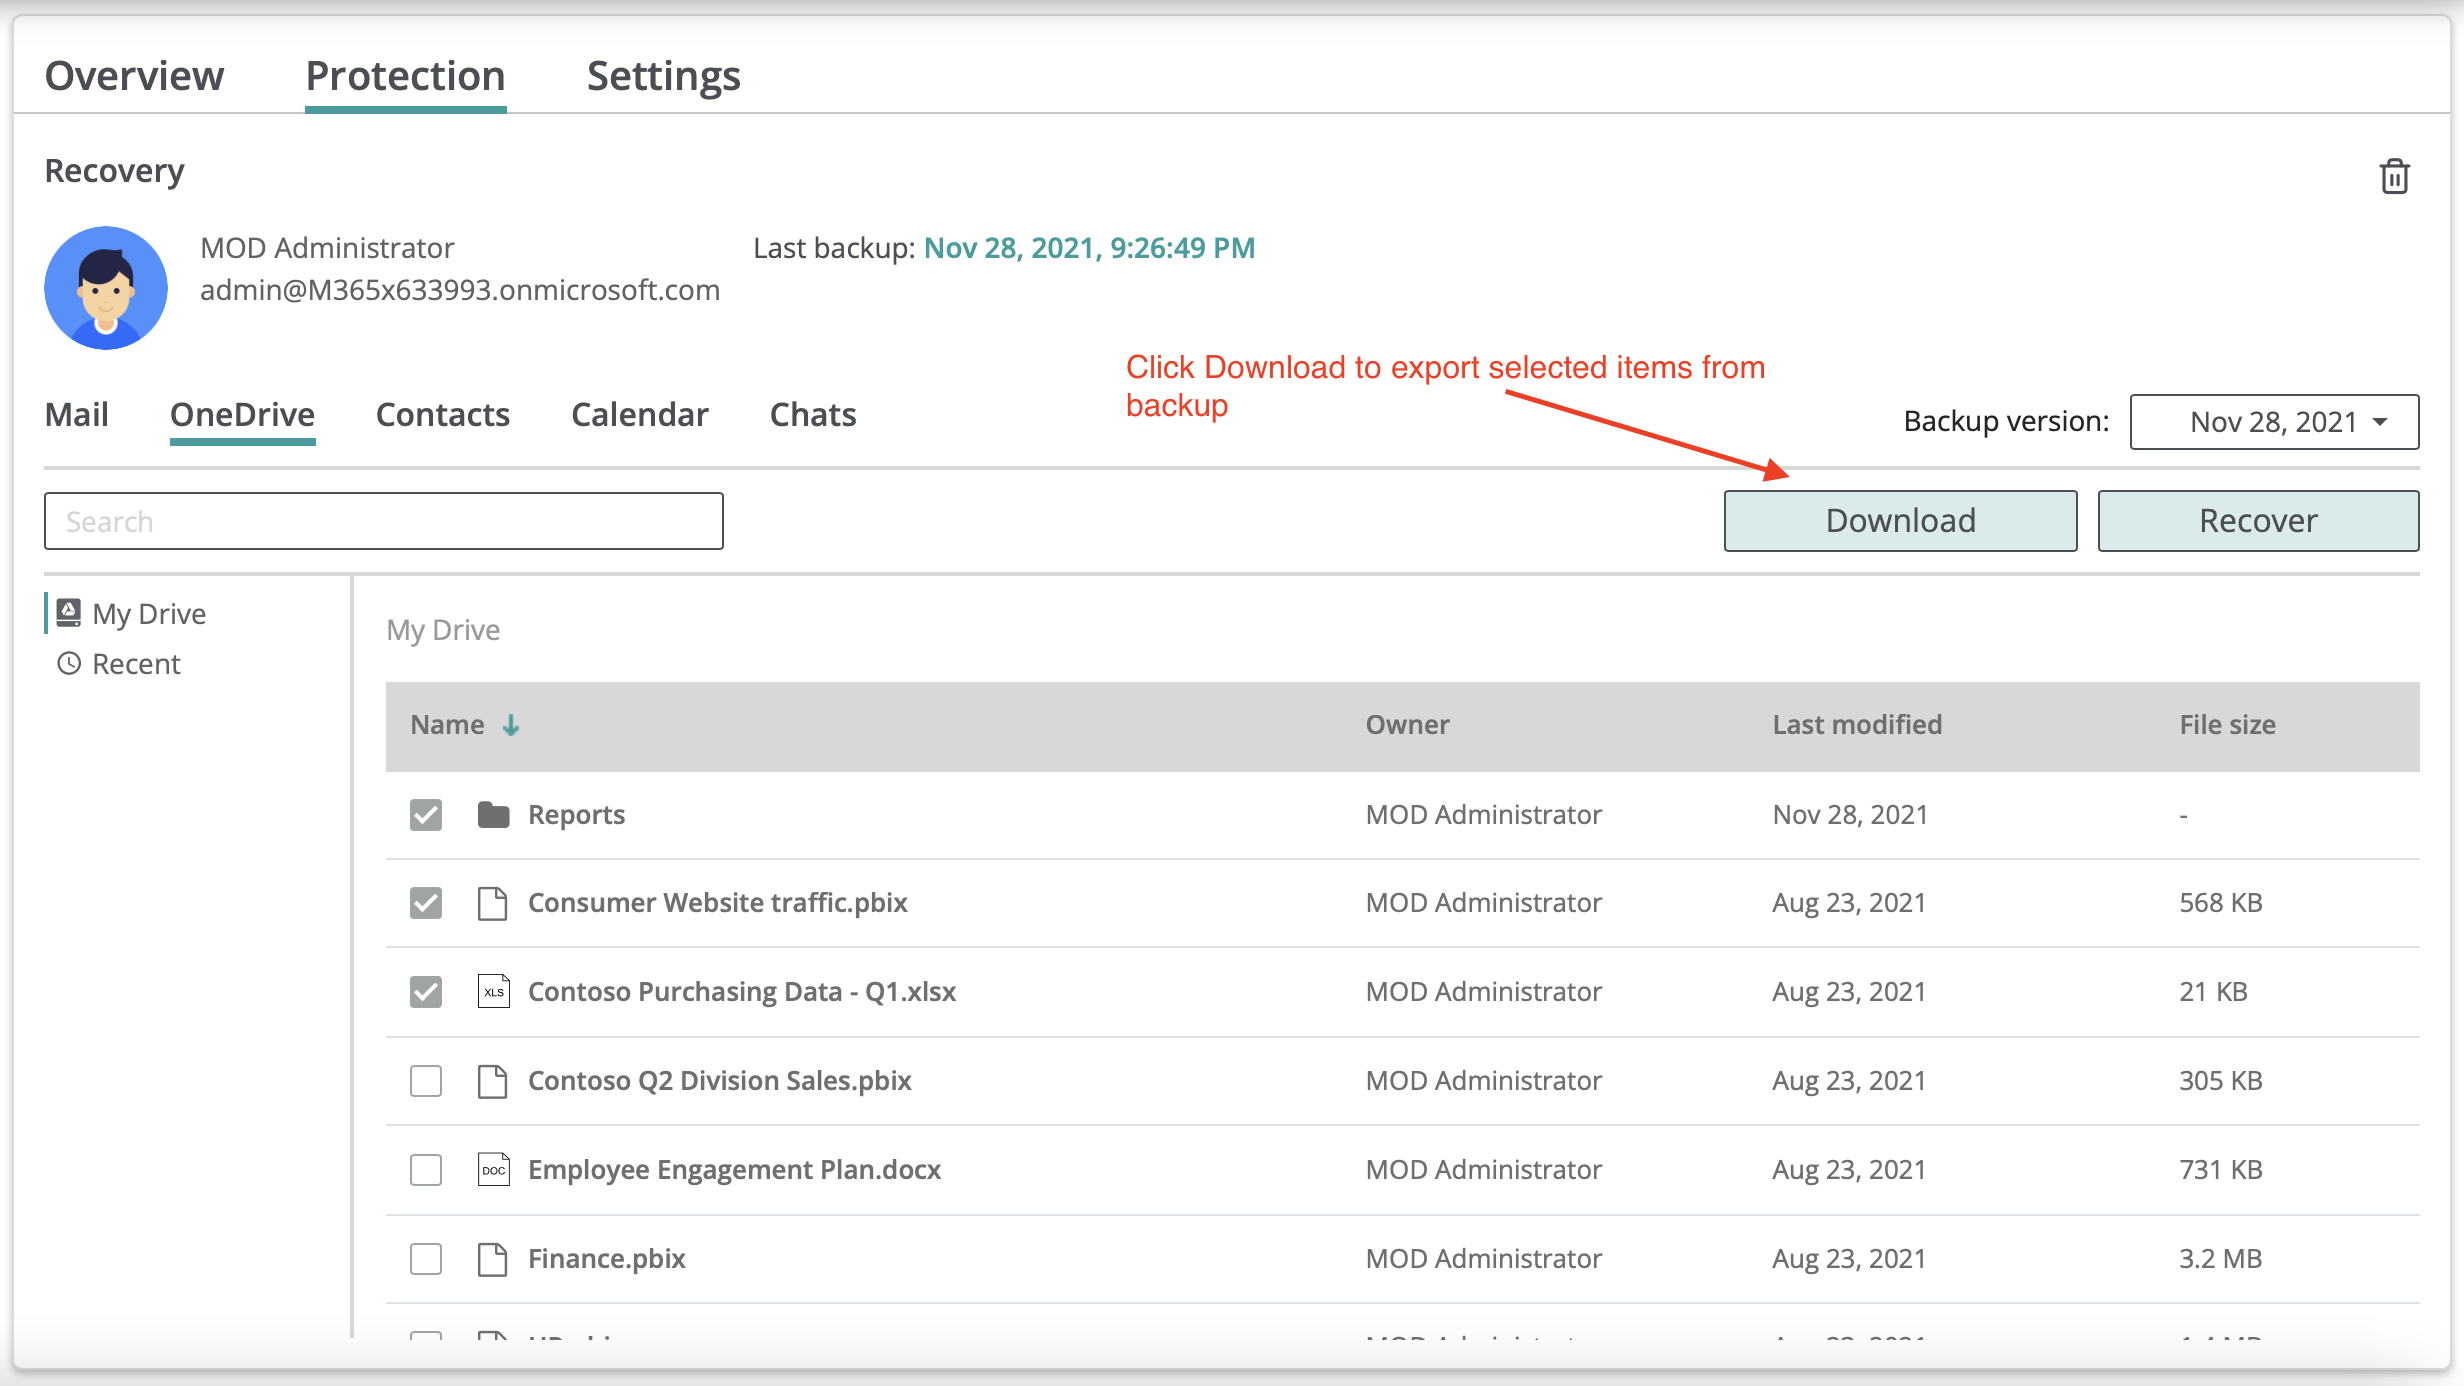
- OneDrive and SharePoint data as ZIP archives (for several files or folders) or as individual files;
- Calendar data as ICS and PST;
- Contacts data as VCF and PST;
- Team chats and channels data as HTML;
- Planner data as HTML;
- Copilot chats data as HTML;
- Azure Active Directory data as JSON and CSV;
- Power Platform data in Microsoft-native formats (PBIR, PBIX, RDL, etc.).
Choose emails to download and press the Download button:
Choose files and/or folders to download and press the Download button:
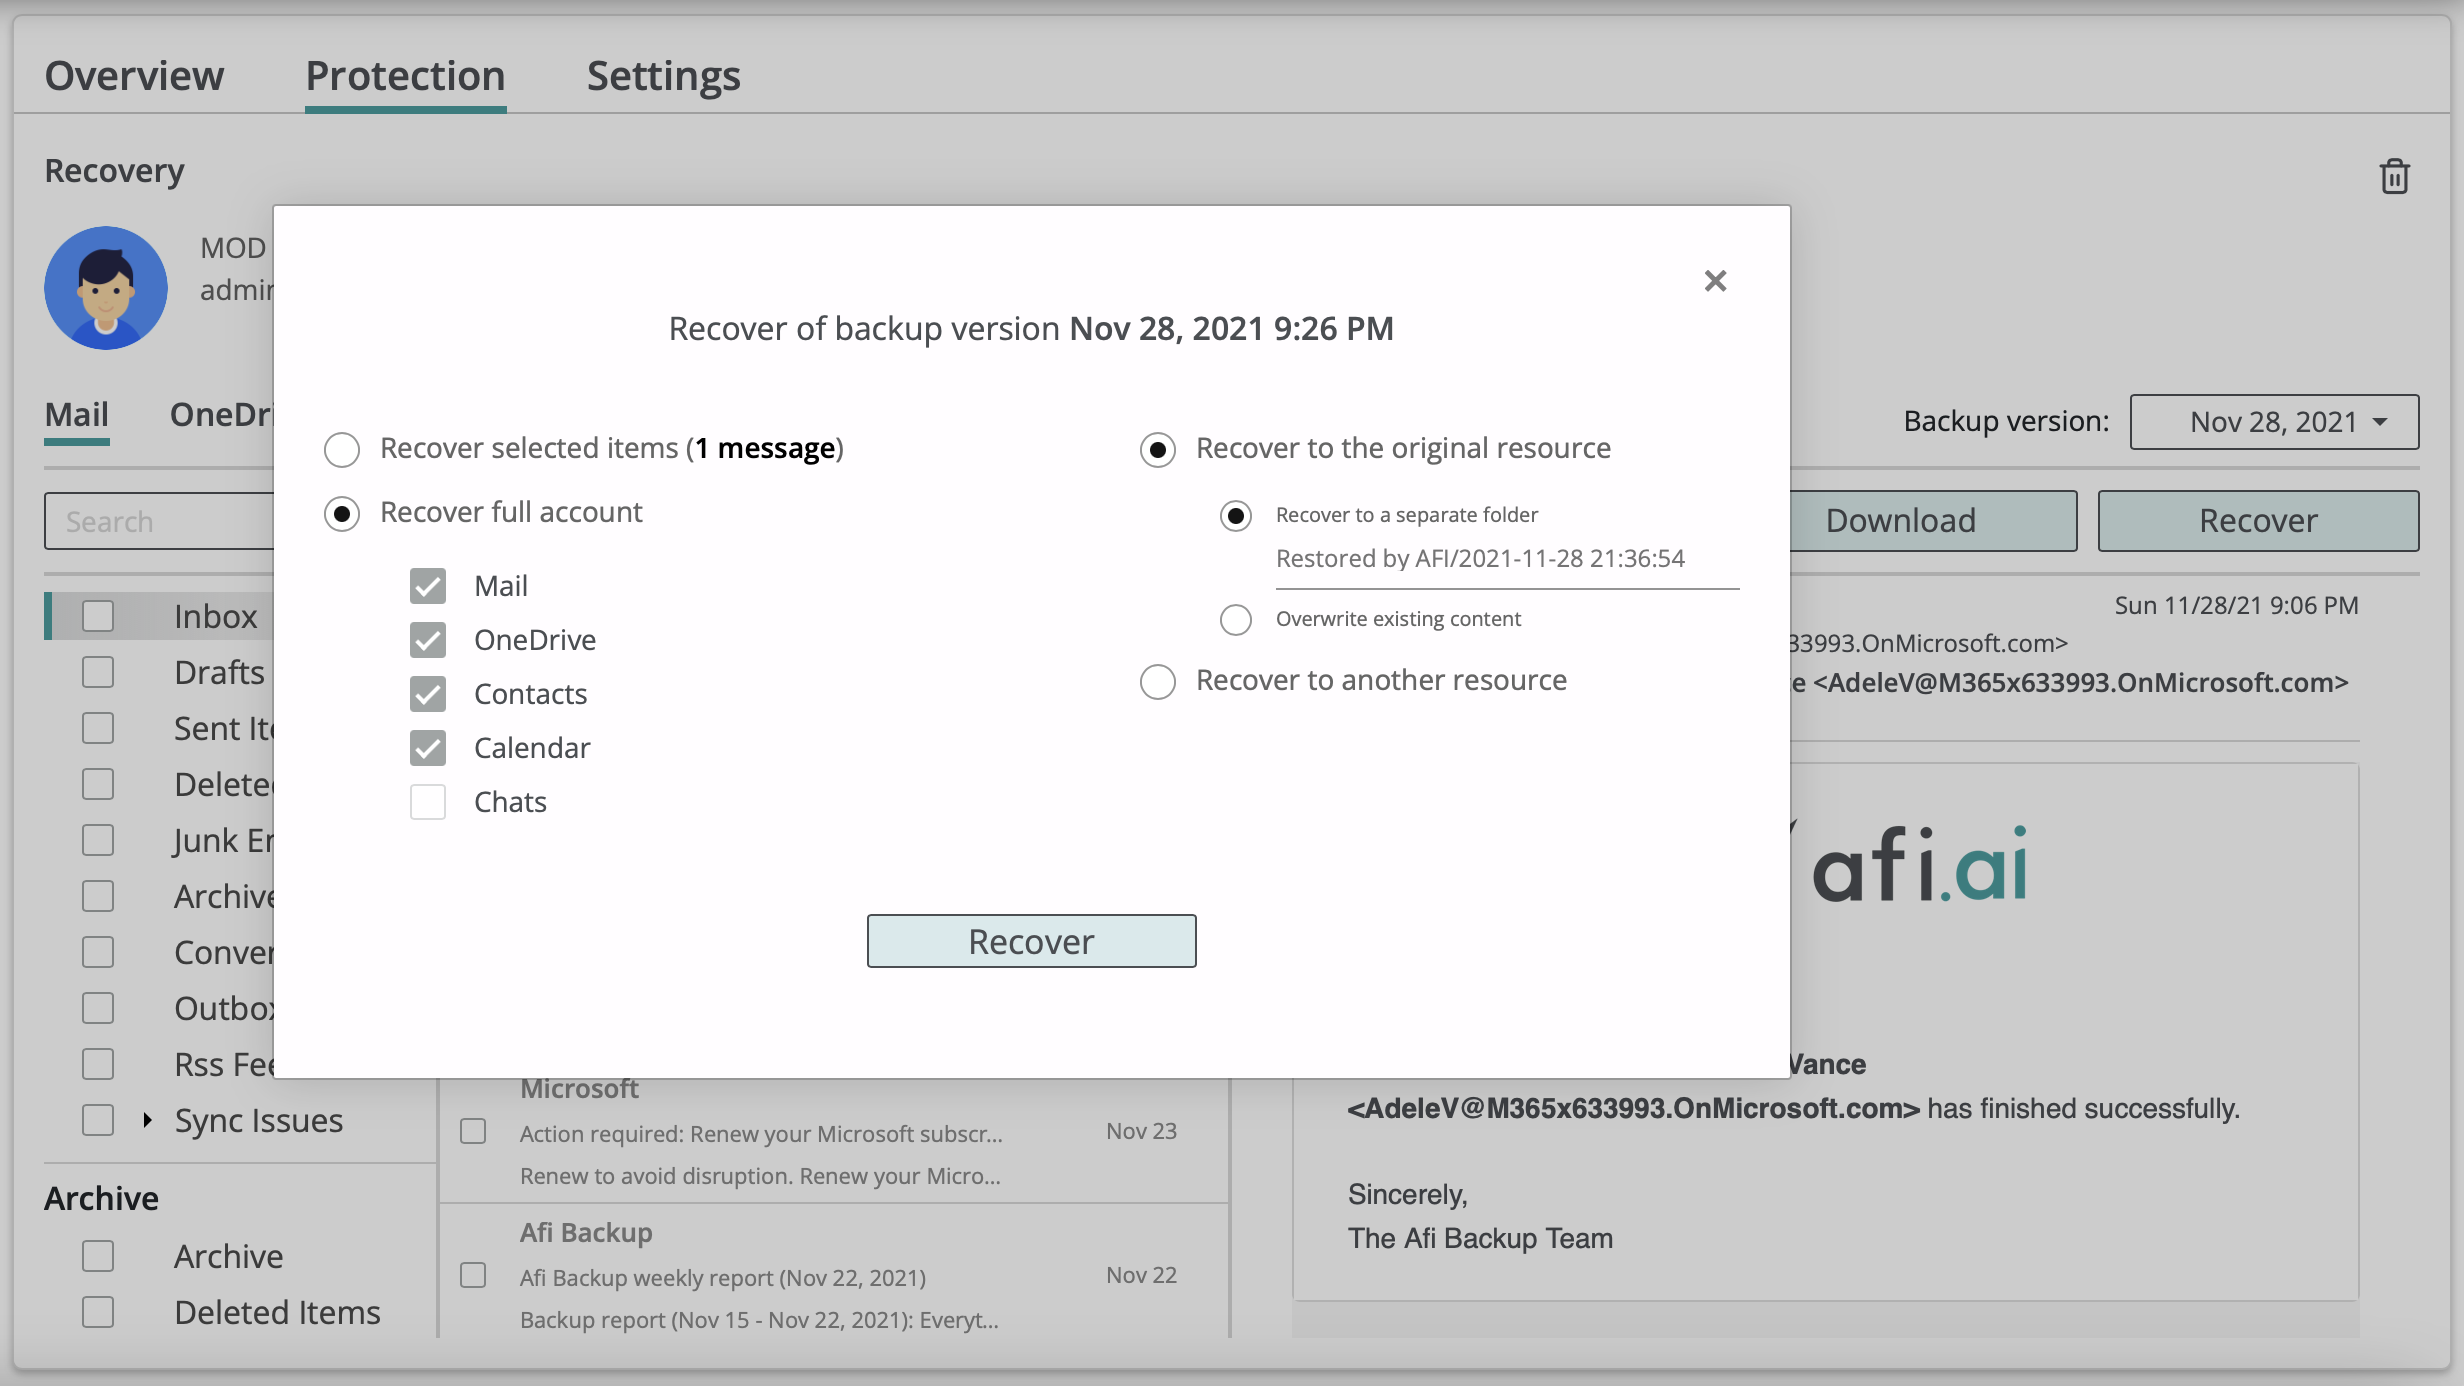
Data restore
Restore can be performed for:
- a full user account or SharePoint site or Team;
- selected Microsoft 365 workloads (for example, only user mailbox without OneDrive data);
- selected items (for example, specific emails or folders inside a OneDrive or a SharePoint site).
To initiate a restore process:
- (optional) choose specific items for restore by enabling checkboxes across item names (for example, choose emails to restore);
- press the Recover button;
- choose if it is required to restore a full account/service or only specific items;
- choose recovery destination (new user or the same user, new site or the same site);
- choose if to perform in-place recovery or restore data to a separate folder.
You can track recovery progress on the Activity → Tasks tab, and Afi will notify you via email once the recovery is complete.